background image

w

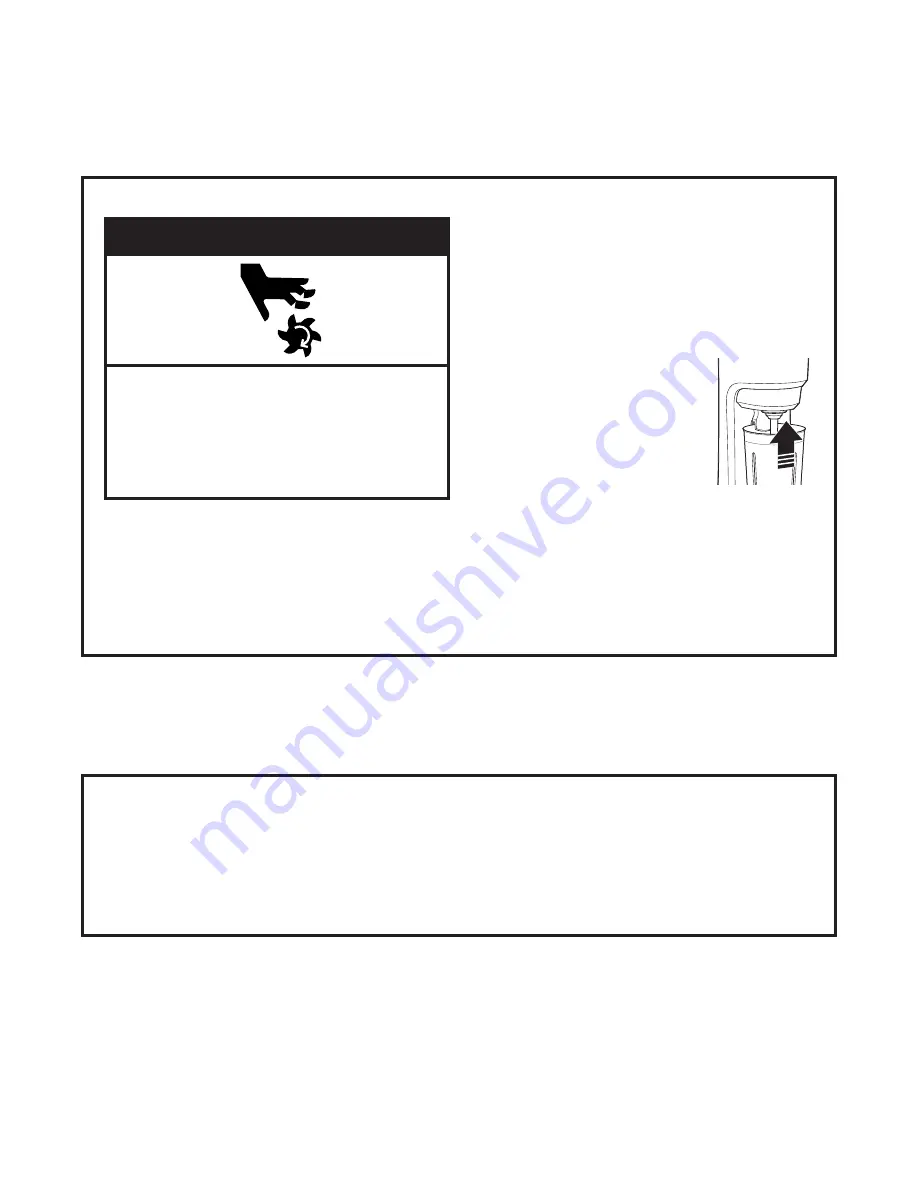
WARNING

Cut Hazard

Always use metal container when mixing.

Do not put spoon or other utensils in metal
container when mixing.

Failure to follow these instructions can 
result in cuts.

1.

Plug mixer into a grounded outlet.

2.

Place the ingredients into the container. The basic
milkshake recipe is:
• 3 No. 24 scoops of ice cream
• 4 ounces of very cold milk
• 1

1

2

ounces of syrup

3.

Select the desired speed using the 3-speed 
selector switch.

4.

Position the container into
the container guide and
move the cup upward to

automatically

turn the

motor on. Set the container
down onto the cup rest. 

NOTE:

You may also turn

the motor ON and OFF
using the pulse switch. 

5.

When the drink is completely mixed, lift the 
container up off the cup rest and pull down 
from the container guide. The motor will turn off.

NOTE:

Inspect agitator(s) daily. Replace 

agitator(s) every 90 days.

4

Mixing a Drink

You must read the “Mixer Safety” section before
using the mixer.
For best mixing results, use the Hamilton Beach
Universal Container (#110E). Do not use a paper
cup. The container fits the container guide which
starts the motor. 

Mixing a Drink

Operating the Mixer

Using the Container Rest

Two-Position Container Rest

The top container rest position is used when mixing
with a standard container. In the top position, a 
standard container will fit into the container guide 
to lift the container guide pin against the actuator
switch, allowing the motor to run. To turn off the
motor, rest a standard container on the lower, 
or standby, container rest position.

The lower container rest position may also be used
when mixing with larger containers, or for storing
standard containers when the mixer is not in use.

NOTE:

When container is not positioned as

described above, you may also turn the motor on
using the pulse switch.

Summary of Contents for HMD400 - Commercial Drink Mixer

Page 1: ...840145000 Batteur de boisson Manuel d utilisation Page 9 Drink Mixer Operation Manual Page 2 Batidora de bebidas Manual de uso P gina 17 READ BEFORE USE LIRE AVANT D UTILISER LEA ANTES DE USAR...

Page 2: ...not use an adapter Do not use an extension cord Disconnect power before cleaning or servicing and before installing or removing agitator Do not spray or submerge mixer Always use metal container when...

Page 3: ...ner guide Container rest Agitator Mixing spindle Container guide Stabilizer bar Top cover Housing Agitator Housing plug Container guide pin ON OFF actuator Container guide Pulse switch 3 Speed selecto...

Page 4: ...ff NOTE Inspect agitator s daily Replace agitator s every 90 days 4 Mixing a Drink You must read the Mixer Safety section before using the mixer For best mixing results use the Hamilton Beach Universa...

Page 5: ...ntainerGuidePin HousingPlug To remove the container guide container guide pin 1 Unplug mixer 2 Hold the container guide by the indents on each side and pull it straight down 3 To remove the plastic co...

Page 6: ...container 2 Position the container into the container guide and mix on low speed I for 5 seconds Empty the container 3 Place 1 cup of clean water into the container and repeat mix for 5 seconds to rin...

Page 7: ...he upper tab and seal of the back panel are in place below the lip of the cover Secure the cover with the screws 8 Plug mixer into a grounded outlet MotorReplacement 1 Unplug mixer 2 Loosen the three...

Page 8: ...PARTICULAR PURPOSE ANY LIABILITY IS EXPRESSLY LIMITED TO AN AMOUNT EQUAL TO THE PURCHASE PRICE PAID AND ALL CLAIMS FOR SPECIAL INCIDENTAL AND CONSEQUENTIAL DAMAGES ARE HEREBY EXCLUDED There is no war...

Page 9: ...amais utiliser un cordon d extension D brancher le courant avant de nettoyer d entretenir le batteur et avant d installer ou d enlever un agitateur Ne jamais arroser ou immerger le batteur Toujours ut...

Page 10: ...age Guide de r cipient Barre de stabilisation Couvercle du haut Bo tier Agitateur Bouchon de bo tier Taquet du guide de r cipient servo commande ON OFF marche arr t Guide de r cipient Commutateur de p...

Page 11: ...Inspecter les agitateurs chaque jour Remplacer les agitateurs tous les 90 jours Battage d une boisson Lire la section s curit du batteur avant d utiliser le batteur Pour obtenir de bons r sultats util...

Page 12: ...r viter d endommager l agitateur ne pas utiliser de tenailles pour tenir les lames de l agitateur quand on visse ou on d visse 4 Brancher le batteur dans une prise mise la terre Votre batteur a t envo...

Page 13: ...en s assurant de noter leur bonne direction NOTE Il est galement possible de faire fonctionner le batteur sans guide de r cipient et sans taquet du guide de r cipient Mettre le bouchon de bo tier dan...

Page 14: ...nt dans le guide de r cipient et battre basse vitesse I pendant 5 secondes Vider le r cipient 3 Mettre une tasse d eau pure dans le r cipient et battre nouveau pendant 5 secondes pour rincer NOTE Insp...

Page 15: ...aut et le joint du panneau arri re sont bien plac s en dessous du rebord du couvercle Fixer le couvercle au moyen de vis 8 Brancher le batteur dans une prise mise la terre Remplacementdumoteur 1 D bra...

Page 16: ...TE GARANTIE STATUTAIRE OU CONDITION DE QUALIT MARCHANDE OU DE CONVENANCE UN OBJET PARTICULIER TOUTE RESPONSABILIT EST EXPRESS MENT LIMIT E UN MONTANT GAL AU PRIX D ACHAT PAY ET TOUTES LES R CLAMATIONS...

Page 17: ...tador No utilice un cable de extensi n Desconecte la electricidad antes de limpiar o arreglar la batidora y antes de instalar o quitar el mezclador No moje o sumerja la batidora Siempre utilice el rec...

Page 18: ...u a del recipiente Barra estabilizadora Tapa superior Cubierta Mezclador Enchufe de la cubierta Clavija de la gu a del recipiente accionador encendido apagado Gu a del recipiente Interruptor de pulso...

Page 19: ...es todos los d as y reempl celos cada 90 d as C mo batir una bebida Usted debe leer la secci n Seguridad de la batidora antes de utilizar la batidora Para obtener mejores resultados utilice el recipie...

Page 20: ...3 Para quitar la clavija pl stica de la gu a del recipiente presione el clip de retenci n y desl celo fuera de la gu a del recipiente 4 Revierta los pasos de 1 a 3 para volver a instalar la gu a del...

Page 21: ...el recipiente dentro de la gu a y bata a baja velocidad I durante 5 segundos Vac e el recipiente 3 Coloque 1 taza de agua limpia dentro del recipiente y repita la acci n durante 5 segundos para enjua...

Page 22: ...trasero est n en su lugar por debajo del reborde de la tapa Ajuste la tapa con los tornillos 8 Enchufe la batidora a un tomacorriente con conexi n a tierra Reemplazodelmotor 1 Desenchufe la batidora...

Page 23: ...RCANTIBILIDAD O PROPIEDAD PARA UN PROP SITO EN PARTICULAR CUALQUIER RESPONSABILIDAD LEGAL ES EXPRESAMENTE LIMITADA A UNA CANTIDAD IGUAL A LA QUE SE PAG POR EL PRODUCTO Y TODOS LOS RECLAMOS EN BUSCA DE...

Page 24: ...261 Yadkin Road Southern Pines NC 28387 840145000 5 06 www commercial hamiltonbeach com...

Reviews: