background image

       ___                            

 Hamilton/Buhl 


5

Warranty Information 
 

Hamilton/Buhl warrants to the original purchaser that this product is free from defects in 
material and workmanship. Hamilton/Buhl will for one year, at its option, repair or 
replace at no charge for parts and labor from the date you purchase the product from 
Hamilton/Buhl.  
 
Hamilton/Buhl reserves the right to determine the validity of all warranty claims. 
Warranty is void if the product serial number has been altered or removed.  Warranty is 
void if the product has been misused or damaged or if evidence is present that the 
product was altered, modified or serviced by unauthorized service people. 
 
THE ABOVE STATED WARRANTY IS EXCLUSIVE AND REPLACES ALL OTHER 
WARRANTIES EXPRESSED OR IMPLIED INCLUDING THOSE OF 
MERCHANTABILITY AND FITNESS FOR A PARTICULAR PURPOSE. 
HAMILTON/BUHL WILL NOT BE HELD LIABLE FOR ANY OTHER DAMAGES OR 
LOSS INCLUDING INCIDENTIAL OR CONSEQUENTIAL DAMAGES AND LOSS OF 
PROFITS OR REVENUES FROM WHATEVER CAUSE, INCLUDING BREACH OF 
WARRANTY OR NEGLIGENCE. 
 
HAMILTON/BUHL RESERVES THE RIGHT TO MODIFY OR UPDATE ITS PRODUCT 
OBLIGATION TO REPLACE ANY EQUIPMENT DELIVERED PRIOR TO ANY SUCH 
CHANGE. 


Technical Support 
 

For detailed technical support or questions regarding the DVD Duplicator, contact 
Technical Support at 1-800-631-0868. 
 

Note: 

This duplicator has a serial number located on the rear panel. Please record the 

Model Number and Serial Number and retain them for your records. It will be necessary 
to provide this information to Technical Support personnel in order for them to provide 
you with the best technical support possible. 
 
Model Number: _____________________________________ 
Serial Number: _____________________________________ 


Note: 

Before contacting Technical Support please have your Model Number and the 

Serial Number of your duplicator available for reference. These numbers are located on 
the rear panel of your duplicator. 

Summary of Contents for HB1210

Page 1: ...DVD CD Duplicator User s Guide www HamiltonBuhl com...

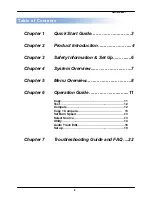
Page 2: ...uction 4 Chapter 3 Safety Information Set Up 6 Chapter 4 System Overview 7 Chapter 5 Menu Overview 8 Chapter 6 Operation Guide 11 Copy 11 Test 12 Compare 12 Copy Compare 13 Set Burn Speed 13 Select So...

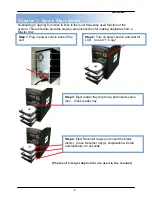
Page 3: ...g duplicates from a Master Disc Photos of 3 target duplicator are used in the manual Step 1 Plug in power cord to back of the unit Step 2 Turn on power button and wait for LCD to read 1 Copy Step 3 Ej...

Page 4: ...ct Technical Support for assistance We strongly suggest you locate your Hamilton Buhl Duplicator in a dust free environment Dirty discs may cause duplication rejects or even total failure Do not place...

Page 5: ...ANY OTHER DAMAGES OR LOSS INCLUDING INCIDENTIAL OR CONSEQUENTIAL DAMAGES AND LOSS OF PROFITS OR REVENUES FROM WHATEVER CAUSE INCLUDING BREACH OF WARRANTY OR NEGLIGENCE HAMILTON BUHL RESERVES THE RIGHT...

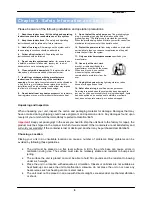
Page 6: ...racket or table specified by the manufacturer or sold with the system When a cart is used use caution when moving the cart system combination to avoid injury from tip over 13 Unplug this system during...

Page 7: ...SC UP Backward Use this button to navigate backward in the menu Down Forward Use this button to navigate forward in the menu ENT Enter Execute or Select the function ESC Escape Go back to previous fun...

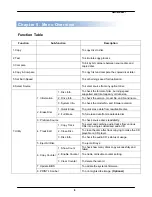
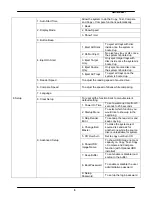
Page 8: ...Info To check the model No and firmware version 2 Erase Disc 1 Quick Erase To quick erase data from rewriteable disc 2 Full Erase To full erase data from rewriteable disc 3 PreScan Source To check sou...

Page 9: ...pare Speed To adjust the speed of drives while comparing 7 Language 8 Clear Setup To reset all the function back to manufacturer s default setting 9 Advanced Setup 1 Power On Time To set a warm up tim...

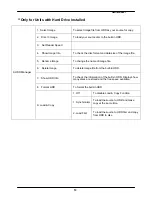
Page 10: ...of the image file 5 Rename Image To change the name of image file 6 Delete Image To delete image file from the built in HDD 7 Show HDD Info To check the information of the built in HDD Displays how ma...

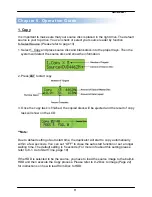
Page 11: ...3 Once the copy task is finished the copied discs will be ejected and the result of copy task will show on the LCD Note Due to default setting of auto start time the duplicator will start to copy auto...

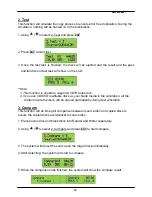
Page 12: ...c 2 If you use CD DVD rewritable discs as your blank media in the simulation all the content inside the discs will be erased permanently during test simulation 3 Compare This function will do bit by b...

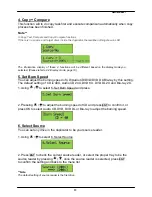
Page 13: ...CD DVD DVD DL Blu ray by this setting The default setting of CD is 40X Audio CD 24X DVD 8X DVD DL 2X and Blu ray 2X 1 Using to select 5 Set Burn Speed and press 2 Pressing to adjust the burning speed...

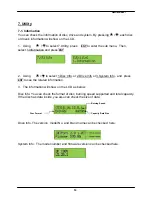
Page 14: ...select 1 Disc Info or 2 Drive Info or 3 System Info and press ENT to see the related information 3 The information will show on the LCD as below Disc Info You can check the format of disc burning spe...

Page 15: ...rase and press ENT 3 Using to select 1 Quick Erase or 2 Full Erase or 4 Pressing ENT to execute the erasing task When the system is detecting the discs you will see the colon flashing 5 When the erase...

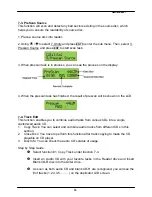
Page 16: ...wn on the LCD 7 4 Track Edit This function enables you to combine audio tracks from various CDs into a single customized audio CD 1 Copy Track You can select and combine audio tracks from different CD...

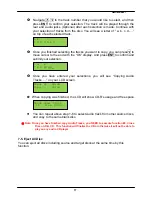
Page 17: ...our selection Once you have entered your selections you will see Copying Audio Tracks on your LCD screen When copying was finished the LCD will show CD R s usage and free space You can repeat above st...

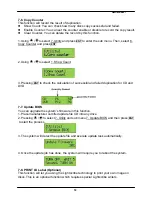
Page 18: ...eck the calculation of successful and failed duplication for CD and DVD 7 7 Update BIOS You can upgrade the system s firmware in this function 1 Place manufacturer certified update file CD into any dr...

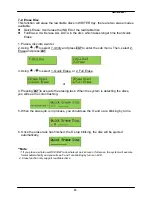
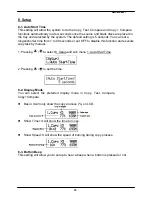
Page 19: ...m 1 to 99 seconds or set OFF to disable this function and execute copy task by manual 1 Pressing to select 8 Setup and sub menu 1 Auto Start Time 2 Pressing to set the time 8 2 Display Mode You can se...

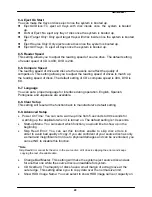
Page 20: ...h Portuguese and Japanese are available 8 8 Clear Setup This setting will reset all the function back to manufacturer s default setting 8 9 Advanced Setup Power On Time You can set a warm up time from...

Page 21: ...py Test Compare or Copy Compare and do it again without the source disc Or you can set No to keep buffer not be used Note The source will be only temporary saved in buffer there will be nothing saved...

Page 22: ...CD Reboot the duplicator Change master disc and try again Reader Drive doesn t read disc and shows error message Check the format of master disc Use other Master disc or other duplicator to test maste...

Page 23: ...he master disc in good condition Disc is not scratched Make sure the disc is placed in the drive properly Data side down Make sure the master disc has been finalized Can I copy Hollywood DVD movies wi...

Reviews: