background image

4

Video output

Step 1.

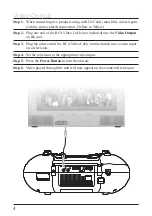
  When connecting two products using an RCA Cable, match the colored ports  

  with the same colored connection. (Yellow to Yellow)

Step 2.

  Plug one end of the RCA Video Cable (not included) into the 

Video Output


  on the unit.

Step 3.

  Plug the other end of the RCA Video Cable (not included) into a video input  

  on a television.

Step 4.

  Set the television to the appropriate video input.

Step 5.

  Press the 

Power Button

 to turn the unit on.

Step 6.

  Video played through the unit will now appear on the connected television.

Summary of Contents for MV8920

Page 1: ...s Warnings and Precautions 2 Important Safety Instructions 3 Video Output 4 Playing a DVD or CD 5 Playing the AM or FM Radio 5 Locations of Controls Definitions 6 9 Setup Menu 10 11 Service Warranty I...

Page 2: ...rference to radio or television reception which can be determined by turning the equipment off and on the user is encouraged to try to correct the interference by one or more of the following measures...

Page 3: ...ding If an outside antenna is connected to the receiver be sure the antenna system is grounded so as to provide some protection against voltage surges and built up static charges Article 810 of the Na...

Page 4: ...end of the RCA Video Cable not included into the Video Output on the unit Step 3 Plug the other end of the RCA Video Cable not included into a video input on a television Step 4 Set the television to...

Page 5: ...ded disc Step 1 Turn the DVD OFF RADIO Dial to the Radio position Step 2 Turn the AM FM FM St Dial to the desired position Extend and adjust the FM antenna to improve FM radio reception An AM antenna...

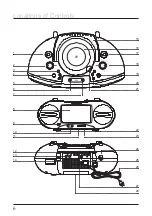
Page 6: ...6 Locations of Controls 1 17 16 18 19 20 24 25 26 27 2 3 4 5 6 7 9 8 10 11 12 13 14 15 21 22 23 28...

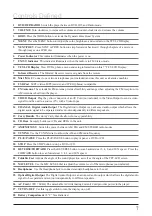
Page 7: ...ce TV with a Video Input 14 COAXIAL Digital Audio Output The Digital Audio Output is an advanced audio output which allows the digital audio signal to be separated and sent out independently to differ...

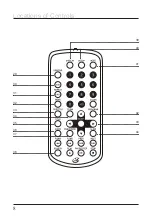
Page 8: ...8 31 43 42 44 41 29 30 32 33 34 35 36 38 39 40 37 Locations of Controls...

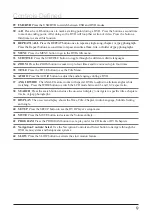
Page 9: ...LE button to see the Title Menu 36 AUDIO Press the AUDIO button to adjust the audio language during a DVD 37 ANGLE WIDE The ANGLE feature works with special DVDs to adjust to alternate angles while wa...

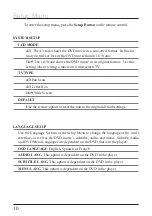
Page 10: ...o the original default settings LANGUAGE SETUP Use the Language Section of the Setup Menu to change the language of the unit s interfaces as well as the DVD movie s subtitles audio and menu Subtitle A...

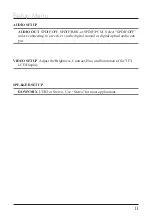
Page 11: ...PCM Select SPDIF OFF unless connecting to a receiver via the digital coaxial or digital optical audio out put VIDEO SETUP Adjust the Brightness Contrast Hue and Saturation of the TFT LCD Display SPEAK...

Page 12: ...o be free of defects for a period of 1 year from date of purchase Defective systems will be either repaired or replaced at the discretion of Hamilton Electronics Free technical support is available vi...

Reviews: