Installation and Service Manual
Overhaul
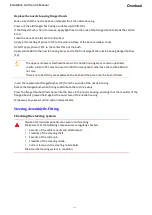
Passivation
Appropriate safety glasses, protective gloves and clothing must be worn to prevent skin
exposure to nitric acid.
If the impeller has been welded, passivation is required.
Immerse the impeller in hot 30% nitric acid for at least 2 hours.
Rinse in clean water.
If nitric acid immersion is not possible, a "brush on" pickling / passivation gel may be used on weld and heat
affected areas.
Marine Bearing Replacement
Check the fit of the water bearing sleeve [4] in the marine bearing [2]. Refer to section: Marine bearing:
Replace the marine bearing if the diametrical clearance exceeds this maximum.
If the water bearing sleeve [4] is badly scored or worn then it must be replaced.
To replace the marine bearing, a bearing press and a special extractor is required, contact C.W.F
Hamilton for details of the special extractor.
When shrink fitting of the marine bearing is required, chilling must be achieved by gradual
cooling to not more than minus 20°F (-28°C) using a freezer or regular ice.
Do not use dry
ice.
Pounding or shocking the bearing while in a chilled state could cause the rubber to
separate from the shell.
Remove the tailpipe. Refer to section: Tailpipe Area Dismantling on page 9-22.
Install the extractor and pull out the marine bearing from the tailpipe.
Support the tailpipe on the bearing press, on the aft face of the casting where the steering housing
attaches.
The M8 studs [26] may have to be removed.
Press in the new marine bearing.
Re-assemble the tailpipe. Refer to section: Tailpipe and Impeller Reassembly on page 9-31.
9-29
Summary of Contents for HJ212
Page 1: ...HJ212 Installation and Service Manual R3A3 Jet unit Manual ...
Page 20: ...Product Description Installation and Service Manual 2 6 ...
Page 56: ...Commissioning Installation and Service Manual 6 4 ...
Page 62: ...Fault Finding Installation and Service Manual 7 6 ...
Page 82: ...Maintenance Installation and Service Manual 8 20 ...
Page 137: ...Installation and Service Manual Appendix Notes 10 21 ...
Page 141: ...Installation and Service Manual Appendix Notes 10 25 ...
Page 164: ...Appendix Installation and Service Manual 10 48 ...
Page 166: ......
Page 169: ......
Page 171: ......
Page 172: ......
Page 175: ......
Page 176: ......
Page 177: ......
Page 178: ......
Page 181: ......
Page 185: ......
Page 186: ......
Page 188: ......
Page 195: ......
Page 196: ......
Page 197: ...Notes ...


