21
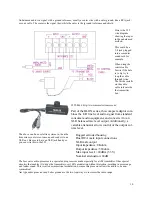
To go to the Cap Tune program just leave the shunt in J13 for 15 seconds, the LED will turn off. Take the shunt off
j13 (and then replace shunt onto J13) and you are in the Cap Tune program.
To find the peak voltage using this program you need to get used to working with the program. As the voltage is
steady or going up the LED will remain green, it will however tell you when the voltage is going down, and how
fast. Turning the Cap Tune more quickly will give more red blinks as the voltage goes down.
When the voltage is dropping quickly the LED will be solid red, when the voltage is dropping slowly the LED will
tend to blink red. Of course as the voltage is going up (which is what you want) the LED will remain green.
So rotate the Cap Tune left or right, which ever way the LED stays green, until it starts to go red. Then rotate Cap
Tune the other way until the LED blinks red again. You should find as you rotate both directions that you can turn
about one full turn either way or so before the LED starts to blink red, leave the Cap Tune in the middle of the
green range and you are tuned!
Just keep in mind the LED blinks/goes red as the voltage is going down, and the goal is to keep the voltage going
up until you find a peak.
An Alternative to using this program is to use the other Red LED (inside the black heatsink) as an indicator. Turn
the power down until you can just barely see the LED light, then you should be able to use this LED as an Voltage
indicator, the LED will get brighter as the voltage goes up. This will only work if the LED is dim.
You may find using a voltmeter quicker, but if you don’t have a voltmeter handy this program will do the job.
Once you have tuned turn the transmitter off, then back on with a shunt in J13. This will put the computer in Power
Set mode.
Simply rotate the Power Adjust to light the LED green for .1 watt legal power level.
Example tuning:
Coil Tune shunt is on position 3
Coil Tune program running (see earlier instructions)
Move Coil Tune shunt to position 4
Remove J13, LED is green (voltage is going up)
Replace J13
Move Coil Tune shunt to position 5
Remove J13, LED is green (voltage is going up)
Replace J13
Move Coil Tune shunt to position 6
Remove J13, LED is red (voltage is going down)
Replace J13
Move Coil Tune shunt to position 5
Remove J13, LED is green (voltage is going up)
Replace J13
Move Coil Tune shunt to position 4
Remove J13, LED is red (voltage is going down)
Replace J13
Move Coil Tune shunt to position 5
Remove J13, LED is green (voltage is going up)
Replace J13
Coil Tune position 5 has the highest voltage.
Leave the shunt in J13 for 15 seconds (LED blanks, then remove J13) to move to Cap Tune program where you
continue peaking the voltage with the Cap Tune control. When the voltage goes down the LED will go red, when
the voltage goes down fast the LED will be solid red, when falling slowly the LED will be blinking RED.
Summary of Contents for HAMILTON AM1000
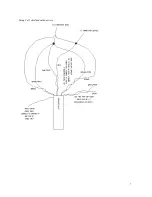
Page 7: ...Using Cat 5 shielded outdoor wire 7 ...
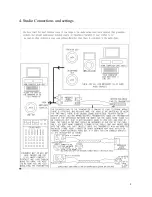
Page 8: ...4 Studio Connections and settings 8 ...
Page 14: ...6 Trying to get good Range 14 ...
Page 19: ...19 11 Certification ...

