background image

16

Camborne Wood & Multifuel Stoves

INSTALLATION

GENERAL PRECAUTIONS

Note - All installations must conform to the
appropriate building regulations. 

The Building Regulations for England and Wales
2000 ref Approved Document J 2002 edition
(issued by the DTLR).
The Building Standards (Scotland) (Consolidation)
Regulations.
Detailed recommendations for installation of
appliances, chimneys and flues are outlined in the
current issue of the following British Standards:-
BS6461, BS8303 and BS4543.

Any Manufacturer's Instructions must not be
taken as overriding statutory requirements.

During installation ensure that adequate
precautions are taken to avoid unnecessary risk to
yourself or any householder. In particular the
danger from the caustic nature of the fire cement
should be avoided by using these accepted
methods:

•  Wear gloves when handling fire cement. 
•  Wear goggles when chiselling or looking up   

chimneys.

Make sure that Building Regulations are adhered to
during installation along with any local by-laws. In
the case of heating systems make sure that the pipe
work is correctly bonded to ensure electrical
earthing.

HANDLING

By the time you read this you will appreciate the
weight of the appliance. The Safety and handling
guidelines as set out on page 5 of this manual
should be followed.
To make movement easier internal fittings, fuel
retainers, grates, firebox liners, flue outlets, hot
plate, throat plate, etc., can be removed. 

Care should be taken to make sure that the hinges
are not damaged during installation.

HEARTH

The fire should be installed to stand on a
constructional hearth of non-combustible materials
not less than 125mm (5'') thick conforming to
Building Regulations. Dimensions of the hearth
should project at least 300mm (12'') forward of the
front of the appliance and 150mm (6'') at the sides.
The surface of the hearth should be free of
combustible materials. In most buildings with solid
concrete floors the requirement will be met by the
floor itself, but mark the perimeter of the hearth to
ensure floor coverings are kept well away or use
different levels to mark the hearth perimeter.

COMBUSTIBLE MATERIALS

A gap of at least 450mm (18'') should be allowed
between the appliance and any combustible
materials including furnishings. Adjacent walls
should be of suitable non-combustible
construction, preferably brickwork. In large
fireplaces take care that any supporting beam is
protected by a 13mm (0.5'') sheet of
Masterboard/Supalux spaced 13mm (0.5'') off the
surface with strips of non-combustible material

- not wood.

Make sure that there is a gap between an
uninsulated flue system and any combustible
material. This gap must be at least 3 x the outside
diameter of the flue pipe, or 1.5 x the flue diameter
to non combustible surfaces. see illustration p22.

AIR FOR COMBUSTION

There must always be a permanent means of
providing air for combustion into the room in
which the fire is installed. A permanent vent with a
total free area of at least 550mm

2

for every kW

rated output above 5kw should be connected
directly to the outside air or to an adjacent room
which itself has a permanent vent of the same size
direct to the outside air. The fitting of an extractor
fan to either of these rooms is not recommended.

Summary of Contents for Camborne

Page 1: ...Wood Multifuel Stoves Operating Installation Manual PLEASE RETAIN THESE INSTRUCTIONS FOR FUTURE REFERENCE Camborne Medium Multifuel Stove Rev 4 September 2005 Part No AFS 1257 Camborne ...

Page 2: ...gned which is why we are so confident in the reliability of our product Should you have any questions about our Hamlet Stoves that are not covered in this manual please contact the local dealer in your area or call our Technical support department on 01308 427234 COPYRIGHT 2005 Arada Ltd This booklet has copyright may not be copied in whole or part or be used for any purpose other than that for wh...

Page 3: ...ring 13 Ash Removal 13 SERVICING Cleaning Annual Maintenance 13 14 Accessories 15 INSTALLATION Page General Precautions 16 Handling 16 Hearth 16 Combustible Materials 16 Firebox Liner Panels 17 Assembling the Multifuel Grate 18 Interchangeable Canopies 19 Fitting the Flue Outlet Hotplate 20 Flues Chimneys 20 23 Add In Boilers Water Connections 24 25 Final Check Final Installation Check List 26 Par...

Page 4: ... BURNED IN THIS APPLIANCE TO USE THESE FUELS WILL INVALIDATE THE APPLIANCE GUARANTEE IF IN DOUBT CONTACT THE SOLID FUEL ASSOCIATION TELEPHONE NUMBER 0800 600 000 www solidfuel co uk THE USE OF SPARE PARTS OTHER THAN THOSE SUPPLIED BY ARADA LTD WILL INVALIDATE THE APPLIANCE GUARANTEE 4 Camborne Wood Multifuel Stoves ...

Page 5: ...erly installed and operated a house fire may result Installation must comply with the Building Regulations and conform to all relevant fire safety standards Hamlet Fires produce a variety of appliances rang ing from units which are traditional in style to stoves which are modern in appearance all bristling with High Tech features Model types include simple room heaters convectors integral boiler m...

Page 6: ... 1 8 Rear liner 2 9 Side liners 2 N A Camborne Medium Wood N A 1 1 5 1 2 2 Camborne Medium Multifuel N A Camborne Small Wood 1 5 1 2 2 8 7 1 1 5 1 2 2 Camborne Large Wood N A N A 1 1 6 1 2 2 Camborne Large Multifuel 9 8 1 1 6 1 2 2 1 5 1 5 1 5 1 5 1 6 1 6 1 Grate bars high 2 Grate bars low N A 3 Throat plate 1 6 Ashpan 1 1 1 1 1 1 1 1 Optional Accessory 1 Optional Accessory Optional Accessory N A ...

Page 7: ... to Centre of Rear Flue Depth from Back to Centre of Flue mm Flue Diameter 127 5 Weight Packed Kg 2 8 Camborne Medium Wood 9 127 5 Camborne Medium Multifuel 1 5 6 Camborne Small Wood 8 395 127 5 2 8 127 5 Camborne Large Multifuel 2 5 11 152 6 Camborne Large Wood 2 5 11 152 6 505 3 8 2 2 3 8 2 2 5 7 2 3 490 400 103 65 Kg 490 395 400 103 74 Kg 525 600 400 415 105 77 Kg 9 5 7 2 3 525 600 400 415 105 ...

Page 8: ...s over draught and The primary air inlet providing under draught to the base of the fire chamber through the controls on the doors of the fire PRIMARY AIR FOR CAMBORNE On the Camborne primary air enters the appliance through the controls on the bottom of the fire door s Moving the control knobs to the right will increase the air inlet to the left to reduce the air inlet or to seal the ash door com...

Page 9: ...w operations can be carried out on a workbench or similar level surface Unscrew the two nuts on the inside of the door securing the retaining clips Carefully remove any pieces of broken glass and sealing gasket wearing suitable gloves Re place the gaskets and line them up in relation to the door frame Fig 6 Fig 6 Lining up the gasket Re seat the new glass ensuring the sealing gasket is flat and in...

Page 10: ...re aligned by the user as follows When the appliance is cold open the fire door so that it is at a right angle to the front face of the fire Lift the fire door up off the hinges Gently tap the two hinge pins in a direction to compensate for the misalignment Fig 9 Refit the door and check to ensure it now sits square to the body if not repeat above steps Fig 9 Adjusting the Camborne hinges 10 Cambo...

Page 11: ...eheat Blazebrite Taybrite Sunbrite Doubles Singles Anthracite Large Nuts and Welsh Dry Steam Coal Large Small Nuts Approval does not cover the use of other fuels either alone or mixed with the suitable fuels listed above nor does it cover instructions for the use of other fuels For latest details please refer to Hetas website www hetas co uk Do not use smaller sizes than Stovesse e g Beans Peas Gr...

Page 12: ...ed as for manufactured smokeless fuel Leave the air inlet control open about a quarter or less Note The high temperature paint acquires durability by being cured during the initial firings of the appliance will give off fumes which are non toxic but which certain persons may find have an unpleasant or irritant effect Ensure that the area is well ventilated during this time EXTENDED BURNING The app...

Page 13: ...old red hot pieces of ash may be concealed and could easily start a fire or cause an injury Replace the ash pan and close the fire door CLINKER The formation of clinker suggests that the unit is being over fired Any clinker forming on the grate should be removed when cold OVER FIRING Do not over fire your appliance Using flammable liquids or too much wood or firing the fire at maximum for prolonge...

Page 14: ...ertainconditions such as burning at a low rate with damp wood or overnight burning the glass may become somewhat blackened To remedy this operate the appliance at a fast rate Alternatively when the stove is cold open the door and clean the inside face of the glass with a damp cloth or with glass cleaner available from fire stockists Apiece of cloth moistened with vinegar and dipped in wood ash not...

Page 15: ...connecting flues pipes or surrounding metalwork ADD ON CANOPIES Option of low or high canopies Please refer to page 19 for fitting instructions TRACERIES Option of Lattice or Gothic tracery for the fire doors Fig 12a 12b ADD IN BOILER TECHNICAL DATA Camborne Small Wood Multifuel Room Heater with Domestic Hot Water with add in boiler type 8 Max Output to Room kW Max Output to Water kW 3 8 2 2 Cambo...

Page 16: ...ion HEARTH The fire should be installed to stand on a constructional hearth of non combustible materials not less than 125mm 5 thick conforming to Building Regulations Dimensions of the hearth should project at least 300mm 12 forward of the front of the appliance and 150mm 6 at the sides The surface of the hearth should be free of combustible materials In most buildings with solid concrete floors ...

Page 17: ...le bend and two cut outs to the front facing up The projecting lugs sit on top of the side liners The long centre tab on the back edge rests on the rear liners The shorter turn down tabs against the vertical face Note It may be necessary to remove some of the grate bars for clearance and ease when fitting the throat plate Note Cracking of lining panels does not effect efficiency Fig 16 Camborne Me...

Page 18: ...he low section of the comb The high grate bars are fitted in a similar manner but with the the larger end seated on the high section of the comb See Fig 17 18 Fig 17 Wood burning setting GRATE BAR REPLACEMENT After extended use it may be necessary to replace some of the grate bars Periodic inspection of the bars is recommended and the removal of any nails or wire that may be present after burning ...

Page 19: ...ter installation and are interchangeable These are fitted as follows To fit the interchangeable canopy Fig 19 Remove the front clamps Tilt the canopy as shown in stage 1 Engage the rear clips and pull fully forward Fit the front clamps and tighten Fit the required blanking plates shown in stage 2 Camborne Wood Multifuel Stoves 19 INSTALLATION Fig 19 ...

Page 20: ...n fumes from the stove outlet to the outside air To ensure a good updraught it is important that the flue gases are kept warm and that the flue size suits the stove The termination of the outlet at the top of the flue also needs to comply with the Building Regulations The minimum effective height of the flue must be at least 4 5 metres from the top of the stove to the top of the flue outlet When w...

Page 21: ...ocument J of the Building Regulations for England and Wales is available from The Stationery Bookshops and can also be viewed at the ODPM website at www safety odpm gov uk bregs brads htm Details on the relevant Building Regulations and BS British Standards are given in the General Precautions section page 16 of these instructions A chimney may comply with the regulations but still be subject to d...

Page 22: ...22 Camborne Wood Multifuel Stoves INSTALLATION ...

Page 23: ...SULATED FLUES TYPICAL METAL INSULATED CHIMNEY SYSTEM TO BE INSTALLED TO THE CHIMNEY MANUFACTURERS INSTRUCTIONS IN COMPLIANCE WITH BUILDING REGULATIONS AND BS7566 PTS 1 4 A is minimum clearance for non insulated flue 1 5 x D to a non combustible surface material or 3 x D to combustible surface material ...

Page 24: ... by a qualified heating engineer In many cases your supplier will be able to offer advice and assistance Direct Systems Stainless steel boilers either factory fitted or retro fitted as add in boilers enable connection to direct systems to be made without the need to change the cylinder or to fit an expansion tank This applies to domestic water supply only and should not be done when in an area wit...

Page 25: ...pipe from the expansion tank should be 28mm diameter copper Pipes in unheated spaces must be lagged FINAL CHECK Before handing over the installation to the customer it is strongly recommended that the appliance is lit and the functioning of the chimney hot water and heating system is checked A checklist Pre lighting Checks appears in the Operating Instructions but in addition to this the installer...

Page 26: ...as appliances only c If clay or concrete flue liners used confirm that they are correctly jointed with socket end uppermost and state jointing materials used d If an existing chimney has been refurbished with a new liner type or make of liner fitted e Details of flue outlet terminal and diagram reference Outlet Details Complies with f Number and angle of bends g Provision for cleaning and recommen...

Page 27: ...escription Visual Aid not to scale Camborne Small Wood Camborne Small Multifuel Camborne Medium Wood AFS1020 AFS903 AFS904 AFS009 AFS008 AFS051 Camborne Medium Multifuel AFS1241 N A AFS012 AFS008 AFS052A Camborne Large Wood AFS1241 AFS900 AFS901 AFS012 AFS008 AFS052A Camborne Large Multifuel AFS010 AFS010 AFS010 3 Flue Spigot AFS010 AFS011 AFS011 AFS1233 AFS1233 AFS1233 7 Airwash Curved AFS1233 AF...

Page 28: ...th Gasket 12 Glass Clips 13 Hinge kit Comprises 2 Hinges 4 Fixings Per Set Part Description Visual Aid not to scale Camborne Small Wood Camborne Small Multifuel Camborne Medium Wood AFS1163 AFS1164 AFS1165 AFS1095 AFS1010 AFS047 Camborne Medium Multifuel AFS1242 AFS1243 AFS1244 AFS1095 AFS1010 AFS047 Camborne Large Wood AFS1242 AFS1243 AFS1244 AFS1095 AFS1010 AFS047 Camborne Large Multifuel AFS997...

Page 29: ...8 Fire Door Locking Assembly 19 Wood Burning kit 20 Multifuel Upgrade Kit Part Description Visual Aid not to scale CAMSM GRATE AFS1021 Left AFS1267 Right AFS1268 AFS1257 ASF1236 AFS1247 CAMLM GRATE AFS1021 Left AFS1267 Right AFS1268 AFS1257 AFS1236 CAMLW BRTAY N A Camborne Small Wood Camborne Small Multifuel Camborne Large Wood Camborne Medium Multifuel Camborne Medium Wood Camborne Large Multifue...

Page 30: ... annually by a qualified heating engineer The Manufacturers decision shall be final If your appliance proves to be defective as a result of faulty materials or workmanship during guarantee we will repair or replace it FREE OF CHARGE as long as the fire has been installed according to the manuals instructions USE OF SPARE PARTS OTHER THAN THOSE SUPPLIED BY ARADA LTD WILL INVALIDATE THE APPLIANCE WA...

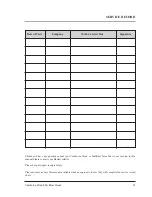
Page 31: ...his manual please contact your Hamlet retailer Please keep all repair receipts safely Please ensure you have this manual available when an engineer visits as they will complete the service record chart Camborne Wood Multifuel Stoves 31 SERVICE RECORD Date of Visit Company Work Carried Out Signature ...

Page 32: ...ersion Model Serial No I ve checked it and it s O K Assembled by Checked by Date of Purchase Name and address of supplier Please ensure installer completes INSTALLATION CHECK LIST details on page 26 of this manual If an add in boiler is fitted please also ensure information on page 25 is completed Please ensure the enclosed registration card is completed and returned to Arada Ltd and the following...

Reviews: