background image

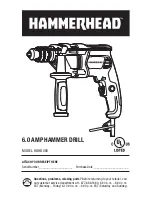
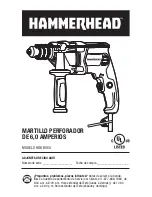
6.0 AMP HAMMER DRILL 7


SAFETY INFORMATION

Specific Safety Rules for Hammer Drill
•  Hold power tool by insulated gripping surfaces, when performing an operation 

where the cutting accessory may contact hidden wiring or its own cord.

 Cutting 

accessory contacting a “live” wire may make exposed metal parts of the power tool 
“live” and could give the operator an electric shock.

•  Wear ear protectors when impact drilling.

 Exposure to noise can cause hearing loss.

•  Use auxiliary handle(s), if supplied with the tool.

 Loss of control can cause personal 

injury.

•  Do not use the power tool with a damaged cord.


Do not touch the damaged 

cord and pull the plug from the outlet when the cord is damaged while working. 

Damaged cords increase the risk of an electric shock. 

•  Secure the workpiece.

 A workpiece clamped with clamping devices or in a vice is held 

more secure than by hand. 

•  Always wait until the power tool has come to a complete stop before placing it 

down.

 The tool insert can jam and lead to loss of control over the power tool. 
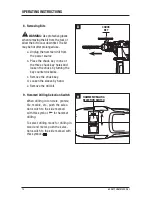
PREPARATION

Before attempting to use the hammer drill, familiarize yourself with all of its operating 
features and safety requirements.

Summary of Contents for HDHD060

Page 1: ...Number______________________ Purchase Date_______________________ Questions problems missing parts Before returning to your retailer call our customer service department at 1 877 888 1880 8 30 a m 8 0...

Page 2: ...Instructions 9 Care and Maintenance 17 Troubleshooting 18 Warranty 18 PRODUCT SPECIFICATIONS COMPONENT SPECIFICATIONS Motor 120V 60Hz 6 0A No load speed 0 2 700 RPM Hammer speed 0 43 200 BPM Keyed ch...

Page 3: ...th ANSI Z87 1 DANGER People with electronic devices such as pacemakers should consult their physician s before using this product Operation of electrical equipment in close proximity to a heart pacema...

Page 4: ...er warning or caution It means ATTENTION Your safety is involved Alternating Current IMPORTANT This tool should only be serviced only by a qualified service technician IMPORANT SAFETY INSTRUCTIONS SAV...

Page 5: ...l Keep cord away from heat oil sharp edges or moving parts Damaged or entangled cords increase the risk of electric shock When operating a power tool outdoors use an extension cord suitable for outdoo...

Page 6: ...from the power source and or the battery pack from the power tool before making any adjustments changing accessories or storing power tools Such preventive safety measures reduce the risk of starting...

Page 7: ...if supplied with the tool Loss of control can cause personal injury Do not use the power tool with a damaged cord Do not touch the damaged cord and pull the plug from the outlet when the cord is dama...

Page 8: ...TION A Chuck jaws B Chuck C Chuck key holes D Chuck sleeve E Hammer drilling selection switch F Depth stop gauge G Lock on button H Chuck key I Chuck key strap J Variable speed trigger switch K Speed...

Page 9: ...speed with increased trigger pressure and lower speed with decreased trigger pressure 2 Lock On Button This hammer drill is equipped with a lock on button which is convenient for continuous drilling f...

Page 10: ...ment dial clockwise for a lower speed range 4 Direction Of Rotation Selector The direction of bit rotation is revers ible and is controlled by a selector located above the trigger switch With the dril...

Page 11: ...desired operating position then push the handle inward until it engages in the desired position e Securely tighten the auxiliary handle by turning the handle clockwise To reposition the handle a Unpl...

Page 12: ...ac cessory has been fully inserted onto the locking teeth on the chuck before setting the depth stop gauge To adjust the depth a Unplug the hammer drill from the power source b Rotate the lower portio...

Page 13: ...d e Place the chuck key into one of the three chuck key holes and turn it clockwise to tighten the chuck jaws on the bit Repeat with the remaining two chuck key holes f Remove the chuck key WARNING It...

Page 14: ...three chuck key holes and loosen the chuck by turning the key counterclockwise c Remove the chuck key d Loosen the sleeve by hand e Remove the drill bit 9 Hammer Drilling Selection Switch When drilli...

Page 15: ...o elongate a hole Allow the tool to do the work k When drilling hard smooth surfaces use a center punch to mark the desired location of the hole This will prevent the drill bit from slipping off cente...

Page 16: ...ings Bend or burn the bits Produce off center or irregularly shaped holes 13 Drilling In Masonry For maximum performance use carbide tipped masonry bits when drilling holes in brick tile concrete etc...

Page 17: ...Unplug the hammer drill from the power source b Open the chuck jaws by turning the sleeve in a counter clockwise direction c Use a Phillips screwdriver not included to remove the chuck screw by turni...

Page 18: ...itional year with product registration at www hammerheadtools com 2 1 for a total three years subject to the warranty coverage described herein Please retain your receipt This hammer drill is warrante...

Page 19: ...____ Fecha de compra_____________________ Preguntas problemas piezas faltantes Antes de volver a la tienda llame a nuestro Departamento de Servicio al Cliente al 1 877 888 1880 de 8 30 a m a 8 00 p m...

Page 20: ...8 Cuidado y mantenimiento 36 Soluci n de problemas 37 Garant a 37 ESPECIFICACIONES DEL PRODUCTO COMPONENTE ESPECIFICACIONES Motor 120 V 60 Hz 6 0 A Velocidad sin carga 0 2 700 RPM Velocidad del martil...

Page 21: ...con marcas que indiquen que cumplen con la norma ANSI Z87 1 PELIGRO Las personas que poseen dispositivos electr nicos como marcapasos deben consultar al m dico antes de usar este producto La utilizaci...

Page 22: ...N V Voltios n 0 Velocidad sin carga A Amperios min Revoluciones golpes o impactos por minuto Hz Hercios Construcci n clase II W Vatios Corriente continua Peligro advertencia o precauci n Significa ATE...

Page 23: ...trica Las distracciones pueden hacer que pierda el control de la herramienta Seguridad el ctrica Los enchufes de las herramientas el ctricas deben coincidir con el tomacorriente Nunca modifique el enc...

Page 24: ...cas con el dedo en el interruptor o herramientas el ctricas encendidas invita a los accidentes Retire toda llave de tuercas o herramienta de ajuste antes de encender la herramienta el ctrica Si deja u...

Page 25: ...ientas de corte que se mantienen a punto con los bordes afilados son menos propensas a atascarse y m s f ciles de controlar Use la herramienta el ctrica los accesorios las brocas etc de acuerdo con es...

Page 26: ...ctrica Asegure la pieza de trabajo Una pieza sujetada con abrazaderas o con una prensa de tornillo se mantiene m s segura que con la mano Siempre espere a que la herramienta el ctrica se detenga por...

Page 27: ...de la llave de portabrocas D Manguito del portabrocas E Selector de taladro martillo F Calibre de profundidad de parada G Bot n de bloqueo H Llave de portabrocas I Abrazadera de la llave de portabroc...

Page 28: ...a mayor presi n del gatillo y una menor velocidad con menos presi n del gatillo 2 Bot n de bloqueo El martillo perforador est equipado con un bot n de bloqueo que resulta pr ctico en el caso de que se...

Page 29: ...dad variable en sentido de las manecillas del reloj para obtener un rango de velocidad m s bajo 4 Selector de direcci n de rotaci n La direcci n de rotaci n de la broca es reversible Un selector ubica...

Page 30: ...hacia dentro hasta que se enganche en la posici n deseada e Apriete bien la manija auxiliar gir ndola en direcci n de las manecillas del reloj Para colocar el mango en otro lugar realice lo siguiente...

Page 31: ...ajustar el calibre de profun didad de parada Para ajustar la profundidad realice lo siguiente a Desenchufe el martillo perforador de la fuente de alimentaci n b Gire la parte inferior de la manija aux...

Page 32: ...cios de esta y g rela en direcci n de las manecillas del reloj para apretar las mordazas del portabrocas en la broca Repita el procedimiento en los dos orificios restantes de la llave de portabrocas f...

Page 33: ...uno de los tres orificios de esta afloje la broca y gire la llave en direcci n contraria a las manecillas del reloj c Retire la llave portabrocas d Suelte el manguito manualmente e Retire la broca pa...

Page 34: ...je que la herramienta realice el trabajo k Cuando taladre en superficies lisas o duras utilice un punz n para marcar la ubicaci n deseada del agujero Esto evitar que la broca para taladro se deslice f...

Page 35: ...n Producir agujeros descentrados o irregulares 13 C mo taladrar en mamposter a Para obtener un m ximo rendimiento utilice brocas con puntas de carburo para mamposter a cuando taladre agujeros en ladr...

Page 36: ...as del portabrocas y gire el manguito en direcci n contraria a las manecillas del reloj c Utilice un destornillador Phillips no se incluye para retirar el tornillo del portabrocas y g relo en direcci...

Page 37: ...ww hammerheadtool com 2 1 lo que suma un total de tres a os sujeto a la cobertura de la garant a que se describe en el presente documento Conserve su recibo Se garantiza al comprador original que este...

Page 38: ...38 MARTILLO PERFORADOR DE 6 0 AMPERIOS...

Reviews: