background image

DETECTOR DE ÁNGULOS DIGITAL DE 16'' 

23

  INSTRUCCIONES DE SEGURIDAD

  ADVERTENCIA

ASEGÚRESE DE

 leer y comprender todas las instrucciones de este manual antes 

de utilizar este producto. Si no se siguen todas las instrucciones, se podrían 
provocar descargas eléctricas, incendios o lesiones corporales.

•  No 

use esta herramienta para fines distintos de aquellos indicados en este 

manual. Se podrían provocar lesiones graves.

•  Mantenga

 seca la herramienta y no la use bajo la lluvia.

•  Evite

 dejar caer la herramienta y golpearla de otra forma.

•  Si transporta el detector de ángulos digital mientras realiza alguna actividad 

física, como por ejemplo, subir una escalera, asegúrese de colocar la 
herramienta de manera que no se generen contusiones o heridas punzantes 
en caso de accidente.

•  Retire

 las baterías si no se utilizará el dispositivo por varios días.

•  Deseche siempre las baterías usadas de acuerdo con las normas locales. No 

las queme.

•  Use 

solo

 aquellos accesorios que HAMMERHEAD recomienda usar con este 

producto. El uso de accesorios que se diseñaron para otras herramientas 
podría ocasionar lesiones graves.

Declaración de la FCC

  1. Este dispositivo cumple con la Sección 15 de las Normas de la Comisión 

Federal de Comunicaciones de los EE. UU. (FCC, por sus siglas en inglés). 
El funcionamiento está sujeto a las siguientes dos condiciones:


(1) Este dispositivo no debe causar interferencia perjudicial.


(2) Este dispositivo debe aceptar cualquier interferencia que reciba, 

incluida la interferencia que pueda ocasionar un funcionamiento no 
deseado.

Summary of Contents for HLLT16

Page 1: ..._______________ Questions problems missing parts Before returning to your retailer call our customer service department at 1 877 888 1880 8 30 a m 8 00 p m EST Monday Friday 10 00 a m 6 00 p m EST Sat...

Page 2: ...anty 19 TECHNICAL SPECIFICATIONS COMPONENT SPECIFICATIONS Model HLLT16 Power supply 2 x 1 5V AA battery Recommended Use Indoors or Outdoors Angle measuring range 0 to 220 Accuracy of vials 0 029 Accur...

Page 3: ...ncture wounds in the event of an accident Remove the batteries if the device will not be used for several days Always dispose of used batteries according to your local ordinance do not incinerate the...

Page 4: ...installation If this equipment does cause harmful interference to radio or television reception which can be determined by turning the equipment off and on the user is encouraged to try to correct th...

Page 5: ...ny packing materials until all of the contents are accounted for a Open the carton to locate the following Digital Angle Finder 2 pcs 1 5V AA battery Soft bag Operator s manual b Carefully lift the Di...

Page 6: ...N KNOW YOUR DIGITAL ANGLE FINDER Fig 1 The 16 Digital Angle Finder is a precision tool for measuring and transferring angles Use it as an angle finder a compound cut calculator a protractor a level 3...

Page 7: ...gle Finder on or off flips the display 9 HOLD button freezes the display on the screen press again to free the display 10 Encased bubble vials The highly sensitive vials ensure the tool has an accurac...

Page 8: ...GLOSSARY SPR Spring Angle the angle between the wall and the flat back side of crown molding CNR Corner the angle between the two adjacent walls MTR The miter angle computed for the miter saw BVL The...

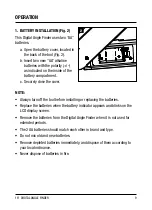
Page 9: ...lose the cover NOTE Always turn off the tool before installing or replacing the batteries Replace the batteries when the battery indicator appears and blinks on the LCD display screen Remove the batte...

Page 10: ...tomatically turn off to save battery power 3 TO USE THE DIGITAL ANGLE FINDER BUBBLE VIALS FOR LEVEL AND PLUMB MEASUREMENTS NOTE Use the highly accurate bubble vials to establish level or plumb surface...

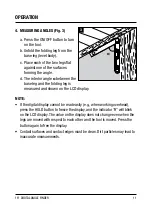
Page 11: ...s measured and shown on the LCD display NOTE If the digital display cannot be read easily e g when working overhead press the HOLD button to freeze the display and the indicator H will blink on the LC...

Page 12: ...that the folding leg cannot contact one of the surfaces a Attach the leg extension Slide the leg extension from the end onto the folding leg b Extend the leg extension as far as necessary over the jo...

Page 13: ...surface that will come in contact with the wall postioned flat on the table as shown in Fig 5 b Press the power button to turn on the tool c Place the folding leg flat against the underside of the ta...

Page 14: ...spring angle is already known follow steps f h below to input the SPR angles f Press the power button to turn on the tool g Move the folding leg until the known spring angle is displayed on the LCD d...

Page 15: ...time when you turn on the unit press the SPR button to check the saved SPR angle and then it will go into CNR mode with CNR blink on LCD display automatically place the unit to desired measuring loca...

Page 16: ...er saw d To recall the MTR or BVL angles press the hold button for 3 seconds go back to the last figure e To return to the normal mode press the MTR BVL button again NOTE If the angle measured is out...

Page 17: ...s a camera or binoculars Always clean the tool with a clean soft cloth If necessary slightly moisten the cloth with pure alcohol or a little water Check the batteries regularly to avoid deterioration...

Page 18: ...e is low Replace with new batteries when the empty battery icon appears on LCD Inaccurate angle measurement Dirt particles on the contact edges or surface of the legs Clean the dirt particles The fold...

Page 19: ...s warranted to the original user to be free from defects in material and workmanship If you believe that the tool is defective at any time during the specified warranty period call HAMMERHEAD support...

Page 20: ...20 16 DIGITAL ANGLE FINDER...

Page 21: ...________________ Fecha de compra______________________ Preguntas problemas piezas faltantes Antes de volver a la tienda llame a nuestro Departamento de Servicio al Cliente al 1 877 888 1880 de 8 30 a...

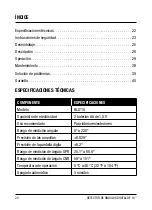
Page 22: ...NES T CNICAS COMPONENTE ESPECIFICACIONES Modelo HLLT16 Suministro de electricidad 2 bater as AA de 1 5 V Uso recomendado Para interiores exteriores Rango de medici n angular 0 a 220 Precisi n de las a...

Page 23: ...colocar la herramienta de manera que no se generen contusiones o heridas punzantes en caso de accidente Retire las bater as si no se utilizar el dispositivo por varios d as Deseche siempre las bater a...

Page 24: ...ial para las comunicaciones por radio Sin embargo no hay garant a de que no se produzca esa interferencia en una instalaci n en particular Si este equipo produce interferencia perjudicial a la recepci...

Page 25: ...aterial de embalaje hasta que todas las piezas est n contadas a Abra la caja e identifique lo siguiente Detector de ngulos digital 2 bater as AA de 1 5 V Bolsa suave Manual del usuario b Con cuidado r...

Page 26: ...EL DETECTOR DE NGULOS DIGITAL Fig 1 El detector de ngulos digital de 16 es una herramienta de precisi n para medir y transferir ngulos selo como detector de ngulos calculadora de corte compuesto tran...

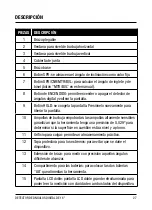
Page 27: ...la Presi nelo nuevamente para liberar la pantalla 10 Ampollas de burbuja empotradas las ampollas altamente sensibles garantizan que la herramienta tenga una precisi n de 0 029 para determinar si la su...

Page 28: ...inclinaci n el ngulo entre la pared y el lado posterior plano de la moldura de corona CNR esquina el ngulo entre las dos paredes adyacentes MTR el ngulo de inglete que se calcula para la sierra inglet...

Page 29: ...rior de dicho compartimento c Cierre bien la tapa NOTA Apague siempre la herramienta antes de instalar o reemplazar las bater as Cambie las bater as cuando aparezca y parpadee el indicador de bater a...

Page 30: ...rar bater a 3 C MO USAR LAS AMPOLLAS DE BURBUJA DEL DETECTOR DE NGULOS DIGITAL PARA MEDICIONES DE NIVELACI N HORIZONTAL Y VERTICAL NOTA Use las ampollas de burbuja altamente precisas para establecer s...

Page 31: ...OTA Si no puede leer f cilmente la medici n que aparece en la pantalla digital por ejemplo debido a que usted est trabajando en altura presione el bot n HOLD Suspender para congelar la pantalla Parpad...

Page 32: ...que el brazo plegable a Conecte la extensi n de brazo deslice la extensi n de brazo sobre el brazo plegable desde el extremo b Prolongue la extensi n de brazo seg n sea necesario sobre la junta del d...

Page 33: ...el ngulo de inclinaci n SPR a Fije la moldura de corona a la esquina de una mesa Aseg rese de que la superficie que estar en contacto con la pared est en posici n plana sobre la mesa como se muestra e...

Page 34: ...e el bot n SPR Inclinaci n para guardar el ngulo de inclinaci n en la herramienta y usarlo m s adelante La letra S que aparece en la pantalla LCD indica que el ngulo de inclinaci n se guard correctame...

Page 35: ...PR para guardar este valor en la herramienta La letra S que aparece en la pantalla LCD indica que el ngulo de inclinaci n se guard correctamente Fig 8 Determine el ngulo de esquina CNR a Luego de dete...

Page 36: ...a vez desea utilizar un nuevo ngulo SPR en lugar del ngulo SPR guardado coloque la unidad en la ubicaci n de medici n deseada presione el bot n MTR BVL SPR aparecer en la pantalla LCD esto quiere deci...

Page 37: ...para obtener la ltima medici n e Para regresar al modo normal presione el bot n MTR BVL nuevamente NOTA Si el ngulo medido est fuera del rango permitido en lo que respecta al ngulo de inclinaci n o d...

Page 38: ...mo una c mara o binoculares Siempre limpie la herramienta con un pa o suave limpio Si es necesario humedezca ligeramente el pa o con alcohol puro o un poco de agua Revise las bater as de forma peri di...

Page 39: ...ando aparezca el icono de bater a agotada en la pantalla LCD Medici n de ngulo poco precisa Hay part culas de suciedad en los bordes o la superficie de contacto de los brazos Limpie las part culas de...

Page 40: ...en los materiales y en la mano de obra Si cree que la herramienta tiene alg n defecto en cualquier momento durante el per odo de garant a especificado simplemente llame a Ayuda al cliente de HAMMERHEA...

Reviews: