background image

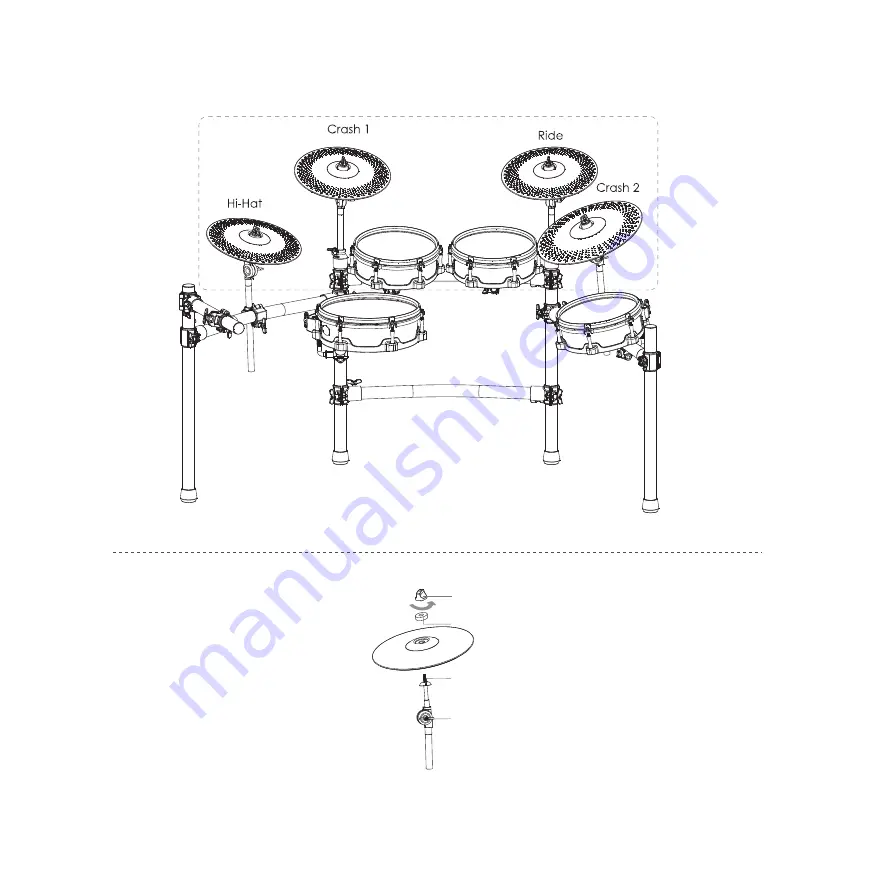
3-A . Attach the cymbals

Knob nut

Check bracket

Tighten screw

Felt washer

Summary of Contents for ACE-Short

Page 1: ...Installation Instruction for ACE Short Drum Cavity Series Technology speed up the spread of music ...

Page 2: ......

Page 3: ...ipe 630mm bend pipe 700mm straight pipe on the right 630mm bend pipe 820mm straight pipe on the left Install 350mm straight pipe and 200mm straight pipe A Apply to 3 cymbals According to above figure to assemble the stand and pad in turn Pad Mount Holder B Apply to 4 cymbals C 4 cymbals and Hi Hat ...

Page 4: ...ding to the arrow According to above figure to assemble the stand and pad in turn Insert pad mount and tighten the wing nut 2 Assemble the pad Wing nut Pad nut A Apply to 3 cymbals B Apply to 4 cymbals C 4 cymbals and Hi Hat ...

Page 5: ...3 A Attach the cymbals Knob nut Check bracket Tighten screw Felt washer ...

Page 6: ...3 B Install the Hi Hat stand The screw should be the same side of the hole The screw should be the same side of the hole ...

Page 7: ...4 Attach the Sound Module connect DB25 Audio cable and fix it insert sound module and adjust wing konb to fix it ...

Page 8: ...pen the kick drum stand entirely and lock the screw at sides Install the beater into the holder securely by fixing the screw Install the kick pedal securely On the blanket On the floor Position beater at the center of kick drum ...

Page 9: ...6 Power Connection Wiring To connect the jacks as shown in the figure and using cable clip to organize the cables AC Adapter DB25 Audio Cable ...

Page 10: ...ymbals Hi Hat Crash Ride Head shot Rim shot Edge sensor Bow shot Edge shot Bell shot Pedal Open Hi Hat Half open Hi Hat Closed Hi Hat Adjust the beater Adjust the center of gravity of beate Adjust the gradient of beater Adjust the tightness of spring ...

Page 11: ...ACE 500 ACE 510 ACE 530 ACE 730 ACE 750 Complete the installation according to the installation guide of the model you purchased ...

Reviews: