13
HAMPTONBAY.COM
Please contact 1-855-HD-HAMPTON for further assistance.
Assembly - Assembling The Fan Without The Light Kit
Operating your Fan
Turn on the power and check the operation of the fan. The pull
chain controls the fan speeds as follows:
1 pull - High, 2 pulls - Medium, 3 pulls - Low, 4 pulls - off
The appropriate speed settings for warm or cool weather depend
on factors such as the room size, ceiling height, and number of
fans.
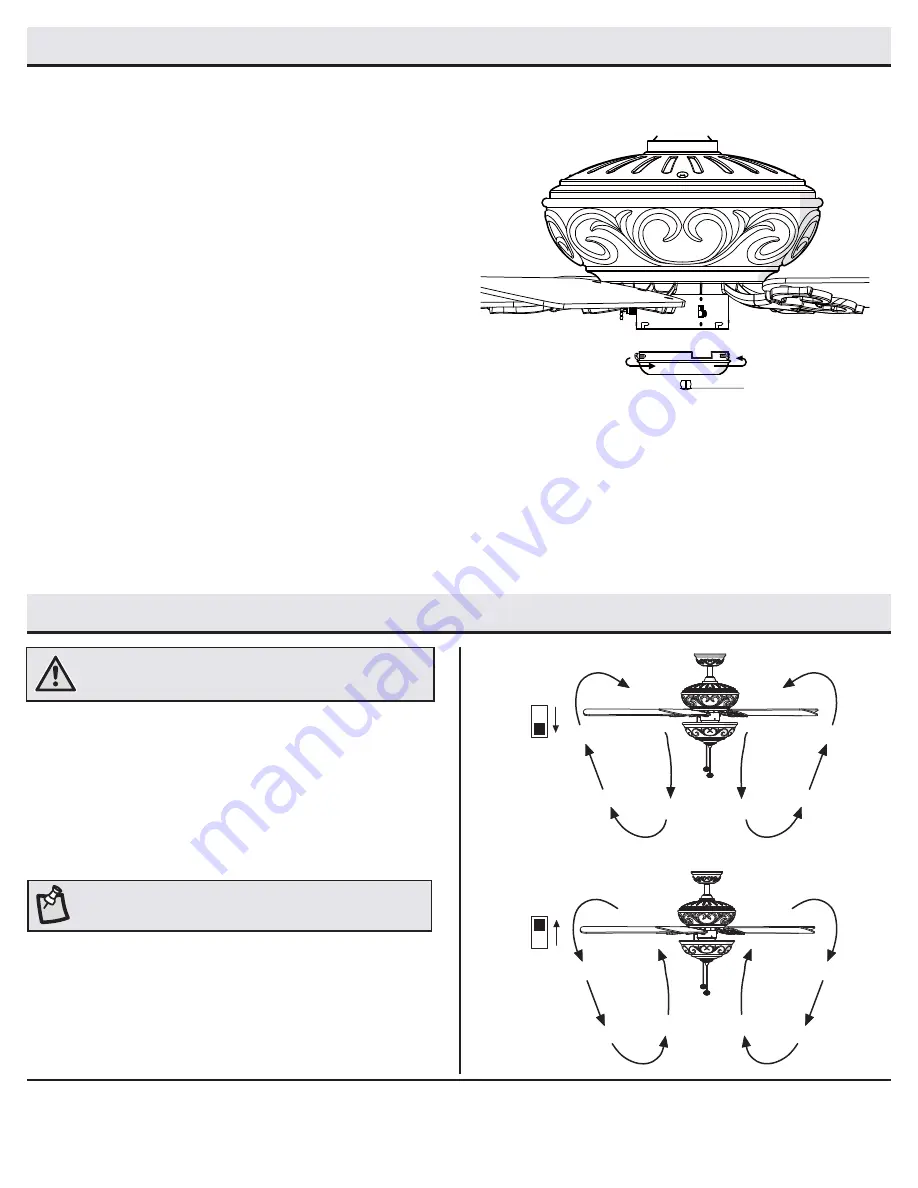
The slide switch controls the direction of the blades: forward
(switch down) or reverse (switch up).
Warm weather - (Forward) A downward airflow creates a cooling ef-
fect. This allows you to set your air conditioner on a warmer setting
without affecting your comfort.
Cool weather - (Reverse) An upward airflow moves warm air off of
the ceiling. This allows you to set your heating unit on a cooler set-
ting without affecting your comfort.
NOTE:
Wait for the fan to stop before reversing the direction of
blade rotation.
WARNING:
To reduce the risk personal injury. Do not bend the
blade holders while installing, balancing the blades, or cleaning
the fan. Do not insert objects between rotating blades.
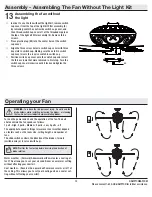
Assembling the fan without
the light
13
□
In order to use the fan without the light kit, remove switch
cup cover from the top of the light kit fitter assembly (E)
by removing center hex nut inside switch cup cover, and
then thread switch cup cover off of the threaded nipple on
the top of the light kit fitter assembly (E). Remove three
screws.
□
Press plastic plug (EE) into the center hole of the switch
cup cover.
□
Align the three screw holes in switch cup cover with three
key slots in switch cup. Making sure the notch in switch
cup cover clears the reverse switch in switch cup.
□
Position switch cup cover onto the switch cup and install
the three screws that were removed in first step. Turn the
switch cup cover clockwise until it locks and tighten the
three screws.
EE


