


5
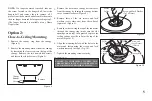
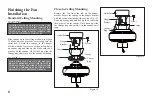
Option 2:
Close-to-Ceiling Mounting
WARNING
FAILURE TO COMPLETELY TIGHTEN THE
THREE SCREWS IN STEP 7 COULD RESULT IN
FAN LOOSENING AND POSSIBLY FALLING.
Remove the canopy ring from the canopy.
(Figure 5).
Remove the mounting bracket from the canopy
by loosening the four screws on the top of the
canopy. Remove the two non-slotted screws
and loosen the slotted screws (Figure 6).
1.
2.
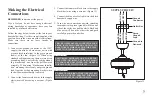
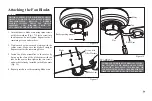
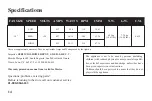
Remove the decorative canopy bottom cover
from the canopy by turning the canopy bottom
cover counterclockwise (Figure 8).
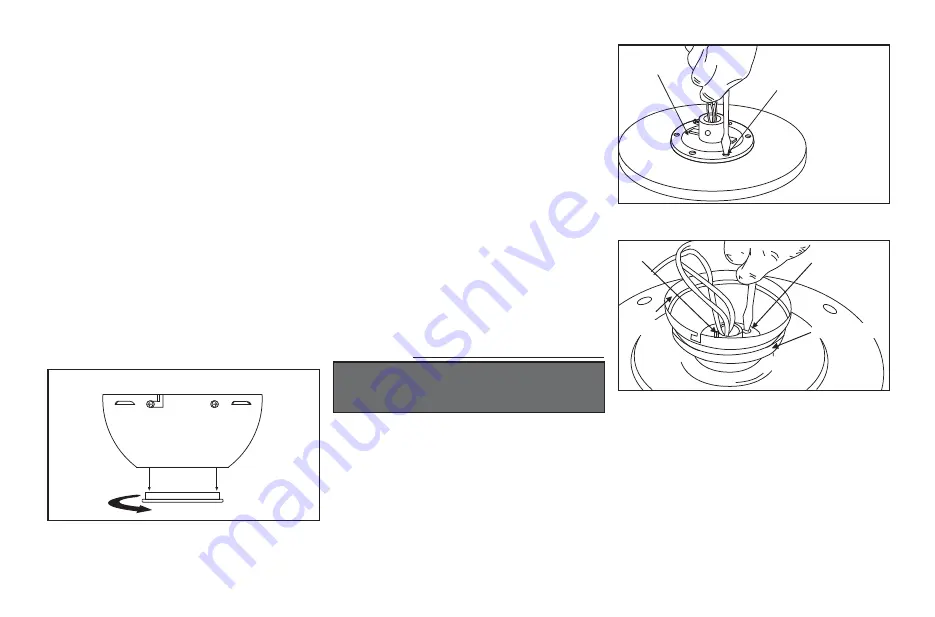
Remove three of the six screws and lock
washers (every other one) from the collar of
top motor. (Figure 9).
3.
4.
Route the wires exiting the top of the fan motor
through the canopy ring (make sure the slot
openings are on top). then proceed to place the
ceiling canopy over the collar at the top of the
motor. (Figure 10)
Align the mounting holes with the holes in the
motor and fasten using the screws and lock
washers removed in step 4 (Fig. 10).
Tighten the mounting screws security.
5.
6.
7.
Canopy
Bottom
Cover
Remove
Figure 8
Motor
Collar
Screw and Lock Washer
(3 of 6 Places)
Figure 9
Figure 10
Collar
Ceiling
Canopy
Screw and
Lock Washer
(3 Places)
Canopy Ring
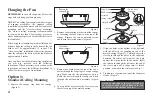
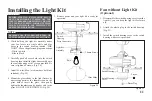
NOTE:
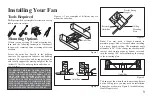
If a longer downrod is needed, take out
the screw located in the hanger ball, lower the
hanger ball and remove the pin, remove all 3
pieces from the downrod and assemble them onto
the new longer downrod before proceeding step 3.
(The longer downrod is available at any Home
Depot store)
Summary of Contents for Minuet III AG806C-EB
Page 2: ...Minuet III by Hampton Bay...


