background image

2

Table of Contents ................................................................ 2

Safety Information ............................................................... 2

Warranty ............................................................................... 3

Pre-Installation .................................................................... 3

Installation ............................................................................ 6

Assembly .............................................................................. 7

Operation ........................................................................... 13

Care and Cleaning ............................................................. 15

Troubleshooting ................................................................. 15

1. 

To reduce the risk of electric shock, ensure the electricity has been 
turned off at the circuit breaker or fuse box before you begin.

2. 

All wiring must be in accordance with the National Electrical Code 
ANSI/NFPA 70-1999 and local electrical codes. Electrical installation 
should be performed by a qualified licensed electrician.

3. 

The outlet box and support structure must be securely mounted and 
capable of reliably supporting 35 lbs (15.9 kg). Use only UL Listed outlet 
boxes marked “Acceptable for Fan Support of 35 lbs (15.9 kg) or less.”

4. 

CAUTION: The fan must be mounted with a minimum of 7 ft. (2.1 m) 
clearance from the trailing edge of the blades to the floor.

5. 

Do not operate the reversing switch while the fan blades are in 
motion. You must turn the fan off and stop the blades before you 
reverse the blade direction.

6. 

Do not place objects in the path of the blades.

7. 

To avoid personal injury or damage to the fan and other items, use 
caution when working around or cleaning the fan.

8. 

Electrical diagrams are for reference only. Light kits that are not 
packed with the fan must be UL-listed and marked suitable for use 
with the model fan you are installing. Switches must be UL General 
Use Switches. Refer to the instructions packaged with the light kits 
and switches for proper assembly.

9. 

After making electrical connections, spliced conductors should be 
turned upward and pushed carefully up into the outlet box. The 
wires should be spread apart with the grounded conductor and the 
equipment-grounding conductor on one side of the outlet box.

10. 

All setscrews must be checked and retightened where necessary 
before installation.

11. 

Suitable for damp location.

WARNING:

 To reduce the risk of personal injury, do not 

bend the blade brackets (also referred to as flanges) during 

assembly or after installation. Do not insert objects in the 

path of the blades.

WARNING:

 To reduce the risk of fire or electric shock, this 

fan must be installed with an isolating wall switch.

WARNING:

 To avoid possible electrical shock, turn the 

electricity off at the main fuse box before wiring. If you 

feel you do not have enough electrical wiring knowledge or 

experience, contact a licensed electrician.

WARNING:

 Electrical diagrams are for reference only. 

Optional use of any light kit shall be UL-listed and marked 

suitable for use with this fan.

WARNING:

 To reduce the risk of fire, electric shock, or 

personal injury, mount to outlet box marked “Acceptable 

for fan support of 35 lbs. (15.9 kg) or less,” and use the 

screws provided with the outlet box.

Safety Information

Table of Contents

READ AND SAVE THESE INSTRUCTIONS

WARNING: 

To reduce the risk of fire or electric shock, this fan 

should only be used with fan speed control part no. JY1156H-

LD-DS manufactured by Chungear Industrial Co., Ltd.

CAUTION:

  To reduce the risk of personal injury, useonly the 

screws provided with the outlet box.

Summary of Contents for TITAN 52

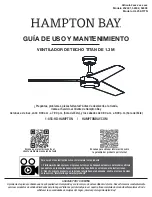
Page 1: ...roduct Overview section Scan for text based customer support Scan for online product warranty information THANK YOU We appreciate the trust and confidence you have placed in Hampton Bay through the pu...

Page 2: ...t kits and switches for proper assembly 9 After making electrical connections spliced conductors should be turned upward and pushed carefully up into the outlet box The wires should be spread apart wi...

Page 3: ...s is not covered by this warranty Because of varying climatic conditions this warranty does not cover any changes in brass finish including rusting pitting corroding tarnishing or peeling Brass finish...

Page 4: ...B Blade screws 10 CC Wire connecting nut 3 DD Hanger pin 1 EE Locking pin 1 FF Machine screw 2 GG Short tapered screw 2 HH Long tapered screw 2 Pre Installation continued HARDWARE INCLUDED NOTE Hardwa...

Page 5: ...te 1 G Blade 3 Part Description Quantity H Receiver 1 I Remote control 1 J 3 pin extension wire 1 K Battery 2 L Remote control with cradle toggle swtich spacer included 1 M 2 pin extension wire 1 IMPO...

Page 6: ...appropriate fasteners and materials The outlet box and its bracing must be able to fully support the weight of the moving fan at least 35 lbs Do not use a plastic outlet box The illustrations below sh...

Page 7: ...E Pull off the canopy bottom cover JJ from the canopy Loosenthetwocanopyscrews HH locatedonthebottomofthe mounting bracket A and turn the canopy counterclockwise to remove the mounting bracket A from...

Page 8: ...ging the fan 3 Carefully lift the fan motor assembly E up to the slide on mounting bracket A Seat the hanger ball portion of the ball downrod assembly B in the mounting bracket socket Ensure that the...

Page 9: ...green or bare wire using a wire connecting nut CC Connect the receiver H black wire to the household black hot wire using a wire connecting nut CC Connect the receiver H red wire to the household red...

Page 10: ...ith 8 in lead wires for use with the provided 6 in ball downrod assembly B If you wish to use longer downrod you can use the extension lead wire 42 in J or M provided If using the 6 in ball downrod as...

Page 11: ...ircuit to the fan before installing the light fixture Assembly Optional Installing the Light Kit not included Attaching the light kit fitter assembly 1 Connect the wires from the light kit fitter asse...

Page 12: ...children Assembly Preparing the Remote Control Pairing one remote to one ceiling fan Confirm that the power to the fan is off at either the wall switch or breaker box Turn the power to the fan on at t...

Page 13: ...ing speed 1 Light Lowest speed 6 Lights Highest speed Comfort BreezeTM Press and release the Comfort BreezeTM button to simulate an outdoor breeze Holding the Comfort BreezeTM button for 3 seconds wil...

Page 14: ...would like a more permanent or secure hold install the wall anchors prior to attaching the wall cradle to the wall 1b Attaching over a paddle switch Remove the two screws from the paddle switch face...

Page 15: ...the ceiling above the tip of one of the blades Measure from a point on the center of each blade to the point on the ceiling Rotate the fan until the next blade is positioned for measurement Repeat fo...

Page 16: ...on between the equipment and receiver Connect the equipment into an outlet on a circuit different from that to which the receiver is connected Consult the dealer or an experienced radio TV technician...

Page 17: ...te manual de instrucciones 2 Haz clic sobre tu producto en la lista de resultados de la b squeda y sobre el enlace de video en la secci n Informaci n general del producto Escanea para recibir soporte...

Page 18: ...s de concluir las conexiones el ctricas debes voltear los conductores empalmados hacia arriba y meterlos con cuidado en la caja el ctrica Los cables deben quedar separados con el cable y el conductor...

Page 19: ...ta garant a Puesto que las condiciones clim ticas pueden variar esta garant a no cubre ning n cambio del acabado en lat n como xido perforaci n corrosi n manchas o descascaramiento Este tipo de acabad...

Page 20: ...10 CC Tuerca para conectar cables 3 DD Pasador de soporte 1 EE Pasador de cierre 1 FF Tornillo maquinado 2 GG Tornillo c nico corto 2 HH Tornillo c nico largo 2 Preinstalaci n continuaci n HERRAJES I...

Page 21: ...ieza Descripci n Cantidad H Receptor 1 I Control remoto 1 J Cable de extensi n de 3 clavijas 1 K Bater a 2 L Control remoto con espaciador de soporte para interruptor de palanca 1 M Cable de extensi n...

Page 22: ...es de sostener completamente el peso en movimiento del ventilador al menos 15 9 kg 35 lb No uses una caja el ctrica de pl stico Las ilustraciones a continuaci n muestran tres formas distintas de monta...

Page 23: ...a C su tapa inferior JJ Afloja los dos tornillos de la cubierta HH ubicados en la parte inferior del soporte de montaje A y gira la cubierta hacia la izquierda para quitar el soporte de montaje A de l...

Page 24: ...colgar el ventilador 3 Hayquelevantarconcuidadoelconjuntodelmotordelventilador E hasta el soporte de montaje deslizante A Coloca la esfera de soporte del conjunto tubo bajante esfera B en el soporte d...

Page 25: ...o del receptor H al cable negro del hogar corriente usando una tuerca de conexi n de cables CC Conecta el cable rojo del receptor H al cable rojo del hogar usando una tuerca de conexi n de cables CC C...

Page 26: ...cables terminales de 30 5 cm 8 plg para usar con el conjunto de tubo bajante esfera B de 15 2 cm 6 plg suministrado Si deseas un tubo bajante m s largo puedes usar la extensi n J de cable conductor 10...

Page 27: ...ar la l mpara Ensamblaje Opcional C mo instalar el kit de luz no incluido C mo instalar el conjunto del soporte del kit de luz 1 Conecta los cables del conjunto del soporte del kit de luz O no incluid...

Page 28: ...o preparar el control remoto C mo configurar un control remoto a un ventilador de techo Confirma que la electricidad del ventilador est desconectada en el interruptor de pared o en el cortacircuitos E...

Page 29: ...rrespondiente 1 luz velocidad m s baja 6 luces velocidad m s alta Comfort BreezeTM Presiona y suelta el bot n Comfort BreezeTM para simular una brisa en exteriores Mant n presionado el bot n Comfort B...

Page 30: ...ra instala los anclajes de pared antes de fijar el soporte de pared a la pared 1b C mo fijar sobre un interruptor de paleta Retira los dos tornillos de la placa frontal del interruptor de paleta Coloc...

Page 31: ...t n al mismo nivel Verifica este nivel seleccionando un punto en el techo sobre la punta de una de las aspas Mide desde un punto en el centro de cada aspa al punto en el techo Gira el ventilador hasta...

Page 32: ...l receptor Consultar al distribuidor o alg n t cnico de radio TV con experiencia CUIDADO Los cambios o modificaciones sin aprobaci n expresa del responsable de este dispositivo podr an anular el derec...

Reviews: