background image

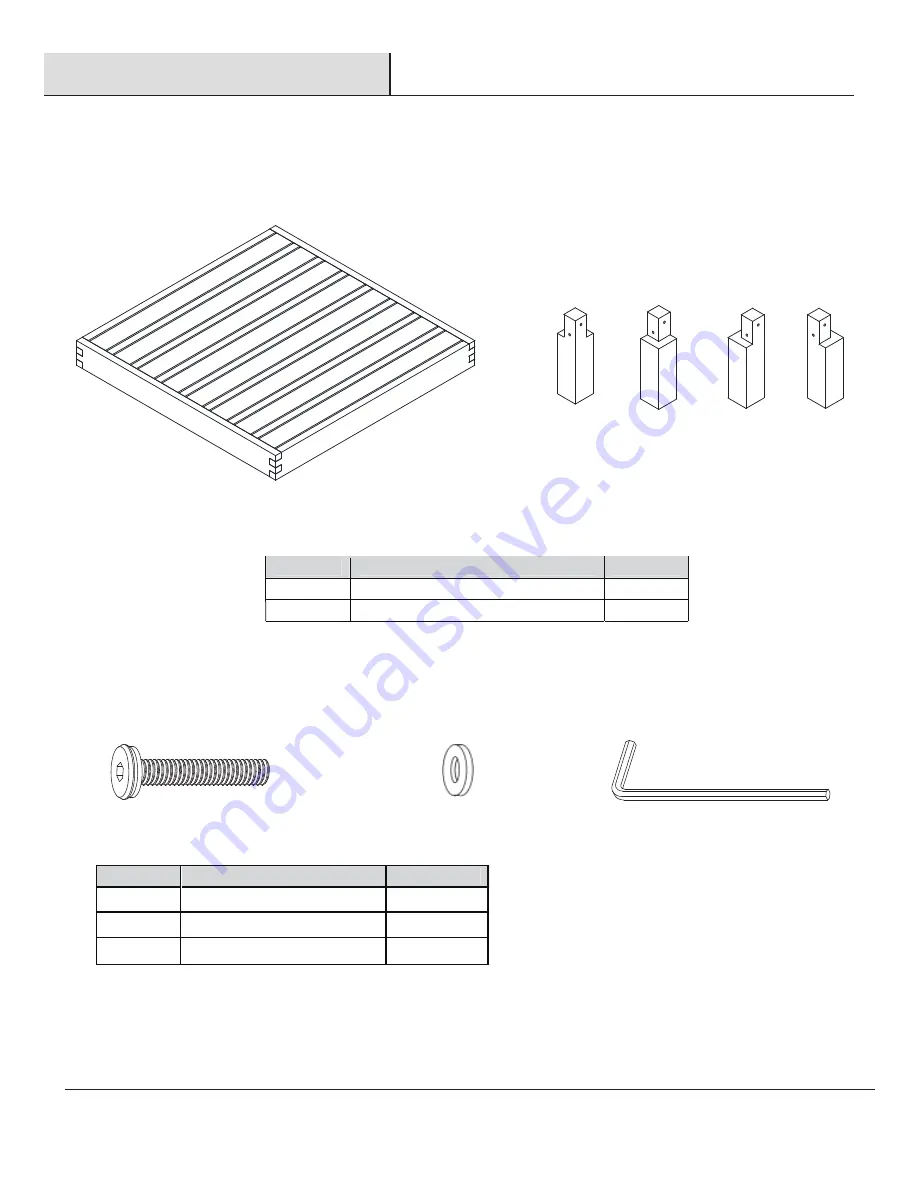
HARDWARE INCLUDED

Part 

Description 

Quantity 

(1)

9

(2)

Flat Washer M6xD1.5mm

9

Bolt                 M6x55mm 

(1)

(2)

(3)

(3)

1

Hex wrench

4mm

PACKAGE CONTENTS 

14

HAMP TONB AY.COM

Please contact 1-855-HD-HAMP TON for further assistance.

Pre-Installation(

255146

)

Part

Description

Quantity

  p

o

e

l

b

a

T

Y

1

Z

Legs

4

Z

Y

Summary of Contents for Bench FG19233S

Page 1: ...Item Model Lounge 65 518333B Bench FG19233S We appreciate the trust and confdence you have placed in Hampto n Bay through the purchase of this Side table We strive to continually create quality products designed to enhance your ho me Visit us online to see our full line of products available for your home improvement needs Thank you for choosing Hampton Bay THANK YOU BRIAR RIDGE 3PC SECTIONAL SET ...

Page 2: ...arrant the frame weave and fabric to be free of manufacturing defects to the original purchaser for two years For glass table top we warrant 30 days from the date of purchase WHAT IS N OT COVERED This w are not covered under this warranty We reserve the right to make substitutions with similar merchandise if the model in question is no longer in production Contact the Customer Service Team at 1 85...

Page 3: ...ion 255146 PACKAGE CONTENTS CHAISE Part Description Quantity A 1 1 C B 1 1 Seat Panel Left Arm Panel With Pre Installed Levellers Left Back Cushion D G H Backrest Panel A D G 1 E Seat Cushion Supoport Bar F C Right Arm Panel With Pre Installed Levellers 1 1 1 Right Back Cushion E B F H ...

Page 4: ... in Step 3 right side up as shown above Step 2 1 Step 2 2 Step 3 1 Step 3 2 Step 2 1 Align the dowels of Support Bar E into the positions in the Right Arm Panel C Then affix Support Bar E with Right Arm Panel C by using Bolt 1 and Allen Key 3 Step 2 2 Attach the Backrest Panel A onto Right Arm Panel C by using Bolts 1 and Allen Key 3 as shown above Step 3 1 Align the dowels of Support Bar E into t...

Page 5: ... Levellers height for balance In a sequential manner tighten all Screws and Bolts at all joints With assistance from your adult partners adjust the Levellers to desired height to avoid wobbles Place Seat Cushion F Left Back Cushion G and Right Back Cushion H to Seat Panel D Inspect it and make sure all parts are adequately connected Ensure all screws bolts are fully locked into position and secure...

Page 6: ... HAMP TONBAY COM Please contact 1 855 HD HAMP TON for further assistance Pre Installation 255146 Part Description Quantity Backrest Panel A 1 B Right Arm Panel With Pre installed Levellers 1 Left Arm Panel With Pre installed Levellers C 1 A C G B D E F G Seat Panel Support Bar Seat cushion Right Back Cushion 1 1 1 1 D E F G ...

Page 7: ... 1 Align the dowels of Support Bar E into the posiitions in the Left Arm Panel C Then affix Support Bar E with Left Arm panel C by using Bolt 1 and Allen Key 3 Step 2 2 Attach the Backrest Panel A onto Left Arm Panel C by using Bolts 1 and Allen Key 3 Place Right Arm Panel B onto the assembled frame from Step 2 Step 3 1 Align the dowels of Support Bar E into the positions in the Right Arm Panel B ...

Page 8: ...he Left Chair as shown in picture above Affix Seat Panel D with Left Chair by using Screws 2 and Allen Key 3 Note Using Screws 2 from inside to outside of Seat Panel D Inspect the Left Chair and make sure all parts are adequately connected In a sequential manner tighten all Screws and Bolts at all joints With assistance from your adult partners adjust the Levellers to desired height to avoid wobbl...

Page 9: ...tact 1 855 HD HAMP TON for further assistance Installation 255146 5 Attaching the chaise seat to the back 6 Attaching the armrest to the seat Place Seat Cushion F Left Back Cushion G and Right Back Cushion H to Seat Panel D G F G ...

Page 10: ...ONBAY COM Please contact 1 855 HD HAMP TON for further assistance Pre Installation 255146 Part Description Quantity Backrest Panel A1 1 B1 Right Arm Panel With Pre installed Levellers 1 Left Arm Panel With Pre installed Levellers C1 1 C1 G1 D1 E1 F1 G1 Seat Panel Support Bar Seat cushion Right Back Cushion 1 1 1 1 B1 A1 F1 G1 D1 E1 ...

Page 11: ... in the Right Arm Panel B1 Then affix Support Bar E1 with Right Arm panel C1 by using Bolt 1 and Allen Key 3 Step 3 2 Attach the Right Arm Panel B1 onto Backrest Panel A1 by using Bolts 1 and Allen Key 3 Place Right Arm Panel B1 onto the assembled frame from Step 2 Step 3 1 Align the dowels of Support Bar E1 into the positions in the Right Arm Panel B1 Then affix Support Bar E1 with Right Arm pane...

Page 12: ...pect the Left Chair and make sure all parts are adequately connected In a sequential manner tighten all Screws and Bolts at all joints With assistance from your adult partners adjust the Levellers to desired height to avoid wobbles D1 12 HAMP TONBAY COM Please contact 1 855 HD HAMP TON for further assistance Installation 255146 3 Attaching the chaise seat to the back 4 Attaching the armrest to the...

Page 13: ... 1 855 HD HAMP TON for further assistance Installation 255146 5 Attaching the chaise seat to the back 6 Attaching the armrest to the seat Place Seat Cushion F1 Left Back Cushion G1 and Right Back Cushion G1 to Seat Panel D1 G1 F1 G1 D1 ...

Page 14: ...y 1 9 2 Flat Washer M6xD1 5mm 9 Bolt M6x55mm 1 2 3 3 1 Hex wrench 4mm PACKAGE CONTENTS 14 HAMP TONBAY COM Please contact 1 855 HD HAMP TON for further assistance Pre Installation 255146 Part Description Quantity p o t e l b a T Y 1 Z Legs 4 Z Y ...

Page 15: ...urface to avoid any scratch or damage to the product Affix loosely the Legs Z and into the mounting position at the corners of the Table Top Y using the Bolts 1 with Flat Washers 2 with the Allen Key 3 as shown above Repeat the same process with the other Leg Z CAUTION When tightening these screws tighten sequentially DO NOT tighten any screw fully and then towards the next one This would cause th...

Page 16: ... color as well Care and Maintenance Wash the frame with a mild solution of soap and water rinse with clean water and dry thoroughly Cushions may also be cleaned by hand with a mild solution of soap andwater Rinse the cushion cover thoroughly and allow to drip dry Theback cushion and pillow should be spot cleaned with a soft cloth Do not machine wash or tumble dry as cushions may shrink Do not useb...

Reviews: