background image

EN

15

•  The appliance is intended for household 

use and must not be used for industrial 
purposes.

•  Set a suitable pressure for the product to 

be inflated before starting the appliance.

•  Screw the valve connection firmly on the 

tyre valve.

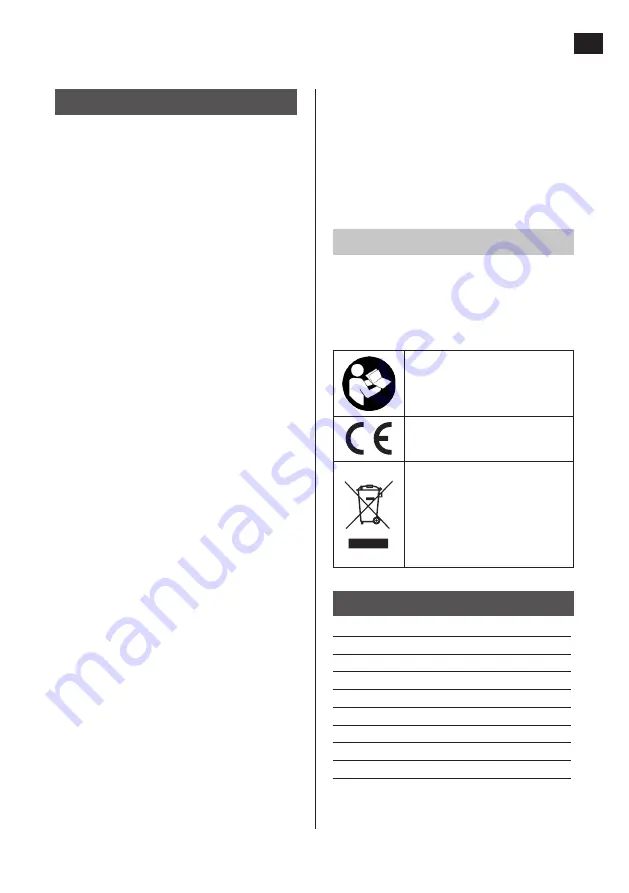
SYMBOLS

The following symbols can be of importance  
for how you should use your power tool.  
Make sure you understand the symbols  
and their significance. 

Read the instructions.

Approved in accordance with 
the relevant EU directives.

Recycle as electrical waste.

TECHNICAL DATA

Voltage 

12 V DC

Output 

120 W

Max current 

< 10 A

Inflation time* 

5 min

Average deviation 

± 0.1 bar

Max pressure 

6.9 bar

Cord length 

1 m

Hose length 

0.1 m

Operating temperature 

-10 to 60°C

*  Based on inflation of empty standard tyre 

195/65/15 to 2.4 bar.

SAFETY INSTRUCTIONS

•  Only for power supply of 12 V DC.
•  Only use the supplied adapters to inflate.
•  The appliance is not intended to pump up 

high pressure tyres, such as truck tyres.

•  Never leave the appliance unattended 

when switched on.

•  Do not pump up to high tyre pressure.
•  Do not expose the appliance to rain or 

moisture.

•  Pull out the plug when the appliance is 

not is use.

•   The switch must be in the off position 

when the appliance is being charged or is 
not in use.

•  Do not immerse the appliance in water or 

any other liquid.

•  Keep out of the reach of children. Do not 

allow children in the work area. Do not 
allow them to handle machines, tools or 
extension cords.

•  Keep the work area clean. Cluttered work 

areas increase the risk of accidents and 
injuries.

•  Put equipment away when not in use. 

Equipment not in use should be stored in 
a dry place and out of the reach of 
children. 

•  Electrical appliances must only be 

repaired by an authorised electrician. 
Repairs that are not carried out correctly 
can lead to a risk of serious personal 
injury and/or death.

•  Do not carry or pull the appliance by the 

power cord. Do not pull the power cord to 
pull out the plug. Keep the power cord 
away from heat, oil and sharp edges.

•  Do not place the appliance on a wet or 

uneven surface.

•  Never use the appliance for anything 

other than its intended purpose.

•  Do not use the appliance if it is damaged 

or not working properly.

Summary of Contents for 005536

Page 1: ...sanvisningen noggrant innan användning Spara den för framtida behov MINIKOMPRESSOR SE EN MINI COMPRESSOR Operating instructions Translation of the original instructions Important Read the user instructions carefully before use Save them for future reference NO MINIKOMPRESSOR Bruksanvisning Oversettelse av original bruksanvisning Viktig Les bruksanvisningen nøye før bruk Ta vare på den for fremtidi...

Page 2: ...ogące być zagrożeniem dla środowiska i dla zdrowia Produkt należy oddać do odpowiedniego punktu składowania lub przynieść go do jednego ze sklepów gdzie przy zakupie nowego sprzętu bezpłatnie przyjmiemy stary tego samego rodzaju i w tej samej ilości Z zastrzeżeniem prawa do zmian W razie ewentualnych problemów skontaktuj się telefonicznie z naszym działem obsługi klienta pod numerem 22 338 88 88 w...

Page 3: ...1 2 4 3 5 J ...

Page 4: ...6 7 ...

Page 5: ...k Utsätt inte apparaten för regn eller fukt Dra ut kontakten när apparaten inte används Strömbrytaren ska vara i avstängt läge när apparaten laddas samt när den inte används Dränk inte apparaten i vatten eller annan vätska Förvaras oåtkomligt för barn Låt inte barn vistas i arbetsområdet Låt dem inte hantera maskiner verktyg eller förlängningssladdar Arbetsområdet ska hållas rent Belamrade utrymme...

Page 6: ...ts tändning och låt den vara tillslagen så att 12 V uttaget är spänningssatt BILD 2 2 Anslut kontakten H till 12 V uttaget BILD 3 3 Skruva fast ventilanslutningen stadigt på däckventilen BILD 4 4 Ställ in önskat däcktryck med knapparna D och F Håll önskad knapp intryckt för snabb ändring tryck kort för fininställning BILD 5 5 Starta kompressorn med strömbrytaren B BILD 6 6 Displayen visar aktuellt...

Page 7: ...gen för fordonets uttag 12 VDC Säkringen ska vara på minst 15 A Minikompressron startar men genererar inget lufttryck Kontrollera att ventilanslutningen är stadigt fastskruvad på däckventilen Kontrollera att inte däcket läcker och att det inte läcker vid ventilanslutningen Minikompressorn arbetar med lågt varvtal Överhettning till följd av långvarig användning Stäng av apparaten och låt den svalna...

Page 8: ...inen for regn eller fuktighet Trekk ut kontakten når apparatet ikke er i bruk Strømbryteren skal være i avslått posisjon når apparatet lades og når det ikke er i bruk Ikke senk apparatet ned i vann eller annen væske Oppbevares utilgjengelig for barn Ikke la barn oppholde seg i arbeidsområdet Ikke la dem håndtere maskiner verktøy eller skjøteledninger Arbeidsområdet skal holdes rent Rotete arbeidso...

Page 9: ...etøyets tenning og la den være påslått slik at 12 V uttaket er spenningssatt BILDE 2 2 Koble kontakten H til 12 V uttaket BILDE 3 3 Skru ventiltilkoblingen godt fast på dekkventilen BILDE 4 4 Still inn ønsket dekktrykk med knappene D og F Hold ønsket knapp inne for rask endring og trykk kort for fininnstilling BILDE 5 5 Start kompressoren med strømbryteren B BILDE 6 6 Displayet viser aktuelt dekkt...

Page 10: ...en for kjøretøyets uttak 12 V DC Sikringen skal være på minst 15 A Minikompressoren starter men genererer ikke noe lufttrykk Kontroller at ventiltilkoblingen er stramt skrudd fast på dekkventilen Kontroller at dekket ikke lekker og at det ikke lekker ved ventiltilkoblingen Minikompressoren arbeider med lavt turtall Overoppheting som følge av langvarig bruk Slå av apparatet og la det svalne i 25 mi...

Page 11: ...m ciśnieniu na przykład opon samochodów ciężarowych Nigdy nie pozostawiaj włączonego urządzenia bez nadzoru Nie pompuj opon zbyt mocno Nie narażaj urządzenia na działanie deszczu ani wilgoci Wyciągnij wtyk z gniazda kiedy urządzenie nie jest używane Przełącznik powinien znajdować się w pozycji wyłączonej podczas ładowania oraz gdy urządzenie nie jest używane Nie zanurzaj urządzenia w wodzie ani in...

Page 12: ...zie i poczekaj aż gniazdo osiągnie napięcie 12 V RYS 2 2 Podłącz wtyk H do gniazda 12 V RYS 3 3 Mocno dokręć końcówkę do wentyla opony RYS 4 4 Ustaw ciśnienie w oponie używając przycisków D i F Przytrzymaj wciśnięty wybrany przycisk żeby zmienić poziom ciśnienia w oponie Wciśnij go krótko żeby przejść do ustawień szczegółowych RYS 5 5 Uruchom kompresor przełącznikiem B RYS 6 6 Na wyświetlaczu poja...

Page 13: ... gnieździe pojazdu ma napięcie 12 V DC Należy użyć bezpiecznika o minimalnym napięciu 15 A Minikompresor włącza się ale nie wytwarza ciśnienia Upewnij się że końcówka jest dobrze dokręcona do wentyla opony Upewnij się że opona jest szczelna i powietrze nie ucieka przez końcówkę Minikompresor pracuje z niską prędkością obrotową Przegrzanie na skutek długotrwałej pracy Wyłącz urządzenie i pozostaw j...

Page 14: ... switched on Do not pump up to high tyre pressure Do not expose the appliance to rain or moisture Pull out the plug when the appliance is not is use The switch must be in the off position when the appliance is being charged or is not in use Do not immerse the appliance in water or any other liquid Keep out of the reach of children Do not allow children in the work area Do not allow them to handle ...

Page 15: ...cle to supply the 12 V outlet with voltage FIG 2 2 Connect the connector H to the 12 V outlet FIG 3 3 Screw the valve connection firmly on the tyre valve FIG 4 4 Set the required tyre pressure with the buttons D and F Press in the required button for quick change tap for fine adjustment FIG 5 5 Start the compressor with the power switch B FIG 6 6 The display shows the actual tyre pressure Switch o...

Page 16: ...e 12 V DC outlet in the vehicle The fuse must be at least 15 A The mini compressor starts but does not generate air pressure Check that the valve connection is firmly screwed on the tyre valve Check that the tyre is not leaking and that there is no leakage at the valve connection The mini compressor is working at low speed Overheating as a result of prolonged use Switch off the appliance and allow...

Reviews: