©1999 Hamtronics, Inc.; Hilton NY; USA. All rights reserved. Hamtronics is a registered trademark. Revised: 1/28/00
- Page 4 -
OPERATION.
General.
Use of the DVR-3 requires firm-
ware version 2.06 or later in the
REP-200 Repeater. This includes all
repeaters manufactured after De-
cember 1993. Older repeaters can
be retrofitted by replacing the
eprom; no hardware changes to the
control board are required.
Recording a Message.
There are two ways to record. In
either method, the audio for the re-
cording is taken from the receiver;
so the microphone on a mobile radio
or handie talkie is used to make the
recording.
In the first method, key the mi-
crophone and depress RECORD
switch S2 and PLAYBACK switch S1,
simultaneously, on the DVR-3 board
while speaking. This method nor-
mally is used only for testing.
In the second, and much easier
method, especially for remote re-
cording or recording without re-
moving the cover from the repeater,
you use the microprocessor in the
control board to "press the record
button" for you. To do this, send the
dtmf command for the Record Voice
Msg function, which usually is
"099*". Allow time for the command
to be acknowledged. Then, key the
microphone and say the message.
Allow about a second of silence after
the message, and then unkey your
microphone. It is that simple.
You can either unkey the mic as
soon as you send the command, in
order to hear the 'R" acknowledg-
ment, and then rekey the mic to
make the recording; or you can sim-
ply keep the mic keyed and allow
enough time for the controller to
recognize and carry out your com-
mand. The former method is pr e-
ferred, because it allows you to
know for sure that the command
was received and allows you to know
precisely when the recording begins
when you rekey.
Be sure to allow a second or two
after pressing ptt switch before
speaking, and allow about 1 second
after the end of your message before
releasing the switch. This will al-
low for smooth transition between
carrier turn on and playback of the
actual message. Total recording
time is 20 seconds.
When you send the Record Voice
Msg command, the yellow TimeOut
led will illuminate to indicate the
DVR-3 is ready to record. This led
is used for convenience; it does not
mean the time out timer had been
triggered.
Voice ID Operation.
To allow automatic voice id to oc-
cur, the Voice ID option must be en-
abled on the COR-5 control board,
either by sending the appropriate
dtmf command (usually "302*") or by
having that option default on by
eprom programming.
Message Playback for Testing.
To playback for testing, momen-
tarily depress PLAYBACK switch S1.
Repeater is keyed automatically
while message is running. Note
that the voice id might be activated
when the repeater is first turned
on. Although unintentional, this is
the way the logic circuits on the
DVR-3 board respond at power up,
and it does not indicate a problem.
Audio level pot R8 should be ad-
justed for desired deviation level on
the transmitter. This adjustment
should be made only after all other
audio adjustments on the exciter
and COR-5 board have been made.
You should set the voice id level for
±5 kHz deviation on the loudest part
of the recording.
Playback by DTMF Request.
Any repeater user can request
message playback by sending the
Playback Voice Msg command, usu-
ally "003*". You can use the com-
mand for testing, as well. You can
make prerecorded messages avail-
able for call up by club members, for
instance.
ENHANCEMENTS.
General.
This section of the manual pr o-
vides information on some modifica-
tions which can be done to allow the
DVR-3 to be used in some other ap-
plications. Some of these are rather
involved and require a good back-
ground in digital electronics to ac-
complish. We recommend that you
only tackle them if you feel your
background is sufficient, and even
then, you should operate the unit in
its standard setup as designed be-
fore attempting any modifications so
it will be easier to solve problems
which may occur.
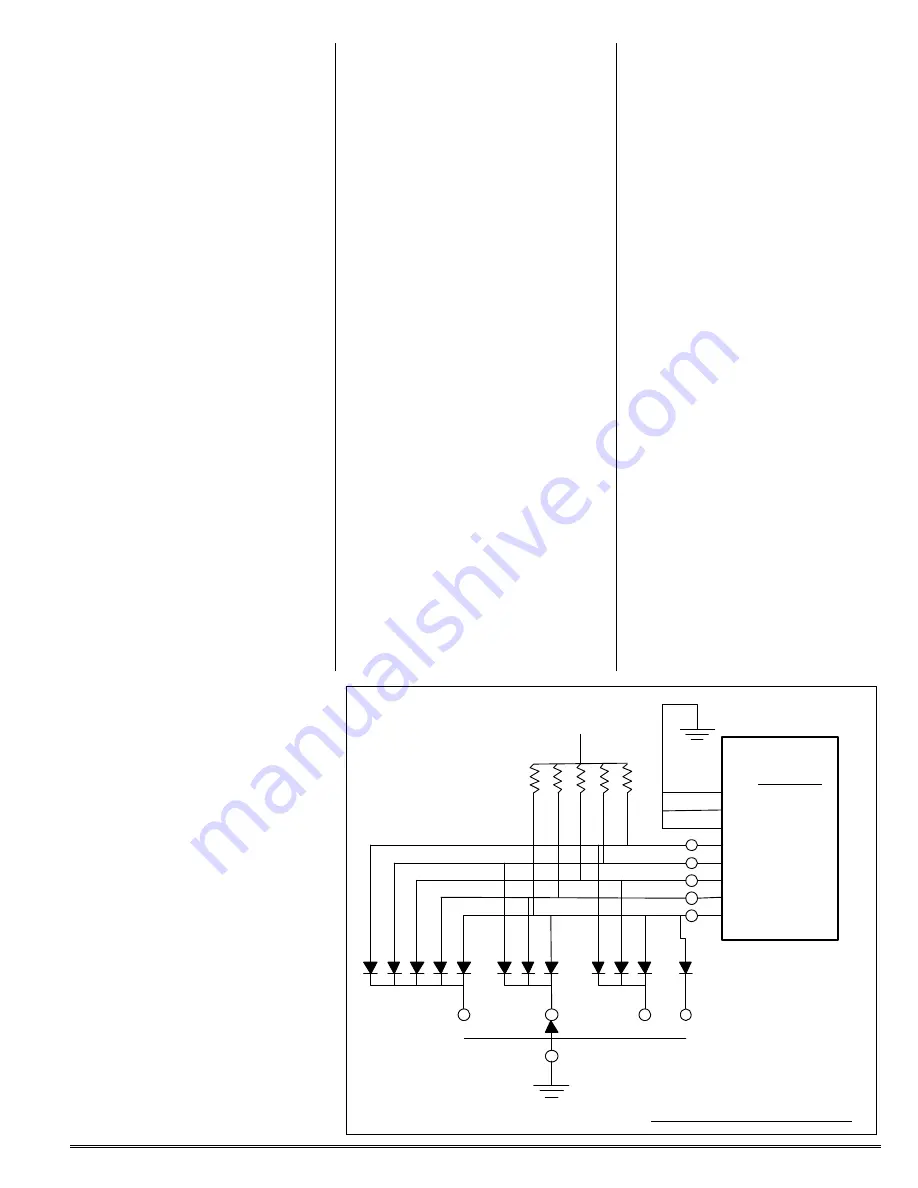
The Theory Of Operation section
gives some additional explanation of
the operation of the recorder ic,
A0
A1
A2
A3
A4
A5
A6
A7
1
2
3
4
5
6
9
10
U1
DIGITAL
RECORDER
+5Vdc
47 K PULL-UP RES
ROTARY SWITCH
0 SEC
5 SEC
10 SEC
15 SEC
EXAMPLE OF 4 MEMORY LOCATIONS


