background image

White

Hamwells logo staand

Hamwells productlogo

Hamwells logo liggend

Installatiehandleiding 

hoe reservoir

Guide d’installation 

modèle d’angle + réservoir

Installation manual


corner model + reservoir

2020_v1.1

NE_FR_EN

HomeSpa

Summary of Contents for HomeSpa

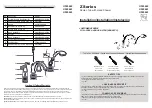
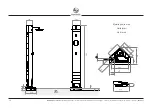
Page 1: ...go staand Hamwells productlogo Hamwells logo liggend Installatiehandleiding hoekmodel reservoir Guide d installation mod le d angle r servoir Installation manual corner model reservoir 2020_v1 1 NE_FR...

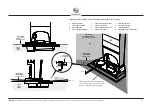
Page 2: ...s Nederland B V Pelgrimsstraat 3 3029 BH Rotterdam T 31 0 85 303 64 96 E info hamwells com I www hamwells com V 1 1 wells Dark Gray ONE Black 7C 333 Hamwells logo staand Hamwells productlogo Hamwells...

Page 3: ...t est prot g par le droit d auteur et toute reproduction de l ensemble ou d une partie de ce document est strictement interdite sauf avec la permission crite de Hamwells Nederland B V Le contenu de ce...

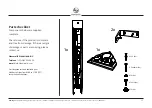
Page 4: ...ntient toutes les tapes que vous devez suivre pour une installation correcte de l HomeSpa Utilisez ce manuel pour des conseils g n raux uniquement Nous vous encourageons lire attentivement ce manuel a...

Page 5: ...nlijst 13 2 Liste des parts 13 2 Parts list 13 3 Installatie instructies 17 3 Instructions de montage 17 3 Installation instructions 17 Veiligheidsvoorschriften 18 Notification de s ret 19 Safety prec...

Page 6: ...Sluit de pomp aan 28 Brancher la pompe 28 Connecting the pump 28 Plaats het onderpaneel 29 Placez le panneau du dessous 29 Placing the bottom panel 29 Douche uitlijnen en vastzetten 30 Aligner et s cu...

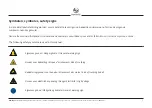
Page 7: ...de volgende markeerconventies gebruikt Dans cette manuel d installation conventions de marquer sont utilis es pour attirer l attention sur certains sujets ou actions The following safety symbols are...

Page 8: ...1 Specificaties Sp cifications Technical specifications...

Page 9: ...ogo Hamwells logo liggend Type reservoir r servoir reservoir Plaatsing Pose Installation hoekmodel mod le d angle corner model Afmetingen douchekolom Dimensions colonne douche Dimensions technical cab...

Page 10: ...r model reservoir 2020 V1 1 10 Hamwells Dark Gray PANTONE Black 7C 333333 Hamwells logo staand Hamwells productlogo Hamwells logo liggend 280 220 80 95 5 7 1 2 414 288 163 114 3 0 2 118 404 506 263 14...

Page 11: ...SHED FLOOR WANDTEGELS CARRELAGE MURAL WALL FINISH E G TILES VLOERTEGELS CARRELAGE SOL FINISHED FLOOR VLOERPAS LE NIVEAU DE SOL FINISHED FLOOR LEVEL 1 3 2 4 Volgorde van de stappen Ordre des tapes suiv...

Page 12: ...re connect es que sur la gauche The electricity can be connected both left and right The water connections can only be connected on the left Elektra en wateraansluitingen Prise electrique et connectio...

Page 13: ...2 Onderdelenlijst Liste des parts Parts list...

Page 14: ...es sont endommag es ou manquantes contactez votre fournisseur Hamwells Nederland B V Telefoon 31 0 85 303 64 96 e mail info hamwells com Joignable du lundi au vendredi de 09 00h 17 30h sauf les jours...

Page 15: ...Hamwells logo liggend Parts checklist Components below are supplied complete Check to see if the product is complete and free from damage If there are signs of damage or parts are missing please conta...

Page 16: ...voir Guide d installation mod le d angle reservoir Installation manual corner model reservoir 2020 V1 1 16 Hamwells Dark Gray PANTONE Black 7C 333333 Hamwells logo staand Hamwells productlogo Hamwells...

Page 17: ...3 Installatie instructies Instructions de montage Installation instructions...

Page 18: ...eSpa 2 Installatie aansluiten en onderhoud mag alleen worden uitgevoerd door technisch gekwalificeerd personeel die de plaatselijke veiligheidsvoorschriften in acht nemen 3 Draag stevige werkhandschoe...

Page 19: ...le raccordement et l entretien doivent tre ex cut s par du personnel qualifi connaissant bien la l gislation et la r glementation locales et ayant l exp rience de ce type d quipement 3 Mettez des gan...

Page 20: ...manual is meant for the use of technically qualified persons who have been trained on the product and who are acquainted with the local safety regulations 3 Wear protective work gloves the polyester...

Page 21: ...ACING THE RESERVOIR Eerst de wand afwerken voordat u de onderstaande stappen volgt Avant de suivre les tapes ci dessous vous devez poser le carrelage mural Before following the next steps the wall has...

Page 22: ...gte tot onderkant beugel gerekend vanaf het hoogste punt reservoir 494 mm hauteur au fond de la support mural compt e partir du r servoir de point le plus lev 494 mm height to bottom wall bracket coun...

Page 23: ...V1 1 23 Hamwells Dark Gray PANTONE Black 7C 333333 Hamwells logo staand Hamwells productlogo Hamwells logo liggend 2 3 PLAATS DE POMP PLACER LA POMPE INSTALL THE PUMP De pomp eerst stof en vetvrij mak...

Page 24: ...KOLOM PLACEZ LA COLONNE PLACE THE TECHNICAL CABINET 8mm Draai de moeren 1 los op het schroefdraad en draai de schroeven 2 ongeveer 5mm in de kolom Deze worden na het monteren van de bottompanel gebrui...

Page 25: ...ells logo staand Hamwells productlogo Hamwells logo liggend 3 Rand aan beide zijden tussen kolom en de muur afkitten Scell s les bords sur chaque c t Sealant on the border on both sides between column...

Page 26: ...AAN CONNECTER L EAU CONNECTING THE WATER HOSES Let op A is kw B is ww Attention A froid B chaud Note A is cold water B is warm water De wateraansluitingen kunnen alleen aan de linkerzijde Les connexio...

Page 27: ...derhoud mag alleen worden uitgevoerd door technisch gekwalificeerd personeel die de plaatselijke veiligheidsvoorschriften en de nationale wet en regelgeving in acht nemen Verzeker u ervan dat de netvo...

Page 28: ...ir Installation manual corner model reservoir 2020 V1 1 28 Hamwells Dark Gray PANTONE Black 7C 333333 Hamwells logo staand Hamwells productlogo Hamwells logo liggend 3 2 1 CONNECTING THE PUMP BRANCHER...

Page 29: ...le receveur Installation manual corner model reservoir 2020 V1 1 29 Hamwells Dark Gray PANTONE Black 7C 333333 Hamwells logo staand Hamwells productlogo Hamwells logo liggend Click 1 2 M4x8 2x M4 2x M...

Page 30: ...che et droite 2 jusqu ce que l alignement soit le m me voir l image ci dessous Le fond peut tre fix avec les 2 crous 1 Tighten the left and right 2 screws until the alignment is the same see image bel...

Page 31: ...C 333333 Hamwells logo staand Hamwells productlogo Hamwells logo liggend Click Click Click Click 1 2 4 3 PLAATS HET REINIGINGSRESERVOIR PLACEZ LE R SERVOIR DE NETTOYAGE PLACING THE SERVICE DRAWER Stel...

Page 32: ...LACING THE FRONT PANEL Zorg ervoor dat de badkamer is voorzien van een ethernetaansluiting Deze is nodig voor de communicatie met de HomeSPa Assurez vous qu il y a une connexion Ethernet disponible da...

Page 33: ...iggend 2 1 3 4 Karton om het bovenpaneel omhoog te houden Un carton pour maintenir le panneau sup rieur en place A cardboard to hold the top panel in place Test het scherm en de douche voordat u het v...

Page 34: ...lls Dark Gray PANTONE Black 7C 333333 Hamwells logo staand Hamwells productlogo Hamwells logo liggend 1 2 PLAATS DE SMARTSTOP EN FILTER PLACEZ SMARTSTOP ET FILTRE INSTALLING THE SMARTSTOP AND FILTER Z...

Page 35: ...ack 7C 333333 Hamwells logo staand Hamwells productlogo Hamwells logo liggend te on tape ruban de t on te on tape ruban de t on 1 2 3 PLAATS HANDDOUCHE EN DE REGENDOUCHE PLACEZ POMME DE DOUCHE ET DOUC...

Page 36: ...d Pays Bas The Netherlands T 31 0 10 737 02 94 E info hamwells com I www hamwells com 2020 Hamwells Nederland B V Alle rechten voorbehouden Tous droits r serv All rights reserved Hamwells logo staand...

Reviews: