


www.HandiQuilter.com/ProStitcher
07/23/12
Installation Instructions 3.27
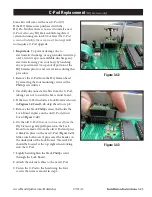
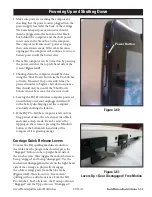
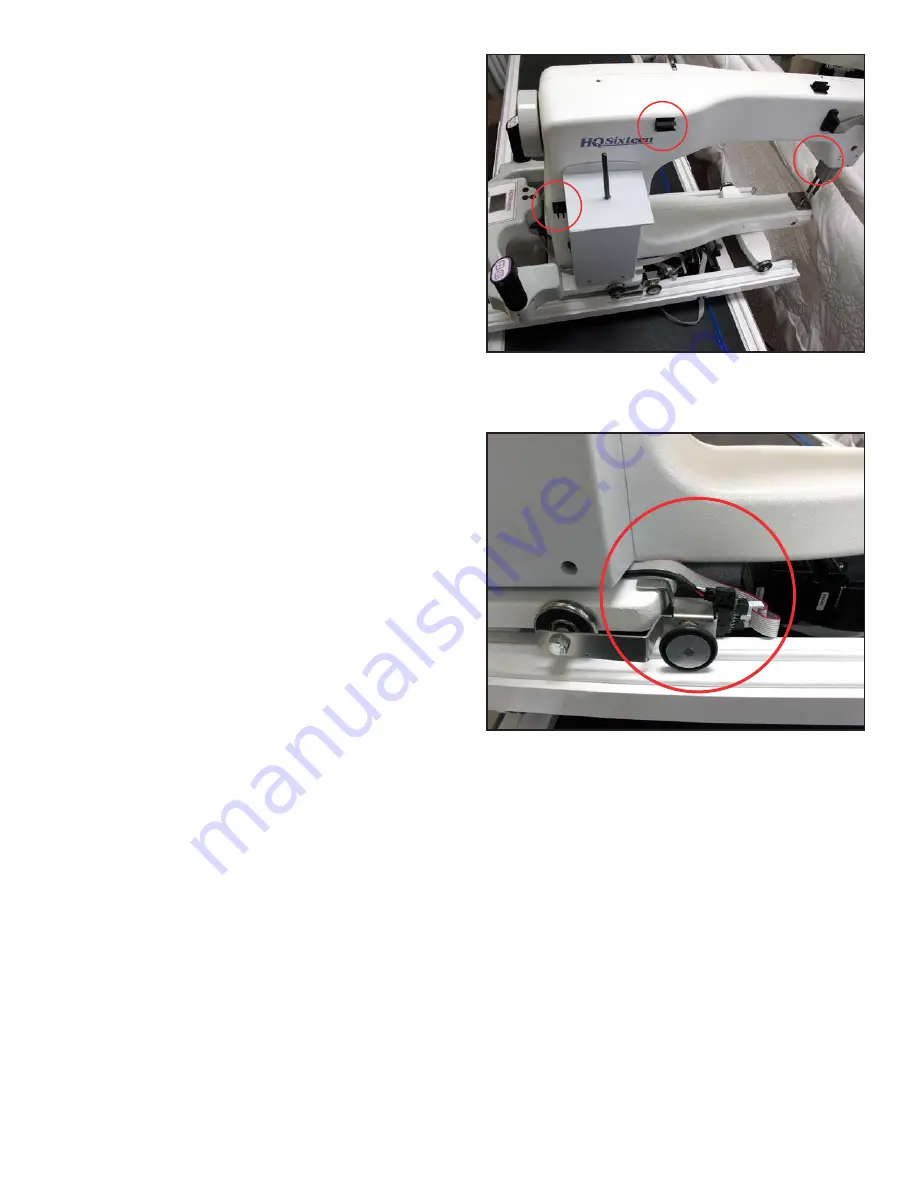
11. The black cables attached to the HQ Pro-Stitcher
carriage should be routed up between the rear
handles and the quilting machine, toward the
right-hand side of the machine (looking at the
machine from the back). Place the black cable
clips as shown
(
Figure 3.51
)
and route the cable
accordingly. The small black cable with the black
3-connector clip should be routed underneath
the P-Pod and snapped into the Stitch Regulator
Adapter Board
(Page 3.16, J) (
Figure 3.52
)
.
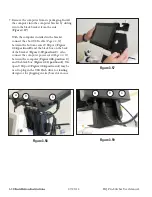
12. Verify that the Y-axis gear engages the blue rack
for the Y-axis.
a. To do this, look from the back of the machine,
between the bottom of the quilting machine
and the top of the carriage. If the white gear
is not high enough to engage the blue rack
above it
(H)
, adjust the lever on the side of
the carriage closest to the back of the carriage
(the Y-axis disengagement lever) into the lowest
position (the teeth of the gear and the teeth of
the rack should engage)
.
b. If horizontal adjustment is needed to ensure
at least half the white gear and blue rack are
interlocking, loosen the two screws that mount
the Y-axis bracket to the base plates and push
the bracket in the direction necessary while
re-tightening the screws.
13. With the power cable unplugged, ensure that as
the HQ Sixteen is moved in both the X and the
Y directions that the corresponding gears are
rotating as well.
Figure 3.51
Figure 3.52


