


HQ Sixteen
™
User Manual 1.6
Page 20
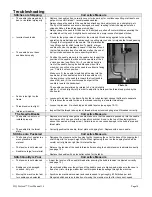
Tension is Poor
Corrective Measure
“Fuzz” caught under the
tension spring in the bobbin
If using short staple threads, inexpensive or industrial threads or coated threads, lint and other
material will build up under the tension leaf spring and begin to lift the spring, reducing the
spring’s ability to compress against the thread. By inserting a needle under the spring and
clearing out the lint, the bobbin tension will return fairly close to its preset tension.
Hand Wheel Won’t
Rotate
Corrective Measure
Thread is entangled and
caught in the hook
Turn off the machine
and unplug the machine
from the electrical outlet. Lubricate the hook,
strongly turn the hand wheel clockwise and if necessary counterclockwise several times, and
then remove the thread caught in the hook.
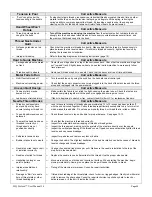
Thread Nests Under
Quilt
Corrective Measure
Not enough tension on top
thread
Improper threading
Check that the machine is threaded correctly. Make certain that the thread is flossed snugly in
place between the two tension discs. If machine is threaded correctly, tighten top tension by
rotating the tension knob clockwise.
Refer to threading diagram and threading instructions (page 10).
Hard to Guide Machine
Corrective Measure
Carriage wheels not centered
on track
Thread caught in wheels
Center the carriage wheels on top of the continuous track. Check that the machine carriage has
not “jumped” track. Slightly loosen wheel on one side to allow machine to more easily follow
track
alignment.
Remove all thread or debris in wheels. Check that the tracks are free of lint and threads.
Motor Fails to Run
Corrective Measure
On/Off switch turned off
Machine not receiving power
Turn the machine on by using the switch on the back electrical control pod.
Check that the power connector is securely plugged into the back of the machine and the three-
prong end is plugged into the power source.
Uneven Quilt Design
Corrective Measure
Take-up rollers may be
bowed or bent
Leaders are stretched/worn
Make certain the fabric is not rolled too tight, causing the poles to bow. Check that poles are
inserted completely together with the push pin engaged so bowing won’t occur.
If fabric is beginning to stretch or fray, contact Handi Quilter LLC for replacement leaders.
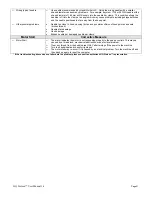
Needle Thread Breaks
Corrective Measure
Thread cones/spools are
poor quality or may have
severe twisting or thread rot
Top and bobbin tensions not
balanced
The machine head has been
threaded incorrectly or
thread spools are not
positioned correctly
Particles in tension discs
Bobbin rotation is not smooth
Needle is burred, bent or dull,
or installed incorrectly
Needle not suited for thread
Hesitating too long at one
point in pattern
Improper needle/hook
relationship
Damage or “Burr” at needle
hole of throat plate or other
thread handling part
Look for severe twisting of threads when approximately 12 to 15 inches has been pulled off,
with the ends pinched together. Cotton threads are particularly susceptible to dry rot or wet rot
which makes thread brittle. Do not use poor quality thread, or thread that is rotted or brittle.
Check thread tension in top and bobbin for proper balance. See pages 12-13.
Check that the machine is threaded correctly.
Inspect for accidental double wrapping of thread on thread guides.
Inspect the thread mast, making sure the eyelets of the mast are directly over the spools.
Inspect the vertical positioning of the thread cones. Tipped cones can dramatically affect thread
tension and can cause breakage.
Inspect for particles and remove any fuzz or debris.
Change the bobbin. The slightest hesitation of the bobbin rotation can be the cause of dramatic
tension change and thread breakage.
Change the needle at least once per quilt. Make sure the needle is installed to the top of the
stop hole in the needle bar.
Replace the needle to one better suited for the thread. Use the proper size needle.
Move more quickly so stitches don’t overlap or build up. When starting the machine, begin
moving immediately. Sewing in one place too long will cause the thread to break.
Timing of the machine is improper. Consult a repair technician.
If thread is shredding at the throat plate, check for burrs or jagged edges. Gently rub with metal
cloth to remove the sharp edge. Consult a repair technician to polish any hard to reach or
delicate areas, or if the burr is inside the throat.
Summary of Contents for HQSixteen
Page 24: ...www HandiQuilter com ...


