background image

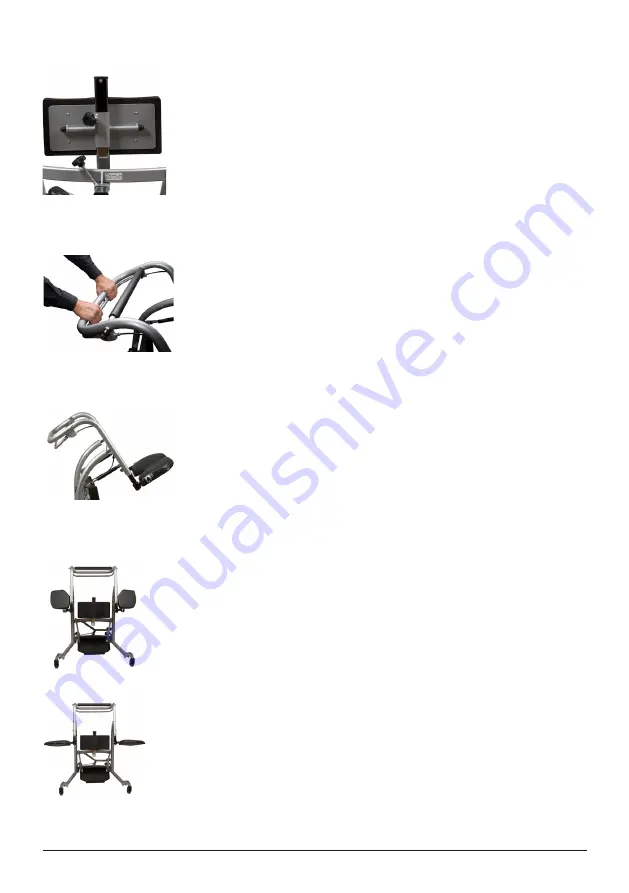
Seat support

Check the seat supports for visible damage to the surfaces, finish, etc. 
Check the split seat pads: both swing away and flip-up.

Angle adjustment crossbar

Check that the angle adjustment crossbar is activating the gas springs.

Knee pad

Check the knee pad for visible damage to the surfaces, finish, etc. Make sure it is 
correctly assembled.
Check the adjustment for knee pad, depth, height and tiltable.

Check that the gas springs are moving smooth and soft. 

Gas spring

11

System

RoMedic

TM

Summary of Contents for 400801334

Page 1: ...ed and serviced Always read the manuals for all assistive devices used during a transfer Keep the manual where it is accessible to users of the product Do not leave the patient unattended during a tra...

Page 2: ...ploded view 4 Component list 5 Spare parts 6 8 Spare part list 6 Replacing spare parts 7 Periodic inspection 9 11 Detail descriptions for Periodic inspection 9 Periodic inspection instruction 10 11 Ca...

Page 3: ...2 Depth adjustable kneepad 3 Angle adjustment of the seat 4 Manual adjustment of seat depth 5 Hight adjustable kneepad 6 Footpedal for leg spread adjustment 7 2 x rear braked castors 8 Detachable foot...

Page 4: ...Exploded view 4 SystemRoMedic TM...

Page 5: ...t 17 Screw M6x10 8 8 DIN 914 18 Grip pipe welded 19 Foam grip 20 Gas spring 21 Release head gas spring 22 Screw M6x12 8 8 ISO 7380 23 Plastic spacer 20x 10 5 10 mm 24 Spacer 10x1 16 mm 25 Spacer 10x1...

Page 6: ...kit 80mm 1 pce 1 x Castor with brake 80100086 Knee pad complete QM 1 pce 1 x Knee pad holder 80100087 Footplate complete QM 1 pce 1 x footplate holder 80100088 Gas spring 1 set 2 x Gas spring 4 x Lock...

Page 7: ...he new castor and ensure correct tightening Raer castors with brakes Disassemble and change the rear castors by unlocking the underneath mounted screw according to picture Use the attached screw to as...

Page 8: ...stment screw on the cable and secondly unhook the cable from the bracket Attach the new cable set to the old one while still mounted in the frame and change the old cable by pulling the cable through...

Page 9: ...e and pivote points Page 7 2 Brakes Page 7 3 Castors Page 7 4 Footpedal for leg spread adjustment Page 7 5 Detachable footplate Page 7 6 Leg support Page 8 7 Angele adjustment crossbar Page 8 8 Gas sp...

Page 10: ...ove unloaded on the floor check that the castors roll and turn freely Check that the castor fasteners are tight and if necessary remove dirt and hair from wheels Footpedal for leg spread adjustment Ch...

Page 11: ...djustment crossbar Check that the angle adjustment crossbar is activating the gas springs Knee pad Check the knee pad for visible damage to the surfaces finish etc Make sure it is correctly assembled...

Page 12: ...uct Use a soft cloth and mild cleaning agent such as dishwashing liquid or car shampoo to clean the QuickMove Do not use abrasive cloths or brushes Do not use solvents To disinfect use 70 alcohol 12 S...

Page 13: ...tor to castor 1050 mm 41 3 F Width between legs Min leg spread 480 mm 18 8 G Width between legs Max leg spread 620 mm 24 4 H Height adjustement Floor to pushbar 1065 1120 mm 41 9 44 I Height Floor top...

Page 14: ...14 SystemRoMedic TM...

Page 15: ...15 SystemRoMedic TM...

Page 16: ...d SystemRoMedic is focused on the prevention and reduction of occupational injuries while allowing users to experience a greater sense of independence and dignity Through a unique combination of train...

Reviews: