Pro-Stitcher Lite for the HQ Simply Sixteen
Installation Instructions | 27
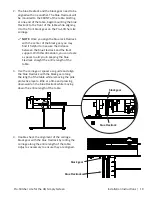
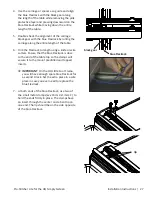
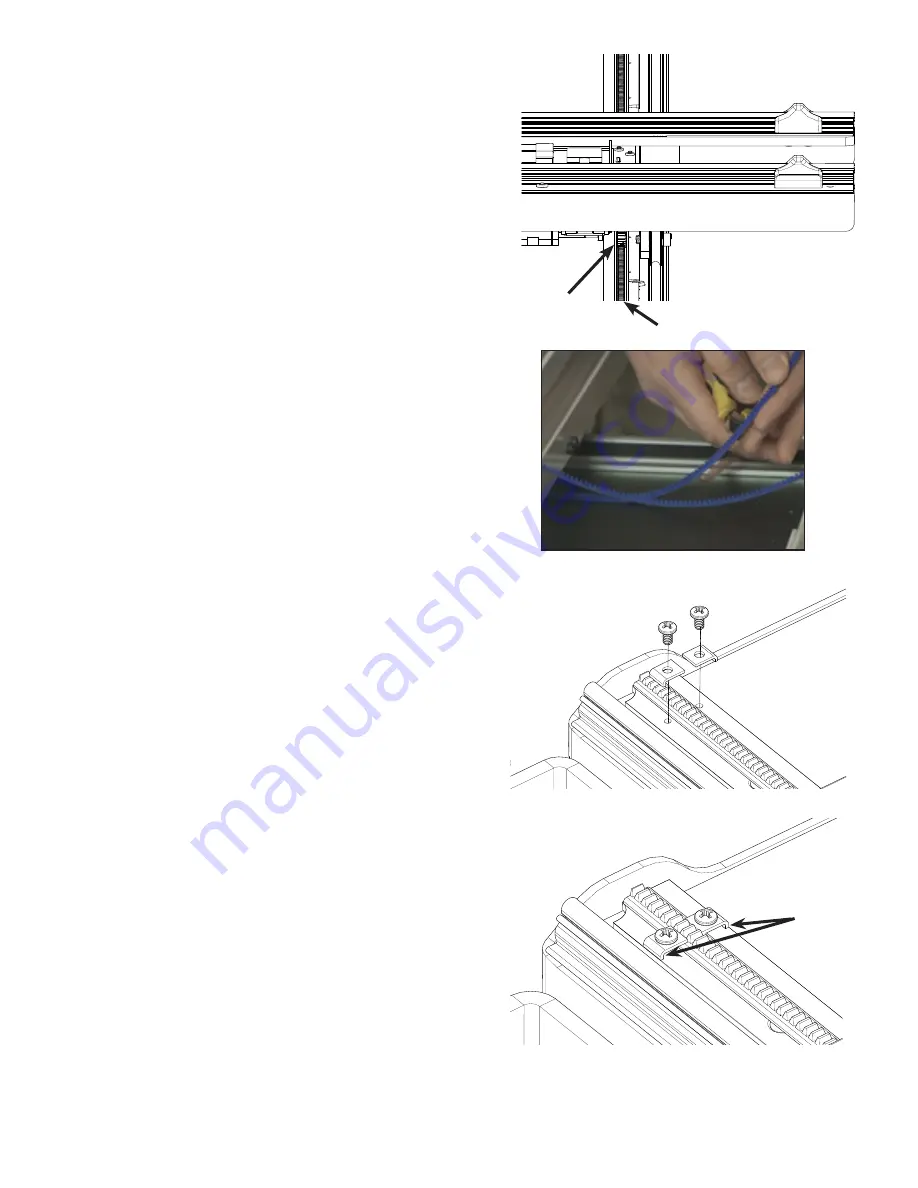
4. Use the carriage or spacer as a guide and align
the blue Flexirack with the black gear along
the length of the table while removing the pink
protective layer and pressing downward on the
blue Flexirack while moving down the entire
length of the table.
5. Double‑check the alignment of the carriage
black gear with the blue Flexirack by rolling the
carriage along the entire length of the table.
6. Trim the Flexirack to length using a knife or wire
cutters. Ensure that the blue Flexirack is close
to the end of the table top so the clamps will
secure it to the mount predrilled and tapped
inserts.
Â
IMPORTANT: On the HQ Little Foot Frame,
you will have enough spare blue Flexirack for
a second X‑rack. Set the extra piece in a safe
place in case you ever need to replace the
blue Flexirack.
7. At both ends of the blue Flexirack, use two of
the small metal clamps (see Parts List, item C) to
hold the ends firmly in place. The clamps have
an insert through the center and a bent lip on
one end. The lip should be on the side opposite
of the blue Flexirack.
black gear
blue Flexirack
lip


