


-18-
SET-UP & ASSEMBLY
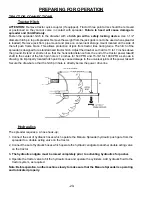
PREPARING MANURE SPREADER
The Manure Spreader may be shipped without the wheels/tires installed.
1. Attach the wheels with tires, using the lug nuts furnished and torque the mounting hardware to
the appropriate torque. Wheel bolts should be tightened at 100 ft/lbs. of torque on the 4242 and
300 ft/lbs. of torque on the 4255.
2. Check the tires and inflate to the recommended pressure.
(425/65R-22.5 tires to 85 psi)
(19L x 16.1 tires to 32 psi)
(600/50R-22.5 tires to 38 psi)
3. Check for proper assembly and adjustment and make sure that all bolts are tightened.
4. Securely retighten after a few hours of operation, as bolts can loosen up on new machinery.
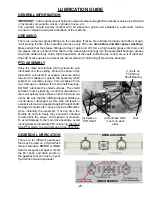
5. Lubricate the machine completely, check the oil level of the gearbox, fill if necessary. Check the
automatic oiler level if spreader is equipped, fill if necessary.
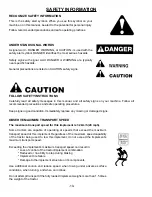
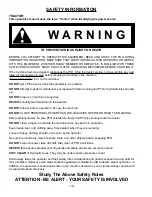
WARNING: Some photographs used in the following pages show guards or
shields removed for clarification. Never operate machine until these guards or
shields are in proper operating position.
NOTE:
Determine right or left side of the Manure Spreader by viewing it from the rear. If instructions
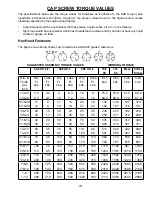
or parts lists call for hardened bolts, refer to the Cap Screw Torques Value page to identify.
Summary of Contents for 4242
Page 6: ...4 Intentionally Left Blank...
Page 8: ...6 Intentionally Left Blank...
Page 10: ...8 Intentionally Left Blank...
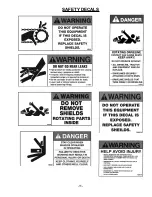
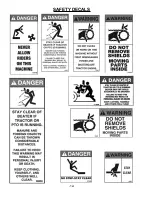
Page 13: ...11 SAFETY DECALS...
Page 14: ...12 SAFETY DECALS...
Page 15: ...13 SAFETY DECALS...
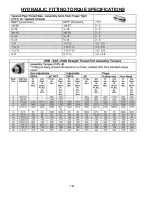
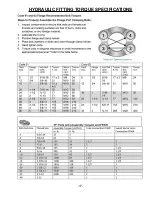
Page 18: ...16 HYDRAULIC FITTING TORQUE SPECIFICATIONS...
Page 19: ...17 HYDRAULIC FITTING TORQUE SPECIFICATIONS...
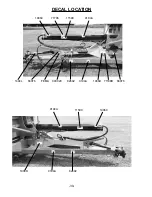
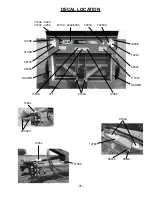
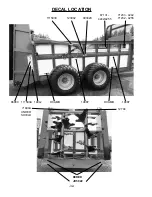
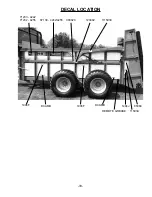
Page 38: ...36 DECAL LOCATION 425 Bushel DCRED 093020 093020 111593A 1494J 86060 DCAMB...
Page 41: ......


