LOADING
Begin loading the spreader at the front end and work toward the rear until loading is completed. Loading
this way permits the material to be spread uniformly. Loading front to rear is particularly important when
the spreader is loaded by a mechanical loader because this type of load requires more power to spread
than other loads.
When hauling extremely heavy materials with a large portion of dirt, it may be necessary to reduce
the loadsize to prevent the torque limiting clutch from disengaging. Do not use extra sideboards. Do not
overload spreader. Overloading decreases spreading effectiveness.
OPERATION
EMERGENCY SHUTDOWN
If a foreign object becomes lodged in the beater area and disengages the torque limiting clutch, stop the
hydraulic drive apron and disengage the PTO. Stop the tractor engine, remove the ignition key, and allow
all mechanisms to stop before cleaning or working on the spreader.
WINTER OPERATION
In freezing weather, make certain that the apron chain is not frozen to the floor, or the hydraulic gate is
not frozen to the track uprights or the floor of the spreader.
-20-
SPREADING
Before beginning to spread, make sure that the knob on the selector valve is in the “FORWARD” position.
1. Engage the tractor PTO slowly. The beater is always in the engaged position, therefore, engaging
the tractor PTO will automatically start the beaters.
2. Raise the hydraulic gate by engaging the tractor hydraulics.
Note: The hydraulic gate can be used for metering loose material, but must always be raised
completely for pen pack material prior to activating the hydraulics for the main apron.
3. Engage the tractor hydraulic lever into the detent position to operate the hydraulic drive main apron.
4. Control the variable speed main apron by using the cab-mounted electric control.
5. When the spreader is completely empty, return the apron speed indicator to the stop position and
engage the tractor hydraulics to close the hydraulic gate.
Summary of Contents for 6180
Page 5: ...3 Remove Copy At Perforation...
Page 6: ...4 Intentionally Left Blank...
Page 8: ...Intentionally Left Blank 6...
Page 10: ...Intentionally Left Blank 8...
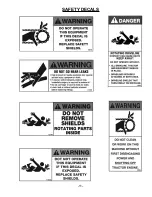
Page 13: ...11 SAFETY DECALS...
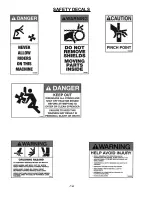
Page 14: ...12 SAFETY DECALS...
Page 15: ...13 SAFETY DECALS...
Page 17: ...15...
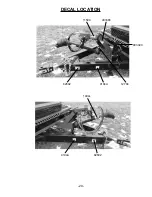
Page 31: ...DECAL LOCATION 9194A 11599 82602 82602 29 1494L 9194A 12794 093366 093020...
Page 35: ...DECAL LOCATION 33 51010 1906F DCAMB 093020 DCAMB 9194A 94012 94009...
Page 39: ......


