28
EN
168.
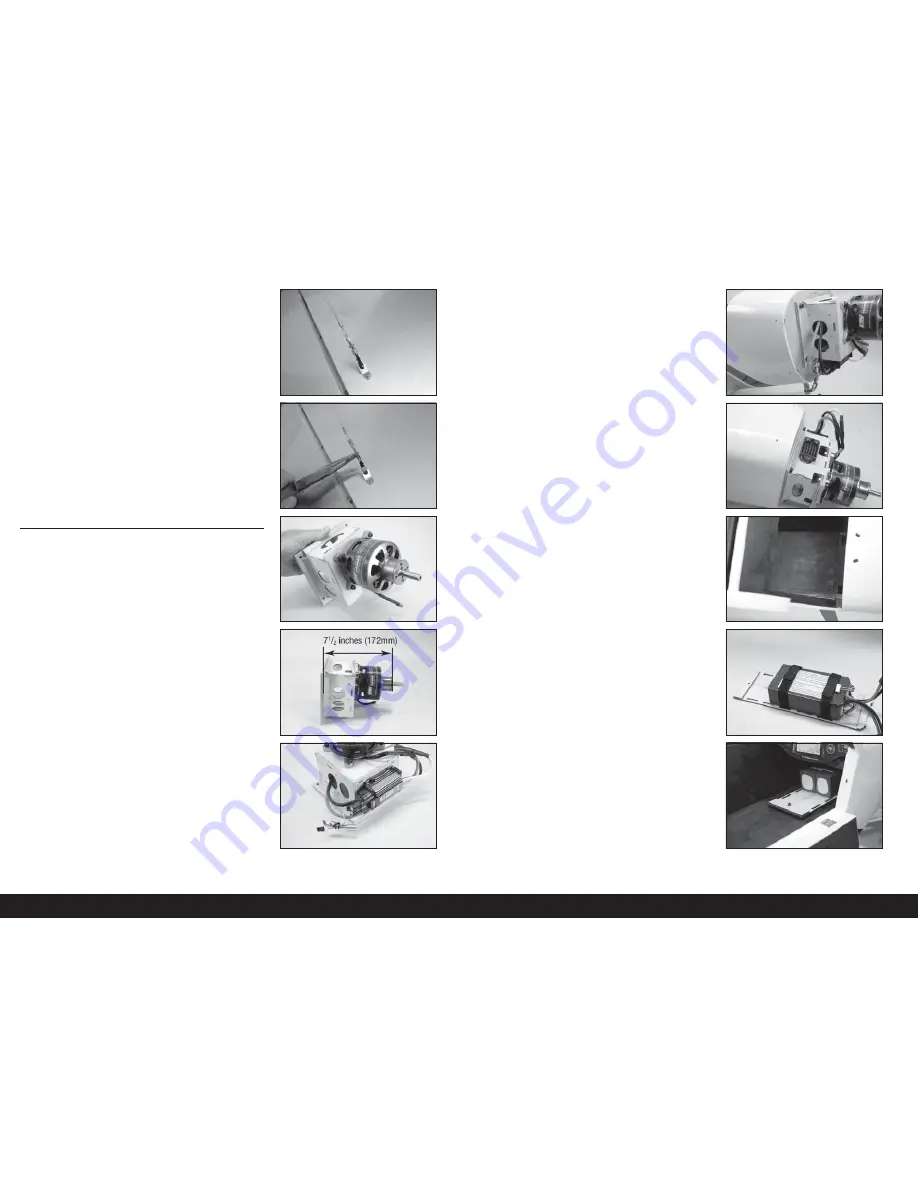
Once all the cables have been installed, check the tension on
the cables. There should be light tension on the cables. Slide
the retainer over the forks of the clevis.
169.
Apply a drop of threadlock near the clevis, then thread the
nut over the threadlock and against the clevis. Use pliers to
tighten the nut against the clevis to prevent the fi tting from
vibrating loose.
The cables may stretch slightly over time. Periodically
check the cables to ensure they still have light tension.
Motor installation other than the Power 360:
The measurement from the fi rewall to the drive washer should
measure 7
1
/
2
inches (191mm). Make any necessary adjustments to
achieve this measurement.
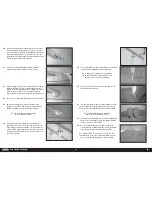
ELECTRIC MOTOR INSTALLATION
170.
Attach the motor to the motor box using four M5 x 20 socket
head cap screws and four M5 fl anged nuts. Place a drop of
threadlock on each screw before installation. Tighten the
hardware using a 4mm hex wrench and 8mm nut driver.
172.
Attach the motor box to the fuselage using four M5 x 20
socket head cap screws and four M5 washers. Place a drop
of threadlock on each screw before their installation. Tighten
the screws using a 4mm hex wrench.
173.
Secure the battery regulator to the side of the motor box.
Follow and instructions included with the regulator to connect
it to the battery and receiver.
175.
Secure the batteries to the battery tray using the hook and
loop straps.
Apply a small amount of 5-minute epoxy to the straps
to secure them to the battery tray. This will prevent them
from falling through the holes when the battery is removed.
174.
Secure the cockpit fl oor in the fuselage using the screws
previously removed.
176.
Slide the battery tray into position. The front of the tray will
lock into the rear of the motor box. Secure the rear of the tray
using an M3 x 15 socket head cap screw and M3 washer.
Tighten the screw using a 2.5mm hex wrench.
Place a drop of canopy glue on the screw before
installation. This will keep the screw from vibrating loose
yet leave it easily removable to remove the battery tray.
171.
Solder any connectors necessary to connect the speed
control to the motor and battery. Secure the speed controller
to the motor box using screws or tie wraps. Connect the leads
between the speed control and motor. Secure the leads so
they don’t interfere with the operation of the motor.


