33
Step 5.
Remove the servos and drill the 12 holes using a
1
/
16
'' drill bit. Remount the servos and screw in the mounting
screws provided with the servos.
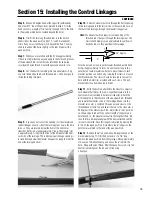
Step 6.
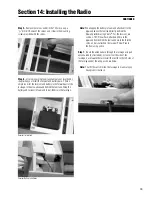
Use radio packing foam (available at your local hobby
shop) when you install the receiver and battery pack. There is
ample room for the receiver and battery in the forward part of the
fuselage, in the area above and behind the fuel tank. Wrap the
battery and receiver in foam and install them into the fuselage.
Note:
We wrapped the battery in foam and attached it to the
plywood above the fuel tank directly behind the
firewall platform using Velcro
®
. For the receiver, we
used a J-TEC Pillow Pack, attached Velcro to the
plywood floor behind the fuel tank next to the throttle
servo, and also attached the receiver Pillow Pack to
the floor using velcro.
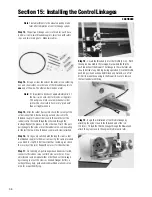
Step 7.
Route the antenna back through the fuselage using an
antenna tube (not included), or route it out the side of the
fuselage, back toward the tail. Install the switch to the left side of
the fuselage under the wing, as shown below.
Note:
Trial fit the switch inside the fuselage to make sure you
have proper clearance.
Section 14: Installing the Radio
CONTINUED
Receiver Installation
Receiver Battery Installation
Summary of Contents for EDGE 540
Page 52: ...52 ...
Page 53: ...53 Template Cut Out of Cowl Bottom MDS 1 48 ...
Page 54: ...54 ...
Page 55: ...55 ...
Page 56: ... 2000 Horizon Hobby Inc www horizonhobby com ...
Page 57: ...57 ...
Page 58: ...58 ...
Page 59: ...59 ...


