36
Note
Final adjustments to the elevators will be made
later after completion of control linkage system.
Step 13.
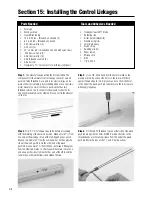
The pull-pull linkage consist of 2 cables; each has a
.020 music wire, two threaded couplers, two clevis with safety
clips, and two locking nuts. Make two cables.
Step 14.
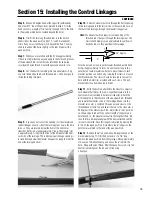
Scrape or clear the ends of the wires. Use a soldering
iron and silver solder, to solder one of the threaded couplers to
one
end of the wire. The other end will be done later.
Note:
It’s important to bend over approximately 3/8'' of
the music wire onto itself at its ends using pliers.
This will give a more secure mechanical solder
joint as the silver solder has more to “grab onto”
than a straight wire end.
Step 15.
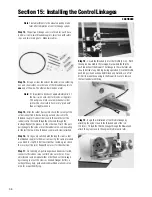
After the solder has cooled, check the security of the
solder connection. Attach a locking nut and clevis onto the
threaded coupler. Connect the clevis to the outer hole of the
rudder control horn and thread the other end through the
fuselage. Repeat the process for the other link. Trial fit the pull-
pull linkage to the servo arm of the rudder servo, compensating
for the fact there will be a threaded coupler and clevis attached.
Step 16.
Once you are satisfied with the length, silver solder
the threaded coupler to the music wire using the same procedure
as outlined in step 15. After the solder has cooled, again check
the security of the joint. Repeat the process for the other link.
Step 17.
Once both pull-pull linkages have been constructed,
connect to the rudder servo control horns outer holes. Final
adjustments can be made at either or both ends of the linkage
by screwing in or out the clevis as needed. Hangar 9 offers a
varitey of heavy duty, gold anodized machined aluminm servo
arms for use with 3D flying.
Step 18.
Locate the threaded rod for the throttle (2 mm). With
the engine mounted to the fuselage, mark where the throttle
pushrod will exit the firewall. The linkage to the carburetor arm
should be free of any binding during operation. Once the throttle
pushrod position has been determined and marked, use a 1/8''
drill bit to make the opening in the firewall. Be sure to remove
the fuel tank before drilling.
Step 19.
Begin the installation of the throttle linkage by
attaching the nylon clevis to the threaded end of the rod
(10 turns). Thread the throttle linkage through the firewall and
attach the nylon clevis to the engine throttle control arm.
Section 15: Installing the Control Linkages
CONTINUED
Summary of Contents for EDGE 540
Page 52: ...52 ...
Page 53: ...53 Template Cut Out of Cowl Bottom MDS 1 48 ...
Page 54: ...54 ...
Page 55: ...55 ...
Page 56: ... 2000 Horizon Hobby Inc www horizonhobby com ...
Page 57: ...57 ...
Page 58: ...58 ...
Page 59: ...59 ...

