7
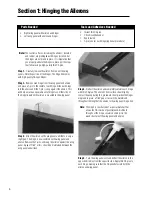
Step 6.
Using CA remover/debonder and a paper towel,
remove any excess CA glue that may have accumulated on the
wing or in the aileron hinge area.
Step 7.
Repeat this process with the other wing panel, securely
hinging the aileron in place.
Step 8.
After both ailerons are securely hinged, firmly grasp
the wing panel and aileron to make sure the hinges are securely
glued and cannot be pulled out. Do this by carefully applying
medium pressure, trying to separate the aileron from the wing
panel. Use caution not to crush the wing structure.
Note:
Work the aileron up and down several times to “work
in” the hinges and check for proper movement.
Sealing the Hinge Gaps
It’s imperative that the aileron and elevator hinge lines be sealed
airtight to prevent flutter. Sealing the hinge line has several
advantages. A sealed hinge line gives a greater control response
for a given control deflection. It also offers more precise,
consistent control response and makes trimming easier.
Sealing the aileron and elevator hinge line is
mandatory. Failure to do so may cause control surface
flutter, resulting in a crash.
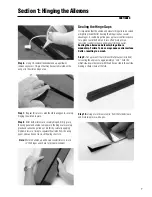
Step 9.
Cut a piece of clear or blue UltraCote
®
(not included)
for sealing the ailerons to approximately 3'' x 28''. Fold the
UltraCote
®
down the center with the adhesive side to the outside
making a sharp crease at the fold.
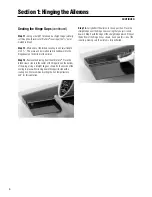
Step 10.
Using a ruler, measure 3/8'' from the folded crease
and mark two places with a pen.
Section 1: Hinging the Ailerons
CONTINUED
Summary of Contents for EDGE 540
Page 52: ...52 ...
Page 53: ...53 Template Cut Out of Cowl Bottom MDS 1 48 ...
Page 54: ...54 ...
Page 55: ...55 ...
Page 56: ... 2000 Horizon Hobby Inc www horizonhobby com ...
Page 57: ...57 ...
Page 58: ...58 ...
Page 59: ...59 ...


