7
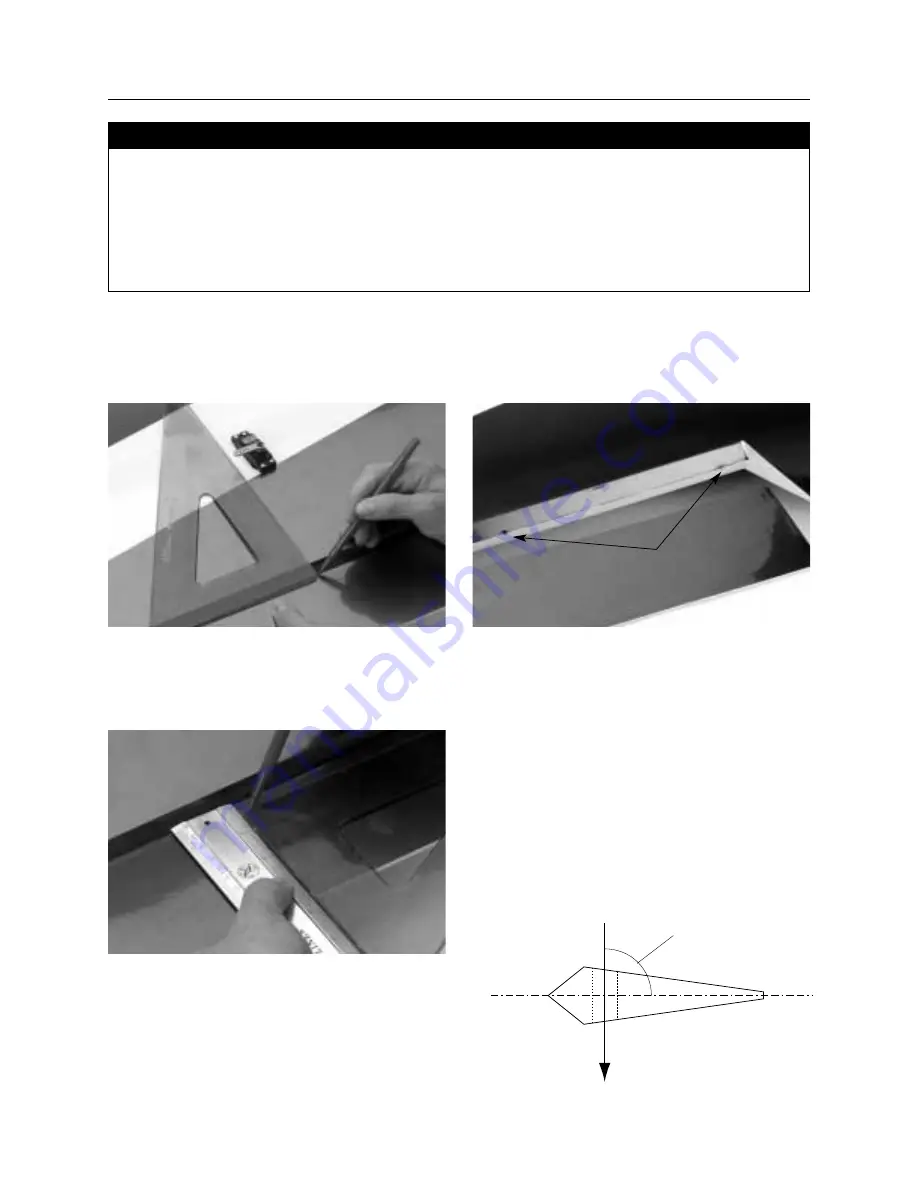
Step 1.
Using a straight edge held in alignment (90°) with the
servo arm and with the hinge line as shown, mark the aileron with
a pen where the straight edge intersects the aileron hinge bevel.
Step 2.
Measure exactly
1
/
4
" rearward from the mark above
parallel to the hinge line and make another mark using a pen.
This will be the position for the control horn.
Step 3.
Untape the ailerons from the wing. Use rubbing alcohol
to remove any tape residue. Notice that the hinge pockets are
already cut into place.
Step 4.
Using a
5
/
32
" drill bit and hand drill, carefully drill a
5
/
32
" hole through the aileron at the marked position. [Drill
perpendicular (90°) to the aileron cross section rather than the
ailerons surface.] Be especially careful when penetrating through
the bottom surface of the aileron as it’s easy to split out the wood
and rip the covering. Placing a wooden block under the aileron
and drilling slowly will prevent these problems. If you choose to
use the counter sink screws included in the Hangar 9 Hardware
Package, counter sink the top of the aileron to allow the screws
to fit flush.
Note:
A hardwood block (hardpoint) is located below the
sheeting; you will be drilling through this.
Section 2: Installing the Aileron Control Horns
• Wings with ailerons and servos
Included in Optional Hangar 9 Hardware Package
• (2) Control Horns (Rocket City 8-32 Swivel Control
Horn #ROC01B)
• 12" or longer ruler
• Drill w/
5
/
32
" drill bit
• 8-32 Tap (DUB363)
• 30-minute epoxy
• Pen
• Rubbing alcohol
• Paper towels
Parts Needed
Tools and Adhesives Needed
90
°
Hinge Pockets


