12
EN
11.
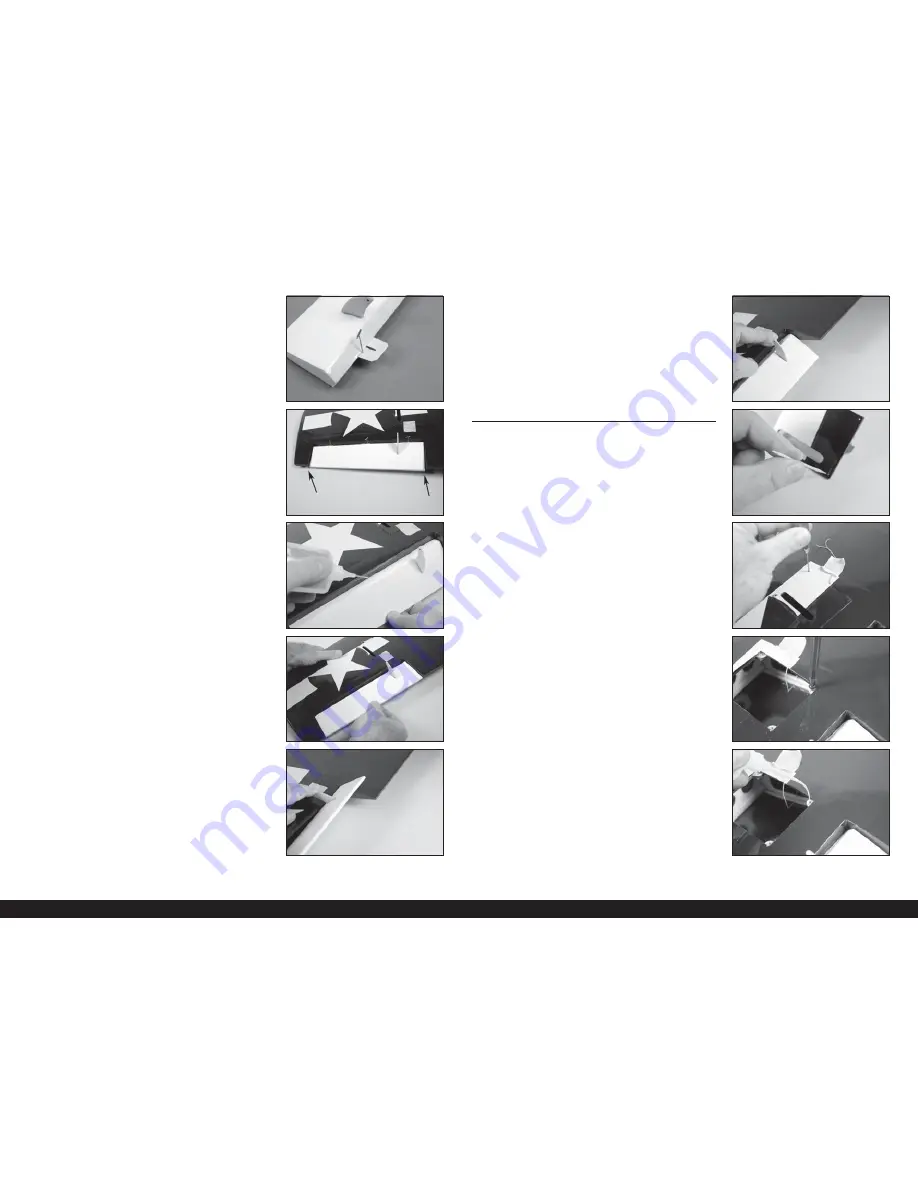
Slide the hinges into position in the aileron with the T-pin
resting against the edge of the control surface.
16.
Check both the up and down movement of the hinges before
proceeding.
Repeat this section for the remaining aileron installation.
12.
Fit the aileron and fl ap to the wing by inserting the hinges into
the slots in the wing. Position the aileron so the gap is equal
between the aileron and wing.
AILERON SERVO INSTALLATION
17.
Remove the aileron servo cover from the wing. Tape the string
to the wing so it won’t fall into the wing. Use a toothpick
or hobby knife to puncture the covering for the servo cover
mounting screws.
13.
Apply thin CA to the top and bottom of each of the hinges.
Make sure to fully soak the hinges so the CA can wick into
the hinge and bond to the surrounding wood.
Use thin CA so it wicks into the hinge. A thicker CA
will not wick into the hinge properly. Do not to allow the
CA to run over the covering on the wing and aileron.
18.
Use a pin vise and 3/32-inch (2.5mm) drill bit to drill the holes
for the servo cover screws.
14.
Allow the CA to cure for 10 to 15 minutes. Gently pull on the
fi xed surface and control surface to make sure the hinges are
glued securely. If not, apply additional CA to secure each of
the hinges.
19.
Use a #2 Phillips screwdriver to thread the M3 x 10 self-
tapping screws into the holes. Remove the screws before
proceeding to the next step.
Do not press down excessively on the
screw as it could damage the structure.
15.
Move the aileron through its range of travel to break in the
hinges.
20.
Apply a small amount of thin CA to harden the threads
made in the previous step. Allow the CA to fully cure before
installing the aileron servo cover.


