background image

- 3 -

2

9

4

0

D

1

0

.

2

0

.

6

1

K

S

1

0

.

2

0

.

6

1

G

J

e

m

a

N

-

D

t

ll

e

t

s

r

e

e

m

a

N

.

r

p

e

g

e

m

a

N

.

f

t

z

t

e

s

r

e

.

d

t

z

t

e

s

r

e

1. Einleitung

1.1 Allgemeines

Der in dieser Betriebsanleitung dokumentierte Kälte-Drucklufttrockner
erfüllt alle Anforderungen, die an ein modernes Gerät gestellt wer-
den.
Um ihn optimal nutzen zu können, benötigt der Anwender ausführli-
che Informationen.

In der vorliegenden Betriebsanleitung haben wir diese Informationen
vollständig und in entsprechende Kapitel gegliedert zusammenge-
stellt.

Lesen Sie die Bedienungsanleitung vor Inbetriebnahme der
Maschine durch,
um eine von Anfang an sachgemäße Handhabung, Bedienung und
Wartung zu gewährleisten.
Im Wartungsplan sind alle Maßnahmen zusammengestellt, die den
Trockner in gutem Zustand erhalten. Die Wartung ist einfach, muß
jedoch regelmäßig vorgenommen werden.
Sie hilft Ihnen auch Unfälle zu vermeiden und die Garantie des Her-
stellers zu erhalten.

Nennen Sie bei jedem Schriftverkehr immer den Typ und die voll-
ständige Seriennummer des Trockners, die auf dem Typenschild
angegeben sind.

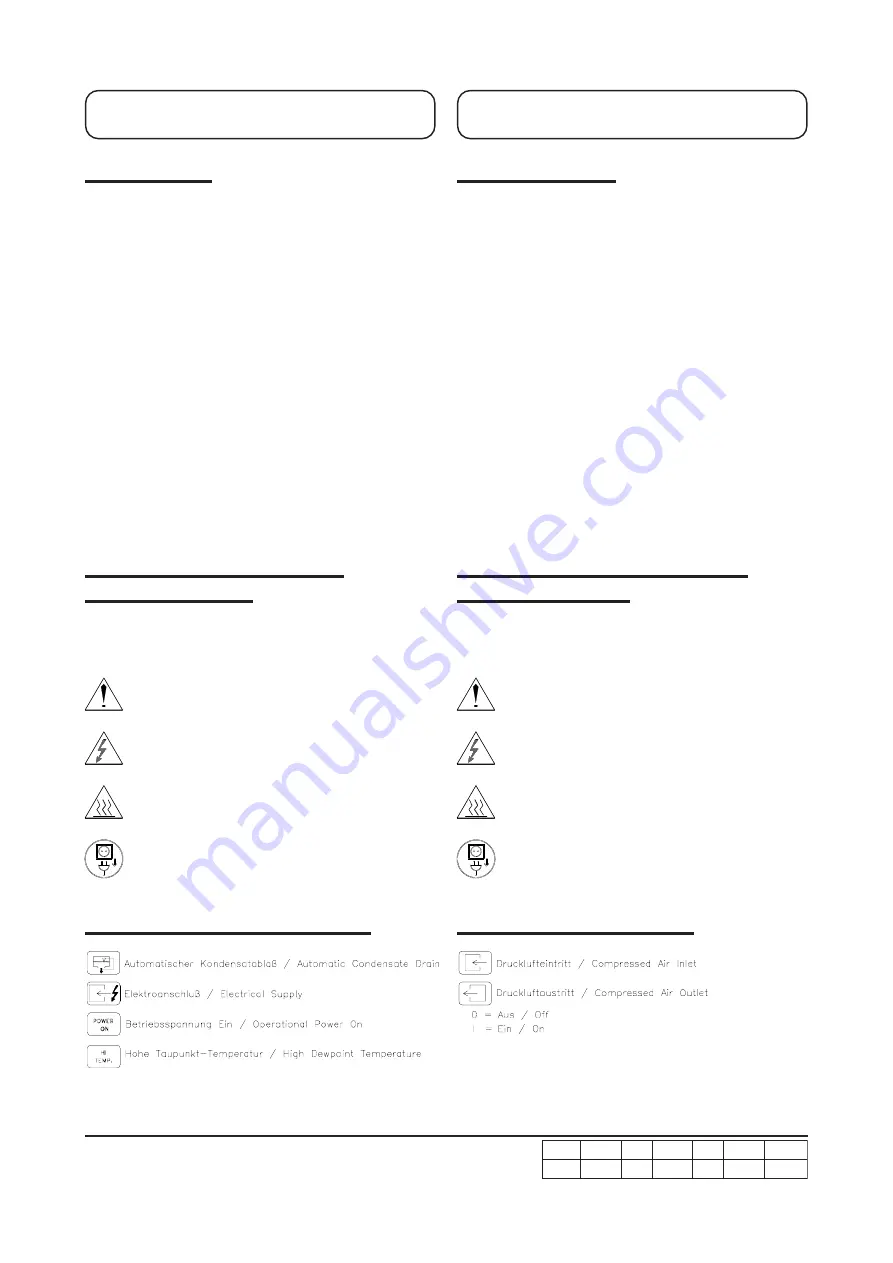
1.2 Erklärung der Symbole in der

Bedienungsanleitung

Alle Sicherheitshinweise in dieser Bedienungsanleitung, die  bei
Mißachtung Personen- bzw. Sachschäden zur Folge haben kön-
nen, sind durch die nachstehenden Symbole gekennzeichnet.

  Allgemeines Gefahrensymbol

   Elektrisches Gefahrensymbol

   Warnung vor heißer Oberfläche

   Netzstecker ziehen

1.3 Erklärung der Symbole am Gerät

1. Introduction

1.1 General remarks

The refrigerated compressed air dryer documented in these operating
instructions has all requirements that can be expected from a mo-
dern device.
In order to obtain maximum benefit from using this dryer the user
should have sufficient information to ensure the unit is installed and
operated correctly, enabling the user to avoid accidents and retain
the manufacturers warranty.

These operating instructions gave the user this information which
has been divided into separate sections for easy reference.

Read the operating instructions, prior to starting the machine,
in order to ensure correct handling, operation and maintenance from
the outset.
The maintenance plan summarizes all the measures which are
required to maintain the dryer in good condition. The maintenance
work is simple, but must be carried out on a regular basis.
Correct maintenance will also help you to avoid accidents an to
ensure that the manufacturer`s guarantee coverage is maintained.

Please state the type and complete serial number of the dryer, as
specified on the nameplate, in all correspondence.

1.2 Explanation of the symbols in the

operating instructions

All safety instructions in this operating manual, failure to observe
which may result in damage or injury, are classified by the symbols
below.

  General danger symbol

   Electrical danger symbol

   Warning: hot surface

   Disconnect mains plug

1.3 Symbols used in the dryer

Summary of Contents for HPRD 0.25-500

Page 1: ... s r e d t z t e s r e Bedienungsanleitung Instruction Manual Hochdruck Kälte Drucklufttrockner High pressure refrigerated compressed air dryer Modell Model HPRD 0 25 500 HPRD 0 50 500 HPRD 0 50 900 HPRD 0 75 500 HPRD 0 75 900 HANKISON GmbH Gutenbergstraße 40 D 47443 Moers Tel 02841 819 0 Fax 02841 87112 ...

Page 2: ...können Abweichungen nicht ausgeschlossen werden so daß wir für die vollständige Übereinstimmung keine Gewähr über nehmen Technische Änderungen vorbehalten Contents 1 Introduction 2 Safety rules warnings 3 Guarantee conditions 4 Transportation delivery inspection of incoming goods 5 Installation assembly 6 Start up operation switching off 7 Description of functions 8 Servicing maintenance 9 Malfunc...

Page 3: ...hes Gefahrensymbol Warnung vor heißer Oberfläche Netzstecker ziehen 1 3 Erklärung der Symbole am Gerät 1 Introduction 1 1 General remarks The refrigerated compressed air dryer documented in these operating instructions has all requirements that can be expected from a mo dern device In order to obtain maximum benefit from using this dryer the user should have sufficient information to ensure the un...

Page 4: ...gsanleitung beigelegt Bringen Sie diese bitte an gut sichtbarer Stelle auf dem Gerät an Prüfen Sie daß dies der Fall ist Sollte dieses Schild bei Ihnen nicht mehr verfügbar sein kann es beim Hersteller bestellt werden 1 Introduction 1 4 Operating Instructions Operating instructions are supplied on a self adhesive label with every instruction manual Please stick this to the dryer in a prominent pla...

Page 5: ...rgungsnetz zu trennen Netzstecker ziehen Hauptschalter ausschalten ACHTUNG Alle Arbeiten am elektrischen System dürfen nur von elektrotechnisch geschultem Fachpersonal oder unter Aufsicht von diesem durch Unterwiesene ausgeführt werden 2 Safety rules warnings 2 1 Use of dryer Attention The dryer system must only be used for the purpose as designated in the operating instructions and only in combin...

Page 6: ...n Anlagen verbrannt werden Kältemittel Das Entweichen der Kältemittel in die Atmosphäre während der Montage und Wartung ist durch geeignete Maßnahmen zu verhin dern 2 Safety rules warnings Warning Certain parts of the unit can reach high temperatures avoid burning by touching Ensure adequate air flow across the unit is maintained as specified in the section on installation See section Dimensional ...

Page 7: ...kstät ten oder andere Personen unsachgemäß geöffnet oder repariert wurde und oder mechanische Beschädigung irgendwelcher Art aufweist 3 Guarantee conditions 3 1 General The manufacturer provides the purchaser of this device with a guarantee for perfect condition and performance for a period of 12 months from the date of delivery subject to the following conditions The guarantee covers the delivere...

Page 8: ...ten Beschädigungen angeliefert so ver ständigen Sie unverzüglich den Spediteur und veranlassen eine Begutachtung des Kälte Drucklufttrockners Für Beschädigungen während des Transportes ist der Hersteller nicht verantwortlich 4 Transport delivery Checking of goods received 4 1 Transport The refrigeration compressed air dryer must by no means be lifted at the compressed air inlet or outlet connectio...

Page 9: ...ließen kann HINWEIS Bei der Entsorgung des Kondensates ist der Schmutzanteil zu berücksichtigen Beachten Sie die jeweils geltenden gesetzlichen Vorschriften 5 Installation and mounting 5 1 Location of Installation The refrigeration compressed air dryer should be installed in a dry room indoors Ample free space should be allowed for the maintenance of the device The refrigeration compressed air dry...

Page 10: ...üssen vermieden werden da sie erhöhte Korrosion am Kälte Drucklufttrockner verursachen können Kontaktieren Sie im Zweifelsfall einen authorisiertes Fachbetrieb 5 Installation and mounting 5 5 Electrical connection The dryer is equipped with a cord and a plug The electro technical connection data are to be taken from chapter 10 Technical data The connection conditions are based on the respective na...

Page 11: ...strittsleitung öffnen Druckluft Bypass schließen Der Kälte Drucklufttrockner ist nun in BETRIEB Beachten Sie bitte den Abschnitt 6 3 Betrieb 6 Start up operation switching off 6 1 Preconditions for starting the dryer The refrigerated compressed air dryer is ready for starting when The device has been installed in accordance with section 5 Assembly installation All inlet and outlet lines have been ...

Page 12: ... längerem Betriebsstillstand ist der Kälte Drucklufttrockner entsprechend dem Kapitel 6 2 In betriebnahme wieder in Betrieb zu nehmen 6 Start up operation switching off 6 3 Operation The indicator light HI TEMP high dewpoint temperature remains switched on for approximately 15 minutes after the dryer has been switched on Should the indicator light HI TEMP be switched on at any time after this duri...

Page 13: ...emittel unter Wärmeentzug verflüssigt Über ein Einspritzorgan wird das flüssige Kältemittel im Druck re duziert und in den Kältemittel Luft Wärmeaustauscher eingespritzt Das verdampfende Kältemittel wird wieder vom Kältemittelverdichter angesaugt Der Heißgas Bypassregler regelt automatisch die im Teillastbereich erforderliche Kälteleistung 7 Description of operation HPRD0 25 500 HPRD0 50 500 HPRD0...

Page 14: ...berwurfring Die im Inneren sichtbar werdende Abscheiderpatrone herausdrehen und austauschen Der Zusammenbau erfolgt in umgekehrter Reihenfolge Gerät einschalten 8 Servicing and maintenance Remark The component specified in parentheses e g A103 refer to the R I schematic diagram Please see also section 13 Dimensional drawing 8 1 Monthly maintenance Clean refrigerant condenser W203 blow the lamellae...

Page 15: ...ut ist Erfolgt nach erneutem Inbetriebsetzen ein wie derholtes Einfrieren Justierung des Heißgasreglers über prüfen durch authorisiertes Fachpersonal und ggf nach justieren 9 Malfunctions troubleshooting Remark The component specified in parentheses e g A103 refer to the R I schematic diagram Please see also section 13 Dimensional drawing 9 1 Malfunctions without fault messages Water in the compre...

Page 16: ...eise Kapitel 8 g j Durch geschultes Fachpersonal überprüfen und ggf instandsetzen lassen k Reinigen des Druckluftsystems mit geeigneten Reinigungsmitteln 9 Malfunctions troubleshooting Remark The component specified in parentheses e g A103 refer to the R I schematic diagram Please see also section 13 Dimensional drawing 9 2 Malfunctions with fault messages Indicator light for High dewpoint tempera...

Page 17: ... r d r e b ü s b e i r t e B 0 A T P O P e r u s s e r p g n i k r o W 0 r a b 5 3 4 6 5 3 4 6 P k c u r d r e b ü s b e i r t e B l u Z S P e r u s s s e r p e l b a w o l l A S r a b 5 3 4 6 5 3 4 6 t t i r t s u A t t i r t n i E k c u r d z n e r e f f i D t e l t u o t e l n i e r u s s e r p l a i t n e r e f f i D r a b 2 1 0 6 0 0 2 0 0 5 0 0 4 0 0 ß u l h c s n a t f u l k c u r D n o i t...

Page 18: ... e m r ö t S e r u t a r e p m e t t n i o p w e d h g i H n o i t a c i d n i e l b u o r T C 2 1 r e t i e l b a t a s n e d n o K t i e z n e s u a P g n u r e u e t s t i e Z e h c s i n o r t k e l E n i a r d e t a s n e d n o c e m i t k a e r B l o r t n o c e m i t c i n o r t c e l E n e t u n i M 5 s e t u n i m 5 r e t i e l b a t a s n e d n o K t i e z s g n u n f f Ö g n u r e u e t...

Page 19: ... 19 2 9 4 0 D 1 0 2 0 6 1 K S 1 0 2 0 6 1 G J e m a N D t l l e t s r e e m a N r p e g e m a N f t z t e s r e d t z t e s r e 12 R I Schema 12 P I Diagram ...

Page 20: ... 20 2 9 4 0 D 1 0 2 0 6 1 K S 1 0 2 0 6 1 G J e m a N D t l l e t s r e e m a N r p e g e m a N f t z t e s r e d t z t e s r e 12 R I Schema 12 P I Diagram ...

Page 21: ... s s e r p m o c t n a r e g i r f e R 5 0 2 0 1 5 9 9 z H 0 5 9 0 2 0 1 5 9 9 z H 0 6 8 0 2 0 1 5 9 9 z H 0 5 1 1 2 0 1 5 9 9 z H 0 6 2 1 2 0 1 5 9 9 4 0 2 N r o t o m r o t a l i t n e V r o t o m n a F 2 5 0 2 5 1 9 9 5 0 2 5 1 5 9 9 6 0 2 5 1 5 9 9 4 0 2 N l e g ü l f r o t a l i t n e V e d a l b n a F 3 5 0 2 5 1 9 9 5 6 0 7 1 5 9 9 6 6 0 7 1 5 9 9 2 1 2 P r h o r r a l l i p a K e b u t y r...

Page 22: ... 22 2 9 4 0 D 1 0 2 0 6 1 K S 1 0 2 0 6 1 G J e m a N D t l l e t s r e e m a N r p e g e m a N f t z t e s r e d t z t e s r e 13 Schaltplan 13 Wiring Diagram ...

Page 23: ... 23 2 9 4 0 D 1 0 2 0 6 1 K S 1 0 2 0 6 1 G J e m a N D t l l e t s r e e m a N r p e g e m a N f t z t e s r e d t z t e s r e 13 Schaltplan 13 Wiring Diagram ...

Page 24: ... 24 2 9 4 0 D 1 0 2 0 6 1 K S 1 0 2 0 6 1 G J e m a N D t l l e t s r e e m a N r p e g e m a N f t z t e s r e d t z t e s r e 13 Wiring Diagram 13 Schaltplan ...

Page 25: ...6 F n o x i l K r e s ö l s u a m o r t s r e b Ü n o x i l K e s a e l e r t n e r r u c r e v O 1 5 0 3 5 5 9 9 z H 0 5 3 5 0 3 5 5 9 9 z H 0 6 6 5 0 3 5 5 9 9 z H 0 5 4 5 0 3 5 5 9 9 z H 0 6 7 5 0 3 5 5 9 9 6 6 4 6 H n ü r g t o r r e d l e m t h c u e L n e e r g d e r t h g i l r o t a c i d n I 1 0 0 3 5 1 9 9 2 6 K s i a l e r t r a t S y a l e r t r a t S 5 0 1 9 2 5 9 9 z H 0 5 5 1 1 9 2 ...

Page 26: ... 26 2 9 4 0 D 1 0 2 0 6 1 K S 1 0 2 0 6 1 G J e m a N D t l l e t s r e e m a N r p e g e m a N f t z t e s r e d t z t e s r e 14 Maßzeichnung 14 Dimensional drawing ...

Page 27: ... 27 2 9 4 0 D 1 0 2 0 6 1 K S 1 0 2 0 6 1 G J e m a N D t l l e t s r e e m a N r p e g e m a N f t z t e s r e d t z t e s r e 14 Maßzeichnung 14 Dimensional drawing ...

Page 28: ... 28 2 9 4 0 D 1 0 2 0 6 1 K S 1 0 2 0 6 1 G J e m a N D t l l e t s r e e m a N r p e g e m a N f t z t e s r e d t z t e s r e 14 Maßzeichnung 14 Dimensional drawing ...

Page 29: ... 29 2 9 4 0 D 1 0 2 0 6 1 K S 1 0 2 0 6 1 G J e m a N D t l l e t s r e e m a N r p e g e m a N f t z t e s r e d t z t e s r e 14 Maßzeichnung 14 Dimensional drawing ...

Page 30: ... 30 2 9 4 0 D 1 0 2 0 6 1 K S 1 0 2 0 6 1 G J e m a N D t l l e t s r e e m a N r p e g e m a N f t z t e s r e d t z t e s r e 14 Maßzeichnung 14 Dimensional drawing ...

Reviews: