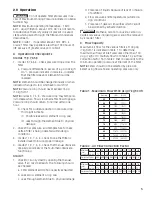
7
5. Grades 7, 6, 5, 3, 1 - Discard old elements and o-
rings.
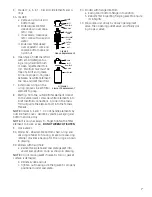
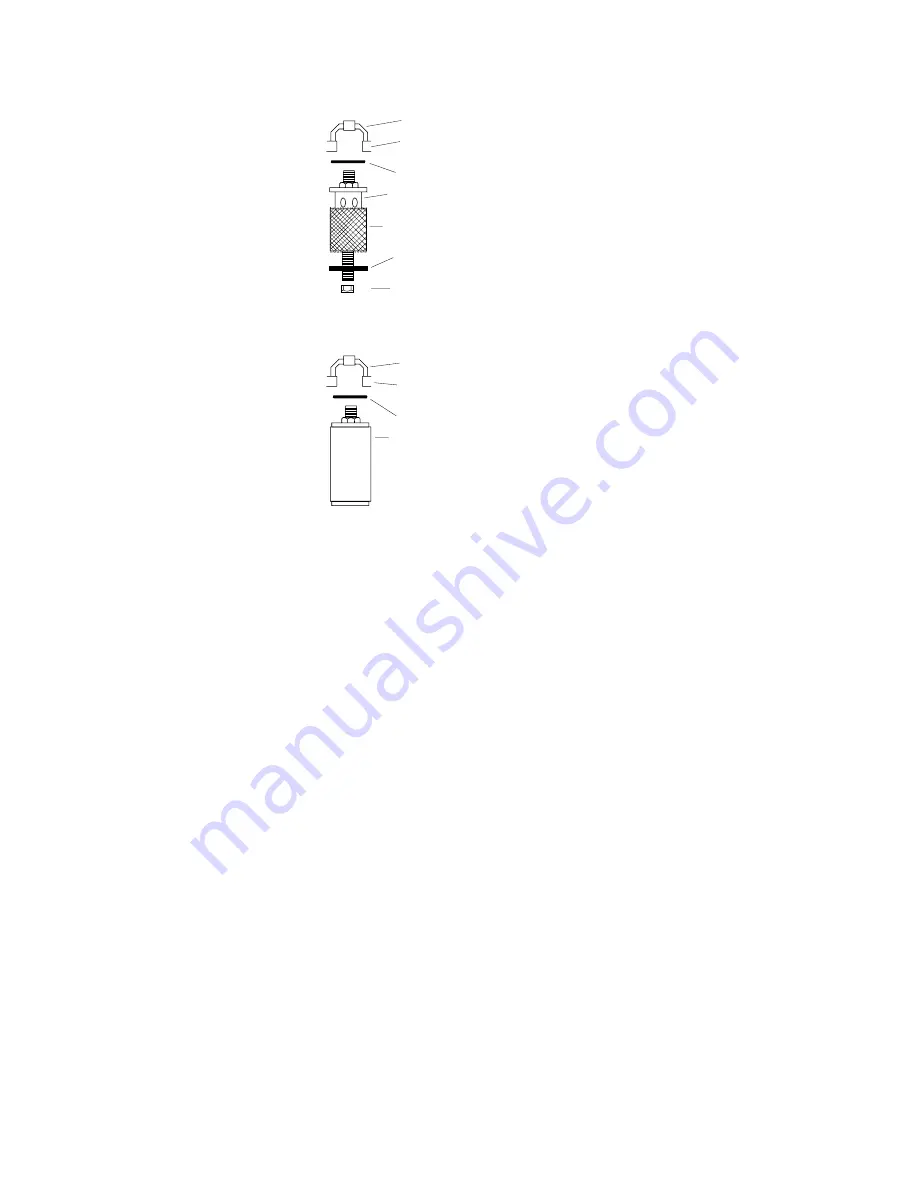
5A. Grade 9
a. Remove nylon nut and
bottom cap
b. Slide disposable filter
sleeve down over sepa
-
rator core.
c. If necessary, clean sepa
-
rator core with soap and
water.
d. Slide new filter sleeve
over separator core and
replace bottom cap and
nylon nut.
6. Clean face of inlet manifold
with a mild detergent us
-
ing a long-handled brush
or clean rag attached to a
rod. Manifold face must be
free of all dirt and grease
to insure proper o-ring seal
between new filter element
top cap and inlet manifold.
7. Install new o-rings in the
o-ring grooves in each filter
element top cap.
8. Starting from the outside (filter element closest
to the vessel wall), screw new filter elements into
inlet manifold connections. A cone in the mani
-
fold will guide the element bolt into the female
threads.
NOTE:
Grades 5, 3 and 1 - Do not handle elements by
outside foam cover. Handle by plastic packaging and
bottom end cap only.
NOTE:
It is only necessary to finger tighten the filter
element to insure a seal.
DO NOT WRENCH TIGHTEN
9. Close vessel
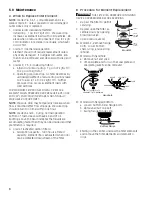
9A. Model 52 - Reassemble bottom shell, o-ring and
seal-ring retainer to housing. Make sure seal-ring
retainer provides a backup for the o-ring as shown
in drawing.
9B. Models with hand hole
a. Reinsert seal plate and seal plate gasket into
vessel and position on lip as shown in drawing.
NOTE:
Do not reuse gasket if gasket is torn or gasket
surface is damaged.
b. Reinstall yoke and nut.
c. Tighten nut making sure that gasket is properly
positioned under seal plate.
CONE
INLET
MANIFOLD
O-RING
SEPARATOR
CORE
REPLACEMENT
SLEEVE
BOTTOM
CAP
NUT
CONE
INLET
MANIFOLD
O-RING
CARTRIDGE
Grade 9 -
Sleeve Replacement
All Grades -
Element Replacement
9C. Models with flanged bottom
a. Swing blind bottom flange into position.
b. Rebolt after inspecting flange gasket to ensure
its integrity.
10. Pressurize unit slowly by slowly opening inlet
valve, then opening outlet valve, and finally clos
-
ing by-pass valve.

