background image


10 

English 

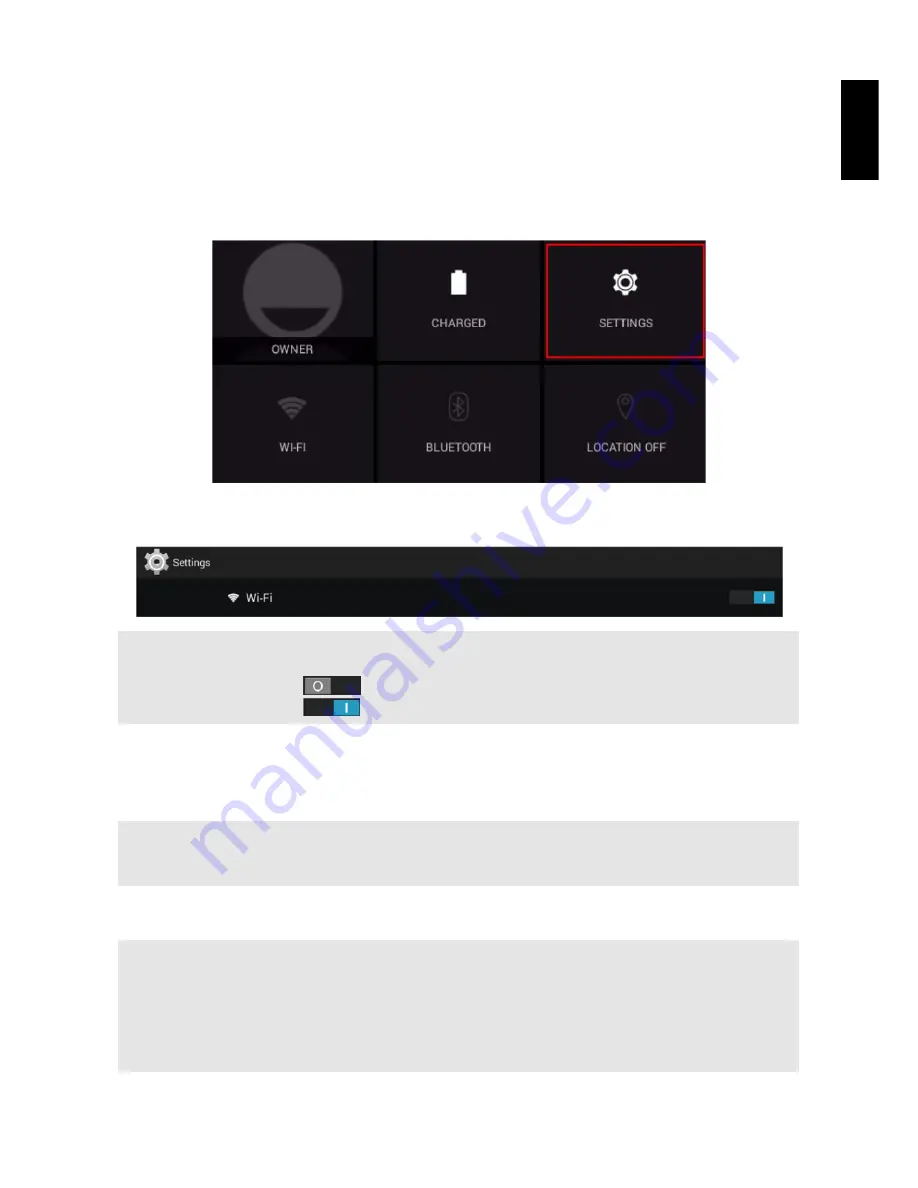
2.2  Connecting to the Wi-Fi Network 

A Wi-Fi connection makes it easy to connect to the Internet. Once you have successfully connected 
to a Wi-Fi network, the device will automatically connect to the network when you are within range. 

To configure the Wi-Fi connection, do the following: 

1.  Tap and drag the status bar downward to open the notification panel. 

2. On the 

Quick Settings

 screen, tap 

SETTINGS


3.  Turn on Wi-Fi. The device searches for available networks within range and displays the 

searched Access Point (AP) names on the right panel. 


NOTE: 

Tap the Wi-Fi switch button to turn Wi-Fi on or off. 

• 

The Wi-Fi icon showing 

  indicates Wi-Fi is turned off. 

• 

The Wi-Fi icon showing 

  indicates Wi-Fi is turned on. 


4.  Tap an access point name that you want to connect to. If the selected access point is protected 

by a password, the device will prompt for the password. 

5.  If prompted, enter the password to connect to the AP. 


NOTE: 

• 

The password entry is required only when connecting to the AP for the first time. 

• 

To make the Wi-Fi password visible while typing it, select the “Show password” checkbox. 


6. Tap 

Connect


NOTE: 

• 

Some public places offer free wireless internet access. This means no password is required to establish the 
connection. 

• 

For secured networks, you may need to enter several parameters to complete the settings. If you are not sure 
about the parameters, please contact your local Internet Service Provider (ISP). 

• 

This tablet PC keeps track and recognizes Wi-Fi networks that have been connected before. Once Wi-Fi is 
turned on and a known connection is detected, the device automatically connects to that network. 


Summary of Contents for SN1AT76

Page 1: ...HANNspree HANNSpad SN1AT76 HSG1316 User s Manual...

Page 2: ......

Page 3: ...and Charging the Battery 9 Connecting to the Wi Fi Network 10 Connecting PC and Data Transmission 11 Use Micro SD card 11 5 The Android Interface 12 Home Screen 12 Customizing the Home Screen Panels 1...

Page 4: ...es great importance to our environmental policy and firmly believe that we can better protect the health of the earth by properly disposing and recycling the industrial technological equipment that ha...

Page 5: ...hearing loss may occur if earphones or headphones are used at high volume for prolonged periods of time This device have been tested to comply with the Sound Pressure Level requirement laid down in th...

Page 6: ...er of the screen B The system automatically shuts down and immediately shuts down after a re start C The operating button does not respond D The product displays the red icon on the upper right corner...

Page 7: ...guarantee that this manual is free from any error or omission The Company assumes no reliability regarding the errors or omissions that might exist in the manual 3 For sustainable development The Comp...

Page 8: ...e illustrations in this document may appear differently from your model This Quick Start Guide and a Warranty card are also included If any item is damaged or missing contact your point of purchase fo...

Page 9: ...For video chatting or taking self portrait pictures About the Power key Power on Press and hold the key for 4 5 seconds until the device is turned on Power off Press and hold the key until the option...

Page 10: ...ng the supplied USB cable 5 Earphone Jack Connects to an earphone using a 3 5 mm audio jack 6 HDMI Port Output images using HDMI cable sold separately to an HDMI television or display device 7 TF Card...

Page 11: ...ging the battery the charging time may take up to 10 hours succeeding times may take up to 5 hours During charging the battery icon on the screen will scroll When charging is complete the battery icon...

Page 12: ...ned on 4 Tap an access point name that you want to connect to If the selected access point is protected by a password the device will prompt for the password 5 If prompted enter the password to connec...

Page 13: ...onnecting the device to a PC you will find two removable disks the front one is the built in memory disk the other one is the Micro SD card disk If there is no card plugged in the second disk cannot b...

Page 14: ...s on how to use the touch screen Item Description Status Bar Display notifications and system icons such as Wi Fi connection status battery power battery charging status current time and USB connectio...

Page 15: ...stored in the device Long press the touch screen the Wallpaper option menu will appear on the screen Then choose the desired option from the list 3 3 Managing Applications Add application shortcuts Lo...

Page 16: ...folder Simply drag one application icon over another application icon and release it A folder is automatically created 4 System Firmware Update Android devices automatically receive over the air OTA...

Page 17: ...xis and direction Sensor G Sensor Yes resolution 10 bits DC power port DC Jack in x1 Headphones 3 5mm x1 Microphone Built in USB 2 0 Micro USB 2 0 x1 OTG Supported USB K B Mouse USB flash disk battery...

Page 18: ...reset your device to the factory default settings for any reason please follow the process below WARNING Please be aware any information currently on the device will be permanently erased by following...

Reviews: