6
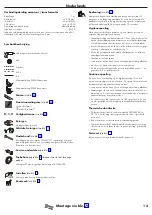
SafetyNotes
Gloves should be worn during installation to prevent crushing and cutting
injuries.
The hot and cold supplies must be of equal pressures.
The product may only be used for bathing, hygienic and body cleaning pur-
poses.
Children may only use the product unsupervised if they have been suitable
instructed and trained to use the product safely and to understand the risks of
improper operation.
Electricalconnection
The installation and test work must be performed by an authorized electrician
under consideration of DIN VDE 0100 part 701 / IEC 60364-7-701.
The current version of the applicable regulations from VDE, local authorities
and utility companies must be observed for electric installation work.
The entire power is supplied via a 240V/N/PE/50Hz AC connection.
The system must be protected via a leakage current protective device (RCD/
FI) with a measurement difference current of ≤ 30 mA.
The proper function of this fusing/protection must be checked at regular
intervals.
The ambient temperature must not be higher than 50ºC.
It must be ensured that the product can be disconnected from the mains, e.g.
via a an all-pin switch as per EN 60335-1, sect. 24.3
transformer
The voltage supply from the 6 V DC SELV must only be fed via the included
transformer type 19769620. The transformer must be installed safe from
outside contact outside the zones 0, 1 and 2 in a socket in the wall to be
provided by the customer. (see page 61)
The mains voltage of 100 - 240 V AC 50 - 60 Hz must be supplied via a
existing shutoff device (switch) as well as a ground fault protector (RCD / FI)
with a measured differential current of ≤ 30 mA.
The transformer type19769620 is only suited for the voltage supply of the
product 45110XXX / 45111XXX.
InstallationInstructions
• The pipes and the fixture must be installed, flushed and tested as per the applica-
ble standards. Installation to EN 1717
• Any work may only be carried out in a de-energized state.
• First, the basic set order no. 16180180 must be installed.
• Pull the connecting cable between fitting / transformer into the empty conduit by
means of a cable retractor (EN 20)
• Only standardized materials may be used for the installation.
• All components must remain accessible.
• After the installation, the output temperature of the fitting must be tested and set to
the temperate desired by the customer.
Adjustment
The mixer is automatically adjusted on to the local conditions (washbasin, bright-
ness, reflection) by the sensory mechanism. During adjustment, the fitting opens
automatically, and water escapes for approx. 10 seconds.
Normaloperation
The range of the detection area or the removal of the switch-on/off point from the
fittings depends on the ambient optical conditions (for example, the shape and
reflection of the washstand and the ambient light) as well as on the shape, the size,
the speed and the reflection of the object that was brought into the detection area.
The detection area of the fittings or the distance of the switch-on/off point from the
fittings is approx. 160 to 200 mm in normal operation.
The detection of dark (for example grey-black) objects by the fittings is inadequate
because of their low reflection. The range of the detection area or the distance
of the switch-on/off point can be smaller than 160 mm. The detection of bright or
reflecting objects by the fittings is very good as a result of their high reflectivity. The
range of the detection area or the distance of the switch-on/off point can be greater
than 200 mm. Strong light sources should not shine directly on the sensor window
of the fittings. Drops of water or condensed water on the sensor window of the fit-
tings can initiate unintended running of the water.
Rangesettingforinfraredproximityelectronics
It may be necessary to reduce the range of the infrared proximity electronics by
manual mode switching when the fittings are connected to very small or highly
reflecting washstands. The following two modes can be selected:
• "Maximum range" (factory setting)
• "Reduced range" (maximum range reduced by approx. 50 mm)
The LED behind the sensor window signals which mode the fittings are currently in:
• Short blinking when the fittings are closed = "reduced range"
• No blinking when the fittings are closed = "maximum range"
Perform the following steps to change from "maximum" to "reduced" range or vice
versa:
• Interrupt voltage supply of the fittings for approx. 10 s (disconnect electrical plug
connection between fittings and battery housing or power pack and reconnect
after 10 s)
• The LED blinks to indicate the software version (e.g. blinking once = software
version 1)
• When the LED lights permanently (-> calibration of infrared proximity electronics),
cover sensor window completely with your hand or a white piece of paper
• Remove your hand or the paper after 20 s to 40 s
• The LED indicates the currently activated mode by blinking: Once = "maximum
range", twice = "reduced range"
• The LED then lights permanently until the calibration of the just set range of the
infrared proximity switch has completed
• When the LED goes off again, the fittings are ready for operation
TechnicalData
Thismixerseries-producedwithEcoSmart
®
(flow limiter)
Operating pressure:
max. 1 MPa
Recommended operating pressure:
0,1 - 0,5 MPa
Test pressure:
1,6 MPa
(1 MPa = 10 bar = 147 PSI)
Hot water temperature:
max. 65°C
Recommended hot water temp.:
65°C
Thermal disinfection:
max. 70°C / 4 min
Follow-up time:
1 – 2 s
Automatic switching-off:
10 s
transformer
Input (IN):
100 – 240 V / 50 – 60 Hz 70 – 170 mA
Output (OUT):
6 V DC / 500 mA
Protection category:
IP X1
Serial number:
19769620 (see typeplate)
Dimensions:
(see page 60)
weight:
81 g
The transformer must not be installed in protection zones 0, 1 or 2.
The transformer must be installed safe from out side contact in a flush-mounted outlet
socket to be provided by the customer. This flush-mounted outlet socket is connected
to the fitting via an empty conduit EN 20.
English
Summary of Contents for AXOR Uno 45110000
Page 62: ...62 SW 17 mm SW 24 mm SW 4 mm 90 90 2 3 1 Montage ...
Page 63: ...63 5 7 SW 5 mm 90 SW 4 mm SW 4 mm 90 90 4 6 ...
Page 64: ...64 SW 5 mm 8 Nm SW 4 mm SW 4 mm 90 90 8 9 10 ...
Page 65: ...65 12 12 13 SW 24 mm 1 mm 1 mm 15 SW 3 mm 14 11 ...
Page 66: ...66 16 17 12 30 M4x30 30 40 M4x45 18 19 20 SW 3 mm 4 Nm SW 3 mm 1 2 ...
Page 68: ...68 SW 5 mm 31 SW 4 mm 5 Nm 32 30 28 29 27 2 1 ...
Page 69: ...69 90 34 SW 4 mm 33 35 90 36 ...
Page 70: ...70 0 1 Nm 37 38 39 40 SW 3 mm ca 30 sec 41 X X 11 1 2 mm 1 2 Justierung ...
Page 71: ...71 1 ca 10 sec ca 60 sec 2 3 10 20 mm Bedienung ...
Page 72: ...72 4 5 2 3 SW 4 mm 1 SW 4 mm 90 90 Wartung ...
Page 74: ...74 12 13 11 SW 4 mm A B 90 90 ...
Page 75: ...75 H C D E SW 3 mm SW 3 mm 6 Nm G F 1 2 ...
Page 78: ...78 ...
Page 79: ...79 ...


