background image

2

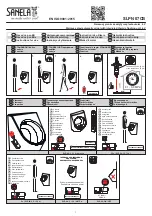
1. Sprache einstellen

Bei  der  ersten  Inbetriebnahme  des  Whirlpools 

muss  zunächst  die  Benutzersprache  einge-

stellt werden. Es stehen die Sprachen deutsch, 

englisch, italienisch, spanisch, französisch oder 

holländisch zur Verfügung. 

Nach dem Einschalten des Poolmasters mit 

Taste 5


erscheint im Display das Menü Programme

 (A)

Drücken Sie 

1 x

 die 

Taste 3


(A)

 und anschließend 

1 x

 die 

Taste 2 (B)

. Mit den 

Tasten 1

 und 

2

 läßt 

sich nun die Sprache auswählen 

(C)

.

Durch  Betätigen  der 

Taste  4

  und  anschließen-

dem  Ausschalten  des  Bedienelemtes  mit 

Taste 5

 wird die gewünschte Benutzersprache 

abgespeichert.

2. Steuerung neu konfigurieren

Bei Austausch einer der Komponenten, Steuerung 

oder Poolmaster, müssen diese neu aufeinander 

abgestimmt  werden  (nur  im  abgesicherten 

Modus möglich).

In den abgesicherten Modus wechseln


Nach  dem  Einschalten  des  Poolmasters 

mit 

Taste  5

  erscheint  im  Display  das  Menü 

Programme 

(A)

.  

  ‚Einstellung‘  in  Menüebelne  1  mit 

Taste  3/4


aufrufen 

(B)

.

  Mit 

Taste 2

 ‚Einst.‘ 

(B)

 auswählen und mit 

Taste 

4

 zu ‚System‘ 

(D)

 wechseln. ‚Einst.‘ 

(D)

 mit 

Taste 

2

 auswählen und mit 

Taste 1/2

 den Pincode auf 

1 setzen, mit 

Taste 3

 den Pincode bestätigen 

(E)

.

- mit 

Taste  3/4

  zu  Display-Anzeige 

(F)


wechseln

- die  Versorgungsspannung  am  Whirlpool  für 

min. 5 sec. ausschalten

- Versorgungsspannung einschalten

- ‚Init LT‘ mit 

Taste 1

 am Poolmaster bestätigen

- warten bis die Konfiguration abgeschlossen ist 

(LTF 0 wechselt nach LTF 1). Dieser Vorgang 

kann bis zu einer Minute dauern.

Zurück zu Menüebene 1 wechseln

Mit 

Taste 3/4

 das leere Menüfenster 

(G)

 aufrufen 

und mit 

Taste 1

 ‚Ende‘ auswählen.

1. Language setting

During the initial start-up of the whirlpool, the user 

language must be first set.

Either German, English, Italien, Spansih, French 

or Dutch language can be selected.

Swiching on the control element by pressing 

but-

ton 5

, the Program selection 

(A)

 appears in the 

display. Press 

1 time


button 3

 (A) and after 

1 time


button 2

 (B). The language can be selected now 

with 

buttons 1

 and 

2 (C)

.

The desired user language is saved by pressing 

button 4

 and then switching off the control ele-

ment with 

button 5

.

2. Reconfigure the control

If a control or Poolmaster component is replaced, 

they  have  to  be  readjusted  to  each  other 

(possible only in secured mode).

Procedure

Changing to the secured mode


Swiching on the control element by pressing 

button 5

, the Program selection 

(A)

 appears in 

the display.

  Call up ‚Settings’ in menu level 1 by pressing 

button 3/4

 (B).

  Press 

button 2

 to select ‚Settings’ 

(B)

 and press 

button 4

 to change to ‚System’ 

(D)

. Press 

button 

2

 to select ‚Settings’ 

(D)

 and press 

button 1/2


to set the pin code to 1; confirm the pin code 

by pressing 

button 3 (E)

.

- Press 

button 3/4

 to change to the display 

(F)

- Switch off the supply voltage on the whirlpool 

for at least 5 seconds

- Switch on the supply voltage

- Confirm  ‚Init  LT‘  with 

button  1

  on  the 

Poolmaster

- Wait until the configuration is completed (LTF 

0 changes to LTF 1). This process can take up 

to one minute.

Returning to menu level 1

Press 

button 3/4

 to call up the empty menu window 

(G)

 and press 

button 1

 to select ‚End’.

Deutsch

English

Summary of Contents for Pharo Poolmaster V1 97307000

Page 1: ...Service Pharo Whirlpool Poolmaster V1 97307000 Poolmaster V2 97857000 ...

Page 2: ...einer Minute dauern Zurück zu Menüebene 1 wechseln Mit Taste 3 4 das leere Menüfenster G aufrufen und mit Taste 1 Ende auswählen 1 Language setting Duringtheinitialstart upofthewhirlpool theuser language must be first set Either German English Italien Spansih French or Dutch language can be selected Swiching on the control element by pressing but ton 5 the Program selection A appears in the displa...

Page 3: ...ng System Einst 10 Settings System Settings 10 Einstellung Pincode 1 10 Settings Pincode 1 10 Einstellung Funk Ch0 LTF 0 ACF 0 LTI 0 ACI 0 Init AC Init LT 10 Einstellung Ende 10 Settings Comm Ch0 LTF 0 ACF 0 LTI 0 ACI 0 Init AC Init CT 10 Settings End D E F G 10 Einstellung Sprache Deutsch 10 Settings Language English C ...

Page 4: ...itTaste3 4dasleereMenüfenster F aufrufen und mit Taste 1 Ende auswählen Whirlpool functions on off Swiching on the control element by pressing button 5 the Program selection A appears in the display Changing with button 3 4 to display picture B Press button 2 to select Settings and press button4tochangeto System C Pressbutton 2 to select Settings and press button 1 2 to set the pin code to 1 confi...

Page 5: ...rograms Choice 10 Settings Einst 10 Einstellung Einst B 10 Einstellung System Einst 10 Settings System Settings 10 Einstellung Pincode 1 10 Settings Pincode 1 10 Einstellung Ende 10 Settings End D E F C 10 Einstellung Luft Ein Aus 10 Settings Air On Off ...

Page 6: ...asto 1 per selezionare End 1 Définir la langue Lorsdelapremièremisenservice ilesttoutd abord nécessaire de définir la langue de l utilisateur Vousavezàvotredispositionl allemand l italien l espagnol le français ou le néerlandais Le programme menu A s affiche après la mise en marche avec la touche 5 Appuyer 1 x la touche 3 A et ensuite 1 x la touche 2 B Maintenant vous pouvez choisir la langue avec...

Page 7: ...ma Scelta 10 Paramèters Systeme Options 10 Regolaz Codice PIN 1 10 Parameters Pincode 1 10 Paramètres Comm Ch0 LTF 0 ACF 0 LTI 0 ACI 0 Init AC Init SY 10 Paramètres Fin 10 Regolaz Comm Ch0 LTF 0 ACF 0 LTI 0 ACI 0 Iniz AC Iniz CT 10 Regolaz Fine D E F G Italiano Français 0 Programma Scelta 0 Programme Choix A 2 1 3 4 5 ...

Page 8: ...ncipale livello Premere i tasti 3 4 per visualizzare il menù F e premere il tasto 1 per selezionare End Mise en route ou arrêt des fonctions Whirlpool Le programme menu A s affiche après la mise en marche avec la touche 5 On peut passer au programme B de la com mande avec la touche 3 4 Sélectionner Options B à l aide de la touche 2 et passer à Systeme à l aide de la touche 4 D Sélectionner Options...

Page 9: ... Sistema Scelta 10 Paramèters Systeme Options 10 Regolaz Codice PIN 1 10 Parameters Pincode 1 10 Paramètres Fin 10 Regolaz Fine Italiano Français 0 Programma Scelta 0 Programme Choix 2 1 3 4 5 A B D E F C 10 Regolaz Aria On Off 10 Parametres Air On Off ...

Page 10: ...queestéfinalizadalaconfiguración LTF0cambiaaLTF1 Esteprocedimientopuede durar hasta un minuto Volver al nivel de menú 1 Pulsar la tecla 3 4 para ir a la ventana de menú vacía G y seleccionar Fin con la tecla 1 Nederlands 1 Taal instellen Bij ingebruikname van de whirlpool moet de gebruiker de taal instellen Er staan 6 talen ingeprogrammeerd nederlands duits engels italiaans spaans en frans Om de k...

Page 11: ... Num PIN 1 10 Instellingen Pincode 1 10 Opciones Comm Ch0 LTF 0 ACF 0 LTI 0 ACI 0 Inic AC Inic CT 10 Opciones Fin 10 Instellingen Aud Ch0 LTF 0 ACF 0 LTI 0 ACI 0 Init AC Init CT 10 Instellingen Einde Español Nederlands 0 Programa Selecc 0 Programma Keuze 10 Opciones Idioma Espanol 10 Instellingen Taal Dutch C 2 1 3 4 5 ...

Page 12: ...luz de colores temporizador trade audio radio logo Volver al nivel de menú 1 Pulsar la tecla 3 4 para ir a la ventana de menú vacía F y seleccionar Fin con la tecla 1 Nederlands Whirlpool functies in of uitschakelen Om de keuze te bepalen drukt u op knop 5 Er verschijnt programma in het display Met de toets 3 4 overschakelen naar de weer gave B Met knop 2 Opties B kiezen en met knop 4 naar Systeem...

Page 13: ...s Sistema Opc 10 Instellingen Systeem Opties D E F 10 Opciones Num PIN 1 10 Instellingen Pincode 1 10 Opciones Fin 10 Instellingen Einde Español Nederlands 0 Programa Selecc 0 Programma Keuze C 2 1 3 4 5 10 Opciones Aire On Off 10 Instellingen Lucht Aan Uit ...

Page 14: ...ać aż zakończy się konfiguracja LTF 0 zmienia się na LTF 1 Może to potrwać do 1 min Powrót do płaszczyzny menu 1 Przyciskiem 3 4 wybrać puste okno menu G i przyciskiem 1 przejść na End koniec Dansk 1 Indstil sprog Nårwhirlpoolentagesibrugførstegang indstilles først brugersproget Der kan vælges imellem tysk engelsk italiensk spansk fransk eller hollandsk Ved at taste 5 aktiveres Poolmasteren progra...

Page 15: ...tem Einst 7 Settings System Settings 7 Einstellung Pincode 1 7 Settings Pincode 1 7 Einstellung Funk Ch0 LTF 0 ACF 0 LTI 0 ACI 0 Init AC Init LT 7 Einstellung Ende 7 Settings Comm Ch0 LTF 0 ACF 0 LTI 0 ACI 0 Init AC Init CT 7 Settings End D E F G 7 Einstellung Sprache Deutsch 7 Settings Language English C 2 1 3 4 5 ...

Page 16: ...ie Strefy Superwhirl Halogen Kolorowe światło Zegar Trade Audio Funk Logo Powrót do płaszczyzny menu 1 Przyciskiem 3 4 wybrać puste okno menu F i przyciskiem 1 przejść na End koniec Tænd eller sluk for whirlpool funktionen Ved at taste 5 aktiveres Poolmasteren programvalget A vises i displayet Skift med tast 3 4 til dpsplay B Vælg Settings B med taste 2 og skift til System med taste 4 C Vælg Setti...

Page 17: ...Programs Choice 10 Settings Einst 10 Einstellung Einst B 10 Einstellung System Einst 10 Settings System Settings 10 Einstellung Pincode 1 10 Settings Pincode 1 10 Einstellung Ende 10 Settings End D E F C 10 Einstellung Luft Ein Aus 10 Settings Air On Off ...

Page 18: ...úroveň menu 1 Tlačítkem 3 4 vyvolat prázdné okénko menu G a tlačítkem 1 zvolit End Ðóññêèé 1 Âûáîð ÿçûêà Ïðè ïåðâîì ââîäå â ýêñïëóàòàöèþ ãèäðîìàññàæíîé âàííû íåîáõîäèìî ñíà àëà óñòàíîâèòüÿçûêïîëüçîâàòåëÿ Íàâûáîðèìåþòñÿ íåìåöêèé èòàëüÿíñêèé èñïàíñêèé ôðàíöóçñêèé èëè ãîëëàíäñêèé ÿçûêè Ïîñëå âêëþ åíèÿ Poolmaster ïðè ïîìîùè êíîïêè 5 íà äèñïëåå ïîÿâëÿåòñÿ ìåíþ Programme À Íàæìèòå 1 ðàç êíîïêó 3 À è çàò...

Page 19: ...tem Einst 7 Settings System Settings 7 Einstellung Pincode 1 7 Settings Pincode 1 7 Einstellung Funk Ch0 LTF 0 ACF 0 LTI 0 ACI 0 Init AC Init LT 7 Einstellung Ende 7 Settings Comm Ch0 LTF 0 ACF 0 LTI 0 ACI 0 Init AC Init CT 7 Settings End D E F G 7 Einstellung Sprache Deutsch 7 Settings Language English C 2 1 3 4 5 ...

Page 20: ...hod zpátky na úroveň menu 1 Tlačítkem 3 4 vyvolat prázdné okénko menu F a tlačítkem 1 zvolit End Ðóññêèé Âêëþ èòü èëè âûêëþ èòü ôóíêöèè ãèäðîìàññàæíîé âàííû Ïîñëå âêëþ åíèÿ Poolmaster ïðè ïîìîùè êíîïêè 5 íà äèñïëåå ïîÿâëÿåòñÿ ìåíþ Programme À Êíîïêîé 3 4 ïîìåíÿòü óêàçàíèÿ äèñïëåÿ Â Âûáðàòü êíîïêîé 2 Settings óñòàíîâêè B è ïåðåéòè êíîïêîé 4 ê System ñèñòåìà C Âûáðàòü êíîïêîé 2 Settings óñòàíîâêè è ...

Page 21: ...Programs Choice 10 Settings Einst 10 Einstellung Einst B 10 Einstellung System Einst 10 Settings System Settings 10 Einstellung Pincode 1 10 Settings Pincode 1 10 Einstellung Ende 10 Settings End D E F C 10 Einstellung Luft Ein Aus 10 Settings Air On Off ...

Page 22: ...22 ...

Page 23: ...23 ...

Page 24: ...24 04 07 9 05437 01 Hansgrohe Postfach 1145 D 77761 Schiltach Telefon 49 0 78 36 51 1282 Telefax 49 0 7836 511440 E Mail info hansgrohe com Internet www hansgrohe com ...

Reviews: