Hansa C27EU O&M Manual
– OM-023 Revision A 16/10/19
© Hansa Chippers 2019
8
Run the chipper in an enclosed area
Exhaust fumes contain carbon monoxide which is poisonous, colourless, odourless, and tasteless
Operate the chipper wearing loose clothing and untied long hair
Stand at a higher level than the base of the chipper when feeding material into it
Feed flax and cabbage tree leaves into the machine
These stringy materials can wrap around the rotor shaft and work their way into the bearing.
If any stringy material becomes wrapped around the rotor shaft, remove it before it works itself into the bearing.
Process old materials such as dried wooden branches
They get very hard and springy when dried out
They are more awkward to handle
The knives dull much quicker
Feed short, stubby pieces of wood into the chipper
They bounce and spin in the inlet chute
Feed short stubby pieces together with longer pieces
Feed branches that are too large (max 160 mm branch diameter)
The chipper engine will stall, which could result in damage to the engine or drive belts
Put soil, sand, grit, stones or pieces of metal into the chipper
This will damage the sharp edge of the cutting knives and can rebound and injure the operator
Put root balls and dead wood into the chipper
This dulls the knives quickly
Overload the chipper
If the cutting rotor is slowing down, feed the material in slower
Transport the chipper while the engine is running
Tamper with the engine governor settings on the chipper
The governor controls the maximum safe operating speed and protects the engine and all moving parts from
damage caused by overspeed
Operate the chipper with blunt knives
This causes excessive vibration which may result in damage to the chipper
Remove any guards on the chipper unless the engine is turned off and the cutting rotor has come to a complete standstill
Put hands or any other part of the body or clothing:
Inside the feed chute past the rubber flap
Inside or near the opening of the discharge chute
Near any moving part
Use the feed control bar as a handle to manoeuvre the machine
Starting procedure
Before proceeding, ensure the ‘safe
setup proced
ure’ has been followed on page 6
of this manual.
DO NOT:
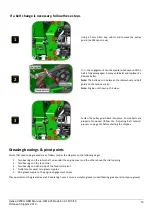
Ensure the rotor is disengaged by winding the
engagement handle in the counter clock-wise direction
until the handle comes to a stop (located next to the
control panel).
1


