background image


Hansa C4 O&M Manual - OM-005 Revision F 20/06/2019 


© Hansa Chippers 2019 

10 

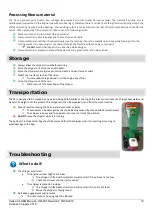
Processing fibrous material 

The  C4  can  process  palm  fronds,  flax,  cabbage  tree  leaves  and  other  similar  fibrous  material.  The  machine

s  cutting  disk  is 

cantilevered (supported on the engine side with two bearings), therefore there is no risk of anything fibrous wrapping around the 
shaft and working its way into the bearings. The resulting output is not as consistent as that of branch material due to the fibrous 
nature. When processing fibrous material, take note of the following points: 


Blades must be sharp to process fibrous material 


Fibrous material is best introduced to the machine as a bundle 


Fibrous material should be introduced slowly into the machine. Tease the material in and out while feeding it into the 
cutting mechanism, ensuring it is not drawn through the machine without being cut properly 


Do NOT 

extend hands past the rubber flap while doing so 


Fibrous material is processed more effectively when it is green rather than when dried 

Storage


Always allow the chipper to cool before storing 


Store the chipper out of the reach of children  


Store the chipper where fuel vapor will not reach an open flame or spark 


Switch the fuel lever to the off position 


For extended storage periods, run the engine dry of fuel 


Store the chipper out of the rain 


Water can rust the steel body of the chipper 

Transportation


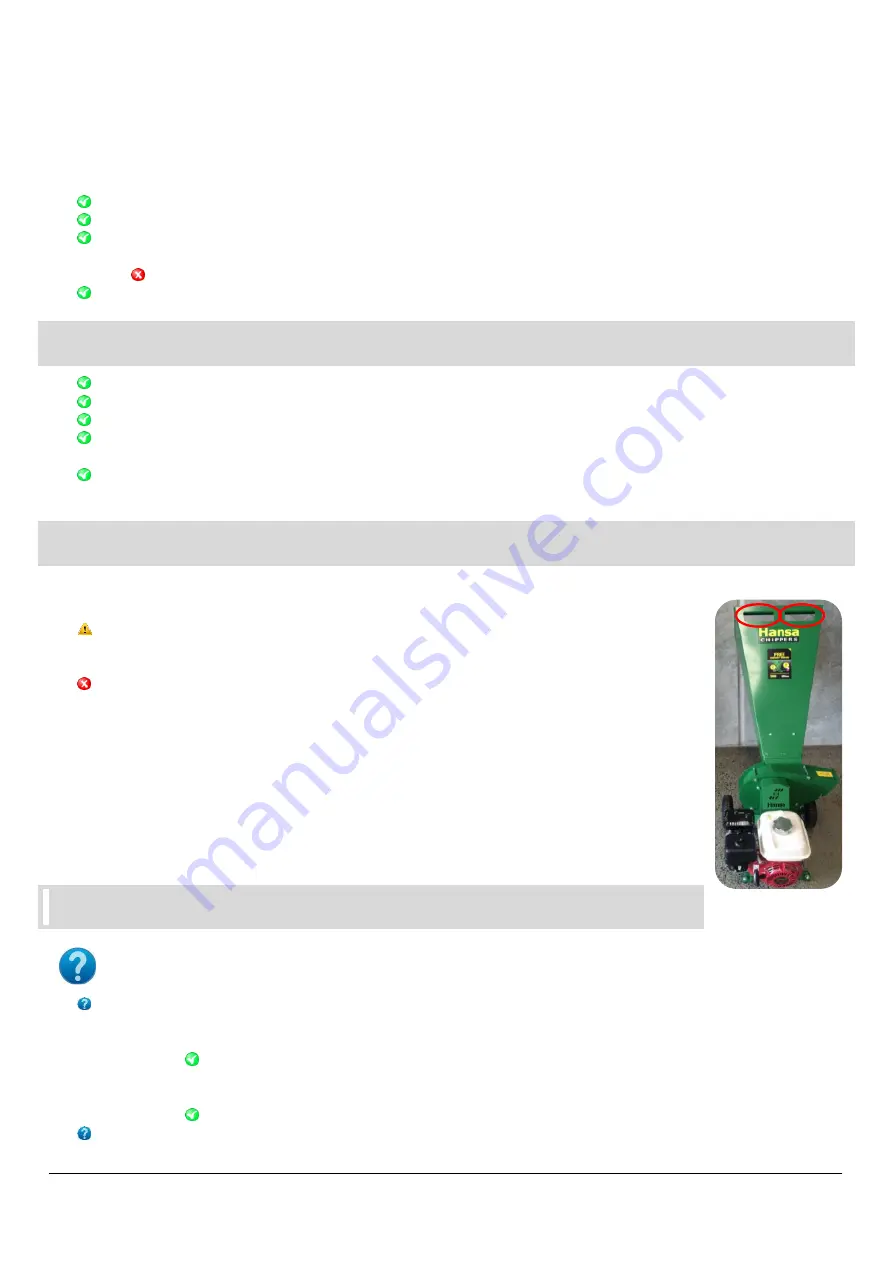
The C4 is designed to be moved by one person using both handles at the top of the inlet chute to lean the chipper backwards and 
transfer its weight onto the wheels. The chipper can then be wheeled to and from the work location.  


Take care when moving the C3e up and down stairs or kerbs 


The wheels can be damaged by the shock loading caused by uncontrolled ascent/descent 


The chipper is heavy and the operator can lose control of the machine 


Do NOT 

move the chipper while it is running 

The optional C4 chip catcher bag should be removed from the chipper when transporting or moving to 
avoid damage to the bag. 


Troubleshooting


What to do if: 


The chipper 

won’t start


The engine oil level might be too low  


The chipper is fitted with oil alert and will not start if the oil level is too low 


Check the oil level and top up if required 


The chipper is placed on a slope 


The chipper is fitted with oil alert and will not start if the oil is not level 


Move the chipper to level ground 


Belt drive engagement will not work  


The inlet chute or housing might be blocked 

Summary of Contents for C4

Page 1: ...hippers com au HANSA NEW ZEALAND 64 7 849 4749 info hansaproducts co nz www hansaproducts co nz HANSA AUSTRALIA 1800 426 722 info hansaproducts com au www hansaproducts com au Operation maintenance and safety manual All operators must fully read and understand this operator s manual before using the chipper Keep this manual for future reference ...

Page 2: ...S 5 OPERATION 6 SAFE SETUP PROCEDURE 6 SAFE OPERATING PROCEDURE 7 STARTING PROCEDURE 8 SHUTDOWN PROCEDURE 9 PETROL 9 PROCESSING FIBROUS MATERIAL 10 STORAGE 10 TRANSPORTATION 10 TROUBLESHOOTING 10 WHAT TO DO IF 10 MAINTENANCE 12 KNIFE RE SHARPENING AND KNIFE REPLACEMENT 12 REMOVE THE KNIFE FOR SHARPENING 13 SHARPEN THE KNIVES 13 REINSTALL THE KNIVES 14 ENGINE SERVICING 16 ENGINE OIL 16 BELT TENSION...

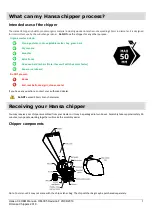
Page 3: ...y grass bark Dry manure Branches Palm fronds Dead and hard timbers Note these will dull the knives faster Paper or cardboard Do NOT process Bones Soil root balls sand grit stones metal If you have any questions contact your authorised dealer Do NOT exceed 50 mm branch diameter Receiving your Hansa chipper You may receive your chipper assembled from your dealer or it may be packaged in two boxes As...

Page 4: ...body Box 2 contains The inlet chute A fastener pack containing parts required for assembly Documentation Hansa operations manual warranty card and Honda motor manual CAUTION The chipper body weighs 53 kg it is recommended to cut the box open rather than lifting the body out Contents in box 1 Chipper body Box 1 Box 2 All the C4 parts in two separate boxes Contents in box 2 Inlet chute Documentation...

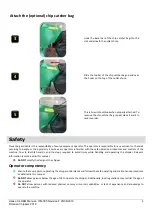
Page 5: ...ng line up with the holes on the back of the inlet chute Line up the holes and insert the bolts item no 1 heavy washers item no 2 spring washers item no 3 and nuts item no 4 Ensure that the heavy washer is touching the chipper body top and the spring washer is touching the nut bottom Item no Fastener pack contents in box 2 1 Two bolts to attach the inlet chute 2 Two heavy washers to attach the inl...

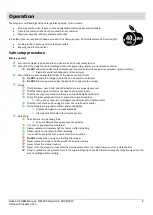
Page 6: ... to people or their property Ensure every operator is familiar with the safe operation procedures and controls of the machine how to identify hazards and the steps required to avoid injury while handling and operating the chipper Relevant information is contained in this manual Do NOT modify the design of the chipper Operator competency Ensure that every person operating the chipper understands an...

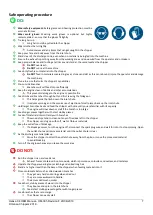
Page 7: ... Skin pinching and or abrasions Ensure that the belt guard is in place and keep away from the belt Cutting rotor and knives Pinching crushing cutting severing Keep your face and body out of the inlet chute Do not extend hands arms past the rubber flap Use a stick to push materials into the inlet chute Do NOT push the stick beyond the rubber flap Sound Damage to hearing Always wear hearing protecti...

Page 8: ...16 to operate the chipper Check That all screws nuts bolts and other fasteners are properly secured That fuel and engine oil levels are above the minimum levels That the fuel cap is secured and there is no fuel leaking from the tank That all chipper components are in place and in good condition If any parts are worn or damaged contact Hansa for replacements That the inlet chute and housing are cle...

Page 9: ...es spinning and the occurrence of ejection of small pieces back up the inlet chute Hold larger branches back and feed the chipper with care until you are familiar with its capacity The engine will slow down or stall if the branch is too large Feed longer pieces together with short stubby pieces Feed soft materials intermittently with branches The wood chips tend to clean out any soft residue left ...

Page 10: ...speed Operate the chipper with blunt knives This causes excessive vibration which may result in damage to the chipper Move or tilt the machine while it is running Remove the catcher bag while the machine is running Touch any guards or stick hands between guards while the machine is on or connected to a power supply Put hands or any other part of the body or clothing Inside the feed chute past the ...

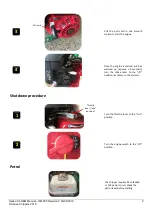
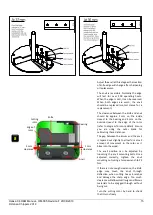
Page 11: ... before starting Pull the pull cord in one smooth motion to start the engine Once the engine is started and has warmed up approx 10 seconds turn the choke lever to the off position as shown in the picture Shutdown procedure Turn the throttle lever to the min position Turn the engine switch to the off position 3 4 1 2 Throttle lever min position Pull cord ...

Page 12: ...en Store the chipper where fuel vapor will not reach an open flame or spark Switch the fuel lever to the off position For extended storage periods run the engine dry of fuel Store the chipper out of the rain Water can rust the steel body of the chipper Transportation The C4 is designed to be moved by one person using both handles at the top of the inlet chute to lean the chipper backwards and tran...

Page 13: ...nd or anvil might be blunt Inspect and sharpen or replace knives and or anvil as required Ensure correct clearances between knives and anvil The material is ejected in long strips The knives and or anvil might be blunt Inspect and sharpen or replace knives and or anvil as required Ensure correct clearances between knives and anvil The chipper is clogged Turn the engine off disconnect the spark plu...

Page 14: ...sion section Grease the bearing as above be careful not to over grease Check sharpness of knives Check condition of the belt guard A damaged guard must be replaced by an identical or equivalent guard immediately It is recommended to contact Hansa for a replacement guard Knife re sharpening and knife replacement How do I know that the knives need re sharpening Chipper loses its self feeding action ...

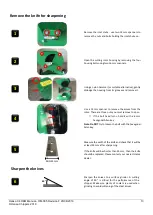
Page 15: ...ives from the rotor There are three nuts you must remove to do so If the bolt head turns hold it with a 6 mm hexagonal Allen key Note Do NOT try to loosen the bolt with the hexagonal Allen key Measure the width of the knife and check that it will be at least 35 mm after sharpening If the knife will be shorter than 35 mm then the knife should be replaced Please contact your nearest Hansa dealer Sha...

Page 16: ...ighten all three nuts as tight as possible by hand using a 13 mm spanner and 6 mm hexagonal Allen key Do NOT tighten the bolts with the hexagonal Allen key Note When blades are sharpened material is removed from the blades affecting the distribution of weight in the rotor The rotor must be balanced appropriately after blade sharpening as per the method outlined below 7 ...

Page 17: ...re detail Ensure you are using the outer blade for calibrating these distances The gap between the knives and the anvil is tapered out slightly to allow for a small amount of movement in the rotor as it bites into the wood The anvil position can be adjusted by loosening the anvil mounting bolts Once adjusted correctly tighten the anvil mounting nuts using a torque wrench to 22 Nm If there is not e...

Page 18: ...ain plug using a 10 mm spanner then let the oil drain into the container Ensure the machine does not lean more than 30 degrees from vertical while doing so Screw the oil outlet drain plug back in and fill the engine with 0 45 Litres of SAE 10W30 or SAE 10W40 through the oil filler cap dipstick hole the oil should reach the thread near the hole opening Using the dipstick check the oil to make sure ...

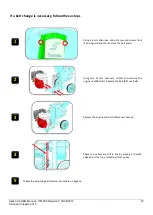
Page 19: ... underneath the machine until the required belt tension is achieved The belt should flex by 5 mm when firmly pressing on it Using two 16 mm spanners tighten the two clamping nuts back up near the bottom of the chipper Recheck belt tension Belt replacement If the belts in your chipper look similar to any of the following images or are clearly broken then they need to be replaced 1 2 3 Clamping nuts...

Page 20: ...ews from the belt guard and then remove the belt guard Using two 13 mm spanners unbolt and remove the engine 4 x M8 Nuts Replace the belt A21 vee belt Replace the engine and do the fasteners back up Check the pulleys are still in line by placing a straight edge across the top and bottom front pulley Follow the adjusting belt tension procedure on page 16 1 2 3 4 5 ...

Page 21: ...32 44 M12 18 mm 22 30 57 77 M16 24 mm 54 73 140 190 M20 30 mm 105 143 274 372 Specifications C4 General Length 900 mm Width 500 mm Height 1120 mm Weight 66 kg Motor Make model Honda GX160 Max Power 5 5 HP Cutting System Disc speed 3600 RPM Disc dimensions 260 x 6 mm Shaft diameter 24 mm Knives 1 Feed System Chipping capacity 50 mm Feed type Gravity fed self feeding Inlet chute opening 100 x 130 mm...

Page 22: ...019 Hansa Chippers 2019 20 Decals Decal Description Location General machine safety and inlet chute considerations Side of inlet chute Belt guard hazard Rotor Housing front next to the belt guard Outlet chute and deflector safety Outlet deflector ...

Page 23: ...anty is available to domestic non commercial and commercial customers excluding commercial customers in the business of plant equipment hire All HANSA products that have not complied with the Extended Warranty registration and maintenance requirements are entitled to the Non Registered warranty period set out below Any authorised HANSA dealer is further authorised to repair or replace any part whi...

Page 24: ...ou purchased your HANSA product Conditional Warranty This is a HANSA extended warranty period for products that are Purchased from an authorised HANSA Dealer Registered at the time of sale through the Hansa Chippers website www hansachippers com registration Serviced by a HANSA Dealer in accordance with the Hansa service schedule using genuine HANSA parts Meeting all other warranty requirements Wa...

Page 25: ... on operating procedures and techniques Safety Instruct owner operator on safety procedures Maintenance Explain the maintenance requirements and the importance of following the maintenance schedule to the owner operator Manual Emphasise the importance of reading and understanding the manual in full before initial operation of the chipper It is the retailers responsibility to ensure that this chipp...

Reviews: