Hansa C5 O&M Manual - OM-025 Revision A 13/02/2020
© Hansa Chippers 2020
4
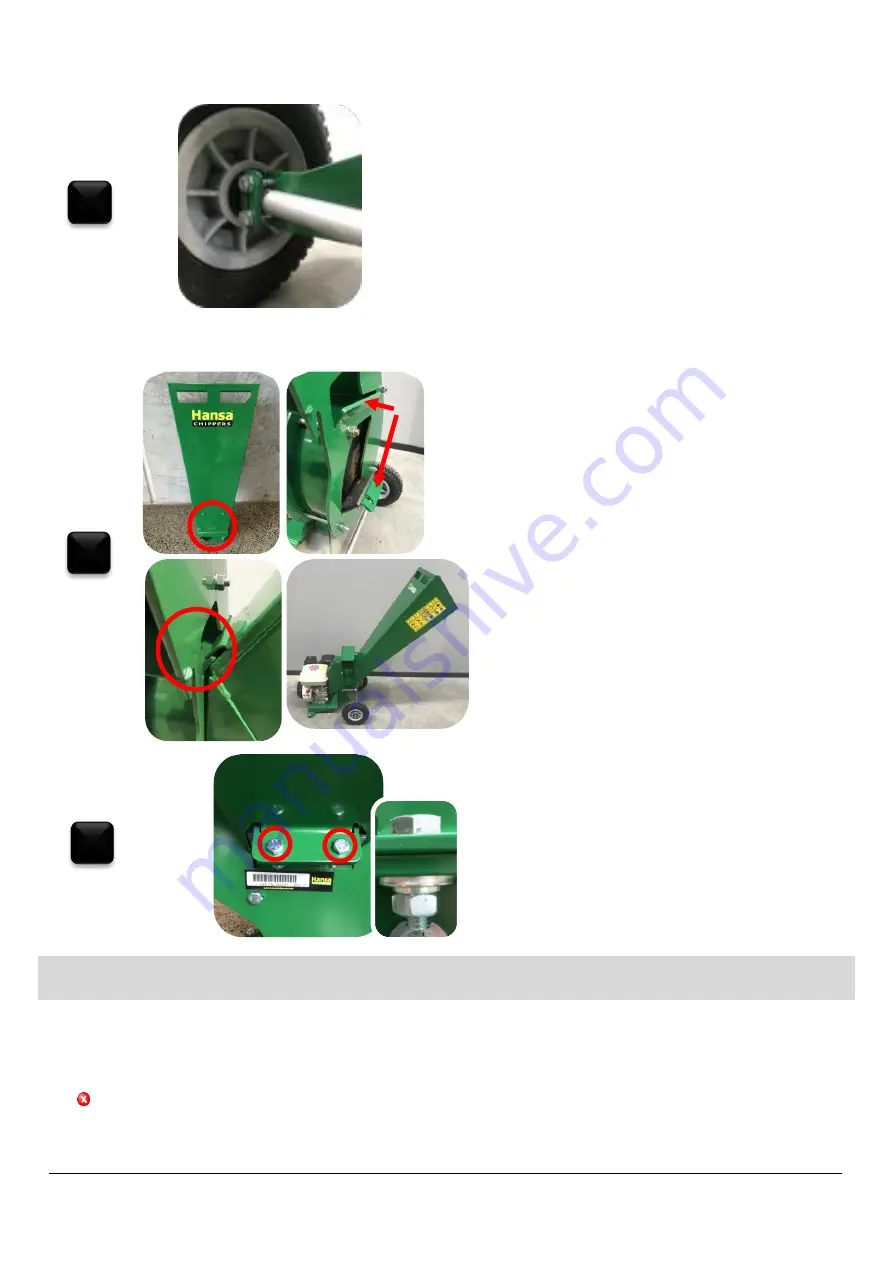
Place another bolt (item no. 1) through the top holes of the
clamping plate (item no. 3) and axle mount. Ensure there is a
washer (item no. 2) between the head of the bolt and the
clamping plate. Fasten a nyloc nut (item no 4) to the other end of
the bolt. Tighten all four bolts evenly using two 10mm spanners.
Do not overtighten, as this can cause the clamping plate to bend.
Check to make sure the axle is properly secured on both sides.
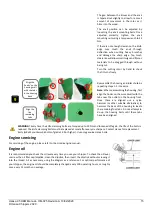
Fit the inlet chute
Fix the inlet chute
–
slide the tab at the base
of the inlet chute over the tab at the top of
the rotor housing. Adjust the inlet chute
until the holes at the back of the rotor
housing line up with the holes on the back of
the inlet chute.
Line up the holes and insert the bolts (item
no. 1), heavy washers (item no. 2), spring
washers (item no. 3), and nuts (item no. 4).
Ensure that the heavy washer is touching
the chipper body (top) and the spring
washer is touching the nut (bottom).
Safety
Preventing accidents is the responsibility of every equipment operator. The operator is responsible for any accidents or hazards
occurring to people or their property. Ensure every operator is familiar with the safe operation procedures and controls of the
machine, how to identify hazards, and the steps required to avoid injury while handling and operating the chipper. Relevant
information is contained in this manual.
Do NOT
modify the design of the chipper.
2
3
4


