background image

Care and maintenance

Page EN-22

Cleaning/changing the 
filter

 NOTICE

Risk of damage!
Improper handling of the 
appliance may result in dam-
age.

Only dry clean the fi lter (= 
no liquid).

Always use the correct fi l-
ter for the appliance, oth-
erwise the air purifi er may 
not function optimally.

Never operate the appli-
ance without fi lters or with 
damaged fi lters. Dust can 
penetrate the appliance 
and damage the motor.

When cleaning the fi lter 
with a vacuum cleaner, 
always keep the vacuum 
cleaner nozzle 5-10 mm 
away from the fi lter sur-
face.

It is recommended that 
the filter be cleaned about 
every two weeks and 

changed about every six 
months, but at the latest when 
the “Filter Warning” (12) indica-
tor lights up red.
If there is a lot of cigarette 
smoke in the environment in 
which the air purifier is placed, 
the filter should be cleaned 
every two to five days. It should 
be replaced if the odour of ciga-
rette smoke has settled in it.

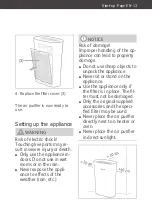
1. Disconnect the mains plug 

from the socket.

2. Remove the filter cover (3), as 

described in section “Cleaning 
the filter cover“ on page EN-21.

(18)

(4)

Summary of Contents for EU-KJ210G-C46

Page 1: ...Luftreiniger Gebrauchsanleitung EU KJ210G C46 Anleitung Version 1901 02684DE20200502 Bestell Nr 1260 6643 Nachdruck auch auszugsweise nicht gestattet ...

Page 2: ...chalten DE 17 Gebläsestärke einstel len und ändern DE 17 Timer Funktion aktivie ren und deaktivieren DE 18 Automodus aktivieren und deaktivieren DE 18 Schlummermodus ak tivieren und deaktivieren DE 19 Sicherungsverriege lung Kindersicherung aktivieren und deakti vieren DE 19 Pflege und Wartung DE 20 Gerät reinigen DE 20 Filterabdeckung reinigen DE 21 Filter reinigen wechseln DE 22 Fehlersuchtabell...

Page 3: ...en Sie es aus 2 Prüfen Sie ob die Lieferung vollständig ist 3 Kontrollieren Sie ob das Gerät Transportschäden aufweist 4 Sollte die Lieferung unvollstän dig sein oder das Gerät einen Transportschaden aufweisen nehmen Sie bitte Kontakt mit unserem Service auf siehe Service auf Seite DE 26 WARNUNG Gerät nicht in Betrieb neh men wenn es einen sicht baren Schaden aufweist ...

Page 4: ...st nicht für eine gewerbliche Nutzung oder Mehr fachnutzung z B Verwendung durch mehrere Parteien in einem Mehrfamilienhaus ausgelegt Verwenden Sie das Gerät aus schließlich wie in dieser Ge brauchsanleitung beschrieben Jede andere Verwendung gilt als nicht bestimmungsgemäß und kann zu Sachschäden oder sogar zu Personenschäden führen Der Hersteller übernimmt keine Haf tung für Schäden die durch ni...

Page 5: ... Tod führen Gerät nur in Innenräu men verwenden Nicht in Feuchträumen oder im Re gen betreiben Gerät niemals Witterungs einflüssen Regen etc aus setzen Gerät nicht in Betrieb neh men oder weiterbetreiben wenn es sichtbare Schäden auf weist z B das Netzkabel defekt ist Rauch entwickelt oder verbrannt riecht ungewohnte Geräusche von sich gibt In diesen Fällen Netz stecker aus der Steckdose ziehen und...

Page 6: ... Feuchträu men oder Räumen mit ho her Umgebungstemperatur Badezimmer Toilette Kü che benutzen Darauf achten dass kein Wasser in das Gerät ein dringt Gerät niemals in Wasser tauchen Netzstecker erst in die Steckdose stecken wenn alle Teile des Geräts voll kommen trocken sind Vor der Reinigung oder dem Wechsel des Filters Netzstecker aus der Steck dose ziehen Eingriffe und Reparatu ren am Gerät dürf...

Page 7: ... Mangel an Erfahrung und oder Wissen benutzt werden wenn sie beauf sichtigt oder bezüglich des sicheren Gebrauchs unter wiesen wurden und die da raus resultierenden Gefah ren verstanden haben Kinder dürfen nicht mit dem Gerät spielen und kei nen Zugriff auf das Gerät haben wenn sie unbeauf sichtigt sind Gerät während des Be triebs nicht unbeaufsich tigt lassen Reinigung und Wartung dürfen nicht vo...

Page 8: ... und auslass nicht blockieren Das Gerät kann überhitzen und in Brand geraten Durch Ultraschall Luftbe feuchter produzierter Nebel kann durch Luftein und oder auslass ins Gerät ge raten und dieses in Brand setzen Explosionsgefahr Keine entflammbaren Subs tanzen auf das Gerät sprü hen oder in der Nähe des Geräts versprühen Wasser oder chemische Rei niger wie Alkohol nicht di rekt auf das Gerät sprühe...

Page 9: ...r verwen den Den Luftreiniger nie direkt neben eine Heizung oder einen Ofen stellen Den Luftreiniger nie in di rektes Sonnenlicht stellen Den Filter niemals auf ei ner Heizung oder mit ei nem Haar oder Wäsche trockner etc trocknen Der Filter wird dadurch porös und kann beschädigt wer den Zum Waschen des Filters nicht die Waschmaschine oder den Geschirrspüler be nutzen Filter nur an der Raumluft tr...

Page 10: ...Geräteteile Seite DE 10 Geräteteile 1 2 3 4 5 7 6 12 13 17 16 15 14 11 10 9 8 ...

Page 11: ...Lichteinfall in der Umgebung und schaltet bei Dämmerung in den Schlummermodus 10 Luftqualitätsanzeige 11 Anzeige der Sicherungsverriegelung Kindersicherung 12 Filterwarnung Zeigt an wenn der Lufteinlassfilter 4 gereinigt gewechselt werden muss 13 ION Taster zum Zurücksetzen des Filters 14 Schlummermodus Taster 15 Automodus Taster 16 Timer Taster 17 Taster zur Stärkeregelung ...

Page 12: ...nstände ver wenden 1 Packen Sie das Gerät aus 2 Entfernen Sie vorsichtig alle Verpackungsteile Kunststoff profile Klebestreifen und Schaumpolster Filter einsetzen Es kann sein dass der Filter werkseitig noch nicht eingesetzt ist In diesem Fall müssen Sie zu nächst den Filter einsetzen 3 1 Nehmen Sie die Filterabde ckung 3 ab 4 2 Nehmen Sie den Lufteinlassfil ter 4 aus der Schutzhülle ...

Page 13: ... zum Tod führen Gerät nur in Innenräu men verwenden Nicht in Feuchträumen oder im Re gen betreiben Gerät niemals Witterungs einflüssen Regen etc aus setzen HINWEIS Beschädigungsgefahr Unsachgemäßer Umgang mit dem Gerät kann zu Sach schäden führen Beim Auspacken keine spitzen Gegenstände ver wenden Niemals sich auf das Gerät setzen oder stellen Gerät nur mit eingesetz tem Filter benutzen Der Filter ...

Page 14: ... Heizung oder einen Ofen stellen Den Luftreiniger nie in di rektes Sonnenlicht stellen 30 cm 30 cm 30 cm 1 Stellen Sie das Gerät so auf dass es zu beiden Seiten so wie zur Zimmerwand mindes tens 30 cm Abstand hat 2 Stecken Sie den Netzstecker in eine vorschriftsmäßig installier te Netzsteckdose ...

Page 15: ...zuletzt ausge wählten Gebläsestärke Lichtsensor Wenn Sie den Schlummermo dus aktiviert haben sorgt der Lichtsensor 9 dafür dass der Schlummermodus aktiviert wird d h dass die Anzeigen herunter gedimmt werden und die Geblä sestärke heruntergeregelt wird wenn es dunkel wird Wenn es wieder hell wird wird der Schlum mermodus automatisch wieder ausgeschaltet Luftqualitätsanzeige Der Partikelsensor 7 pr...

Page 16: ...ktiviertem Automodus wer den die Anzeigen herunterge dimmt und die Gebläsestärke auf den niedrigsten Wert herunterge regelt wenn der Lichtsensor 9 registriert dass sich die Umge bungshelligkeit verringert wie es z B bei Abenddämmerung der Fall ist Wenn die Umgebungshelligkeit wieder zunimmt z B am Mor gen werden die Anzeigen wie der auf normale Lichtstärke hoch gefahren und die Gebläsestärke wied ...

Page 17: ... Ausschalten des Gerä tes drücken Sie den den Ein Aus Taster 8 erneut Gebläsestärke einstel len und ändern Damit Sie die Gebläse stärke einstellen oder ändern können muss das Gerät eingeschaltet sein 1 Schalten Sie das Gerät ein wie im Abschnitt Gerät ein und ausschalten auf Seite DE 17 beschrieben 2 Drücken Sie den Taster 17 zur Stärkeregelung so oft bis die gewünschte Gebläsestärke ausgewählt is...

Page 18: ... Timer Funktion deaktiviert ist Automodus aktivieren und deaktivieren Damit Sie den Automodus aktivieren oder deaktivie ren können muss das Gerät eingeschaltet sein 1 Schalten Sie das Gerät ein wie im Abschnitt Gerät ein und ausschalten beschrieben sie he Gerät ein und ausschal ten auf Seite DE 17 2 Drücken Sie den Automo dus Taster 15 Ein Signalton ertönt die Anzei ge neben dem Taster leuchtet au...

Page 19: ...g akti vieren und deaktivieren Damit Sie die Sicherungs verriegelung aktivieren oder deaktivieren können muss das Gerät eingeschaltet sein 1 Schalten Sie das Gerät ein wie im Abschnitt Gerät ein und ausschalten auf Seite DE 17 beschrieben 2 Drücken Sie den Taster 17 zur Stärkeregelung und den Timer Taster 16 gleichzeitig etwa eine Sekunde lang Ein Signalton ertönt und die Anzeige Lock 11 blinkt zw...

Page 20: ...ngt Gerät niemals in Wasser tauchen Netzstecker erst in die Steckdose stecken wenn alle Teile des Geräts voll kommen trocken sind HINWEIS Beschädigungsgefahr Unsachgemäßes Reinigen des Geräts kann die Ober fläche angreifen Zum Reinigen des Geräts keine scharfen Reiniger Scheuermittel Verdün nung verwenden 1 Wischen Sie bei Bedarf das Gehäuse mit einem feuchten Tuch ab Dabei darf keine Flüssigkeit i...

Page 21: ...einigen 3 1 Nehmen Sie die Filterabde ckung 3 ab 3 2 Reinigen Sie die Filterabde ckung 3 entweder indem Sie sie mit der Fugen oder Möbel düse eines Staubsaugers ab saugen oder mit einer weichen Bürste 3 3 Setzen Sie die Filterabde ckung 3 wieder ein ...

Page 22: ...ann in das Gerät eindringen und den Motor beschädigen Beim Reinigen des Fil ters mit einem Staubsau ger die Staubsaugerdü se stets 5 10 mm von der Filteroberfläche entfernt halten Es wird empfohlen den Filter etwa alle zwei Wochen zu reinigen und etwa alle sechs Monate zu wechseln spätestens jedoch wenn die Anzeige Filterwar nung 12 rot leuchtet Falls in der Umgebung in der der Luftreiniger aufgest...

Page 23: ...einlassfilter fahren oder mit dem Staubsauger Wenn Sie den Lufteinlassfil ter 4 mit dem Staubsauger reinigen halten Sie die Düse des Staubsaugers stets etwa 5 10 mm von der Oberfläche des Lufteinlassfilters entfernt 5 Setzen Sie den Lufteinlassfil ter 4 oder ggf einen neuen Lufteinlassfilter ein wie im Abschnitt Filter einsetzen auf Seite DE 12 beschrieben 6 Setzen Sie die Filterabde ckung 3 wiede...

Page 24: ...n ausführen Problem Mögliche Ursache Lösungen Tipps Gerät arbeitet nicht Ein Aus Taster 8 nicht betätigt Gerät einschalten Netzstecker sitzt lose Festen Sitz des Netzsteckers in der Steckdose kontrollieren Steckdose defekt Gerät an einer anderen Steckdose ausprobieren Sicherungen bzw den Siche rungsautomaten kontrollieren Netzkabel defekt Netzkabel auf Beschädigungen kontrollieren Ggf unseren Serv...

Page 25: ...n noch instabil Ein paar Minuten nach dem Ein schalten stabilisiert sich der Sen sor Das Gerät ist an einer Stelle aufge stellt an der der Sensor die Luftqua lität nur unzuläng lich messen kann Stellen Sie das Gerät an einer an deren Stelle auf Starker Geruch im Raum z B Ziga rettengeruch ver ringert die Sensibi lität des Sensors Betreiben Sie das Gerät einen Tag lang auf höchster Leistungsstufe D...

Page 26: ...rät haben sich eine Störung nicht mithilfe der Fehlersuchtabelle beheben lässt Sie weiteres Zubehör bestellen möchten Ersatzteile Kunden in Deutschland Wenden Sie sich bitte an die Firma Hermes Fulfilment GmbH Tel 057 32 99 66 00 Montag Donnerstag 8 15Uhr Freitag 8 14 Uhr Kunden in Österreich Wenden Sie sich bitte an das Kundencenter oder die Produktberatung Ihres Versandhauses Bitte beachten Sie ...

Page 27: ...zu diesem Thema wenden Sie sich direkt an Ihren Händler Verpackung Unsere Verpackungen werden aus umwelt freundlichen wiederver wertbaren Materialien hergestellt Außenverpackung aus Pappe Formteile aus geschäumtem FCKW freiem Polystyrol PS Folien und Beutel aus Poly äthylen PE Spannbänder aus Polypropylen PP Sollten es Ihre räumlichen Ver hältnisse zulassen empfehlen wir Ihnen die Verpackung zu mi...

Page 28: ... Hersteller Gerätebezeichnung Luftreiniger Modell EU KJ210G C46 Schallleistungspegel in dB A 55 Leistung in W 22 Versorgungsspannung in V 50 60 Hz 220 240 Schutzklasse II Gewicht brutto in kg ca Gewicht netto in kg ca 7 5 Bestellnummer 1260 6643 ...

Page 29: ...Air purifier User manual EU KJ210G C46 Manual version 1901 02684EN20200502 Article no 1260 6643 Reproduction even of excerpts is not permit ted ...

Page 30: ...nd changing the fan speed EN 17 Activating and deacti vating the Timer function EN 17 Activating and deacti vating Auto mode EN 18 Activating and deacti vating Sleep mode EN 18 Activating and deac tivating Safety lock child safety lock EN 19 Care and maintenance EN 20 Cleaning the appliance EN 20 Cleaning the filter cover EN 21 Cleaning changing the filter EN 22 Troubleshooting table EN 24 Service...

Page 31: ...a ble place and unpack it 2 Check that the delivery is com plete 3 Check whether the appliance was damaged during transit 4 If the delivery is incomplete or the appliance has been dam aged during transit please contact our service department see page EN 26 WARNING Do not operate the appli ance if it has visible dam age ...

Page 32: ...ivate households only and is not designed for commer cial use or multiple use e g use by several families in an apart ment building Use the appliance exclusively as described in this user manual Any other use is deemed improp er and may result in damage to property or even personal injury The manufacturer accepts no liability for damage caused by improper use Explanation of terms The following sym...

Page 33: ...s a smell of burning makes unfamiliar noises In this case you should pull the mains plug out of the socket and have the ap pliance repaired see Ser vice on page EN 26 Connect the appliance only to an easily accessi ble socket so that you can quickly disconnect it from the mains in the event of a fault Keep the appliance the mains plug and the mains cable away from open flames and hot surfaces Do no...

Page 34: ...power plug from the socket before cleaning or changing the filter Changes and repairs to the appliance may be carried out only by authorised spe cialists such as our Service team see page EN 26 Un authorised repairs to the appliance can cause prop erty damage and personal injury and invalidate lia bility and warranty claims Never try to repair a defec tive or suspected defective appliance yourself ...

Page 35: ...ended Do not leave the appliance unsupervised while in oper ation Cleaning and maintenance must not be carried out by children unless they are su pervised Even with the filters the ap pliance exhaust air may still contain small quantities of dirt particles If breathed in by small children these can lead to allergic reactions Avoid placing in the imme diate vicinity of children Risks when handling t...

Page 36: ...ucked in air can penetrate the appliance and from there escape into the am bient air NOTICE Risk of damage Improper handling of the ap pliance can lead to property damage Do not use sharp objects to unpack the appliance Never sit on the appliance or place objects on it Use the appliance only if the filter is in place The fil ter must not be damaged Only the original supplied accessories and the spec...

Page 37: ...Safety Page EN 9 Do not use any abrasive cleaners scouring or thin ning agents to clean the appliance and accessories They could damage the surface of the appliance ...

Page 38: ...Appliance parts PageEN 10 Appliance parts 1 2 3 4 5 7 6 12 13 17 16 15 14 11 10 9 8 ...

Page 39: ...t sensor detects the incidence of light in the environment and switches to Sleep mode at dusk 10 Air quality indicator 11 Safety lock indicator child safety lock 12 Filter warning Indicates when the air inlet filter 4 needs to be cleaned replaced 13 ION button to reset filter 14 Sleep mode button 15 Auto mode button 16 Timer button 17 Fan speed button ...

Page 40: ...liance 1 Unpack the appliance 2 Carefully remove all parts of the packaging plastic profiles tape and foam padding Inserting the filter The filter may not already have been inserted in the factory If this is the case the filter must be inserted first 3 1 Remove the filter cover 3 4 2 Remove the air inlet filter 4 from the protective cover 4 3 Insert the air inlet filter 4 ...

Page 41: ...li ance to effects of the weather rain etc NOTICE Risk of damage Improper handling of the ap pliance can lead to property damage Do not use sharp objects to unpack the appliance Never sit or stand on the appliance Use the appliance only if the filter is in place The fil ter must not be damaged Only the original supplied accessories and the speci fied filter may be used Never place the air purifier dire...

Page 42: ...Start up PageEN 14 1 Set up the appliance so that there is a gap of at least 30 cm on either side and to the wall 2 Connect the mains plug to a properly installed power outlet ...

Page 43: ...lected fan speed Light sensor If you have activated Sleep mode the light sensor 9 will cause the Sleep mode to be ac tivated i e the indicators dim and the fan speed is at its lowest level when it gets dark When it gets light again the Sleep mode automatically switches off Air quality indicator The particle sensor 7 checks the air quality the result of this test is shown on the air quality indicat...

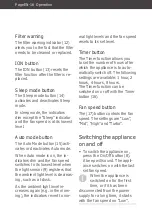
Page 44: ...g such as at dusk As the ambient light level in creases again e g in the morn ing the indicators revert to nor mal light levels and the fan speed resets to its set level Timer button The Timer function allows you to set the number of hours after which the appliance is to auto matically switch off The following settings are available 1 hour 2 hours 4 hours 8 hours The Timer function can be switched...

Page 45: ...ance on as described in Section Switch ing the appliance on and off on page EN 16 2 Press the Timer button 16 as often as required until the de sired time is selected Each time the button is pressed a beep will sound and one of the indicators next to the button will light up If you have set the Timer func tion to 8 hours and press the Timer button 16 again the Timer function will be deacti vated 3...

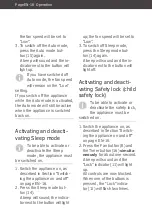
Page 46: ...appliance on and off on page EN 16 2 Press the Sleep mode but ton 14 A beep will sound the indica tor next to the button will light up the fan speed will be set to Low 3 To switch off Sleep mode press the Sleep mode but ton 14 again A beep will sound and the in dicator next to the button will light off Activating and deacti vating Safety lock child safety lock To be able to activate or deactivate ...

Page 47: ...Operation Page EN 19 3 To deactivate the safety lock press the Fan button 8 and the Timer button 16 again simultaneously for about one second A beep will sound and the Lock indicator 11 will light off ...

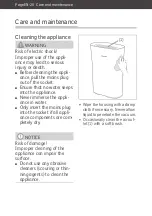
Page 48: ...eeps into the appliance Never immerse the appli ance in water Only insert the mains plug into the socket if all appli ance components are com pletely dry NOTICE Risk of damage Improper cleaning of the appliance can impair the surface Do not use any abrasive cleaners scouring or thin ning agents to clean the appliance 1 Wipe the housing with a damp cloth if necessary Never allow liquid to penetrate...

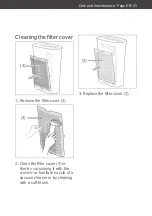
Page 49: ...1 Cleaning the filter cover 3 1 Remove the filter cover 3 3 2 Clean the filter cover 3 ei ther by vacuuming it with the crevice or furniture nozzle of a vacuum cleaner or by cleaning with a soft brush 3 3 Replace the filter cover 3 ...

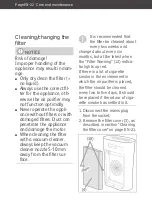
Page 50: ...th a vacuum cleaner always keep the vacuum cleaner nozzle 5 10 mm away from the filter sur face It is recommended that the filter be cleaned about every two weeks and changed about every six months but at the latest when the Filter Warning 12 indica tor lights up red If there is a lot of cigarette smoke in the environment in which the air purifier is placed the filter should be cleaned every two to...

Page 51: ...ntake filter 4 with the vacuum cleaner always keep the nozzle of the vacuum cleaner about 5 10 mm from the sur face of the air intake filter 5 Insert the air inlet filter 4 or if necessary a new air inlet filter as described in section Insert ing the filter on page EN 12 6 Replace the filter cover 3 7 Connect the mains plug to the socket and switch the appli ance on 8 Press the ION button 13 for a...

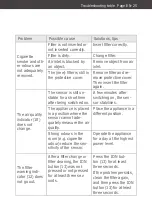
Page 52: ...wed to carry out this repair work Problem Possible cause Solutions tips Appliance is not working On Off button 8 not pressed Switch the appliance on Mains plug is loose Check that the mains plug is firmly inserted into the socket The socket is defective Try the appliance with a different socket Check fuses and or cir cuit breakers Mains cord is defective Check mains cord for damage Contact our Ser...

Page 53: ...short time after being switched on A few minutes after switching on the sen sor stabilises The appliance is placed in a position where the sensor cannot ade quately measure the air quality Place the appliance in a different position Strong odours in the room e g cigarette odour reduce the sen sitivity of the sensor Operate the appliance for a day at the highest power level The filter warning indi ...

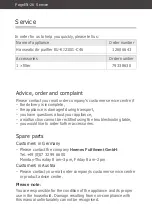
Page 54: ...about your appliance a malfunction cannot be rectified using the troubleshooting table you would like to order further accessories Spare parts Customers in Germany Please contact the company Hermes Fulfilment GmbH Tel 49 0 57 32 99 66 00 Monday Thursday 8 am 3 pm Friday 8 am 2 pm Customers in Austria Please contact your mail order company s customer service centre or product advice centre Please n...

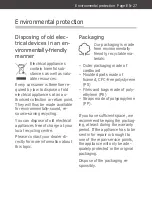
Page 55: ...nces free of charge at your local recycling centre Please contact your dealer di rectly for more information about this topic Packaging Our packaging is made from environmentally friendly recyclable ma terials Outer packaging made of cardboard Moulded parts made of foamed CFC free polystyrene PS Films and bags made of poly ethylene PE Straps made of polypropylene PP If you have sufficient space we...

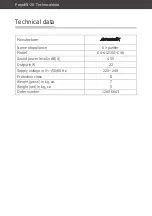
Page 56: ...ata Manufacturer Name of appliance Air purifier Model EU KJ210G C46 Sound power level in dB A 55 Output in W 22 Supply voltage in V 50 60 Hz 220 240 Protection class II Weight gross in kg ca Weight net in kg ca 7 5 Order number 1260 6643 ...

Reviews: