background image

Safety

Page EN-7

 Intended use

The purpose of this appliance is to

chill fresh food,

to store ordinary commercially 
available deep-frozen food,

to deep freeze fresh, room-temper-
ature foods

to make ice cubes and

to draw cold drinking water.

The appliance is designed for use in 
private households and is not designed 
for commercial use or multiple use (e.g.: 
use by several parties in a block of flats).
The appliance is not suitable for storing 
blood reserves, medical products, labo-
ratory samples, etc.
This refrigerator is not designed for use 
as a built-in appliance.
This refrigerator is designed for use 
at ambient temperatures of +10  °C to 
+43 °C.
Use the appliance exclusively as de-
scribed in this user manual. Any other 
use is deemed improper and may result 
in damage to property or even personal 
injury. The manufacturer accepts no li-
ability for damage caused by improper 
use.

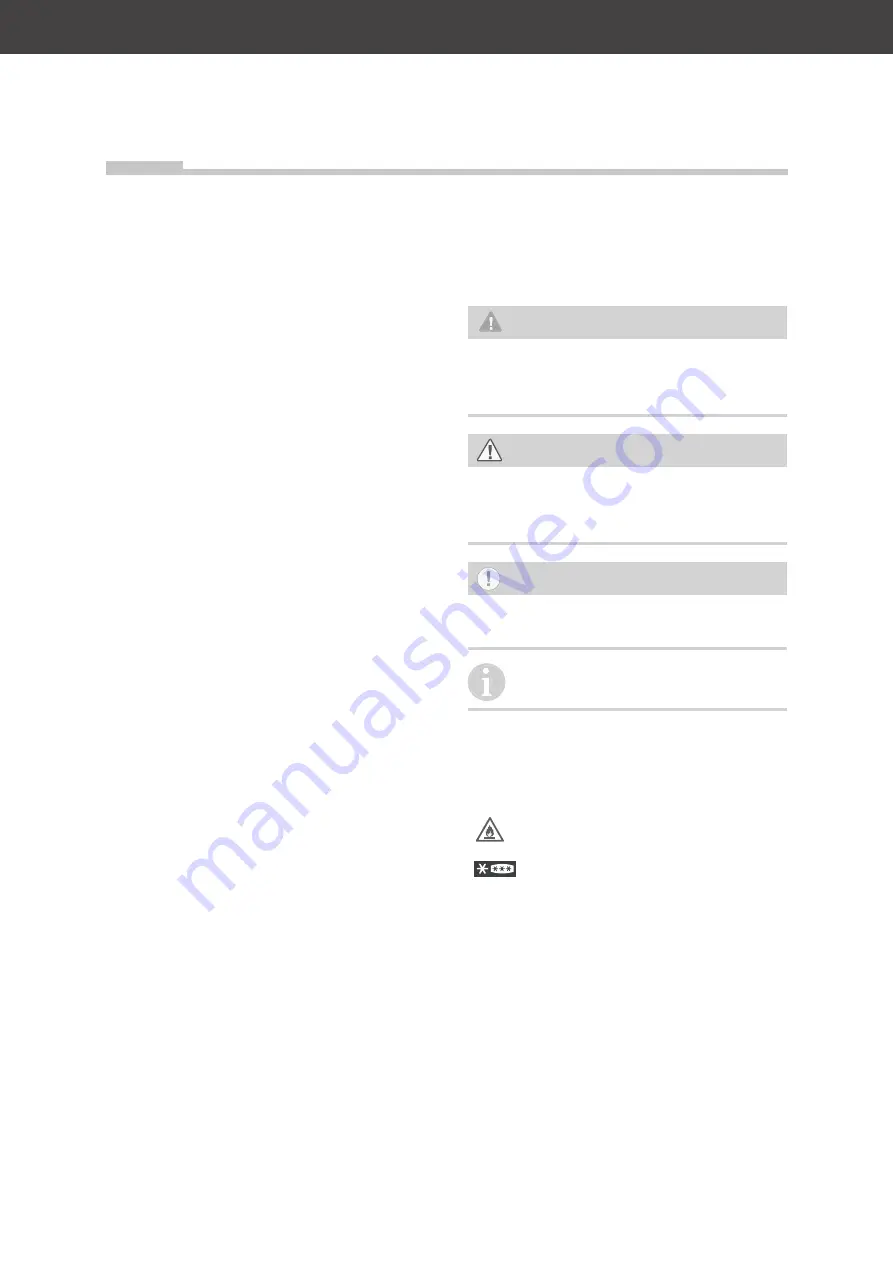
Explanation of terms

The following symbols can be found in 
this user manual.

 WARNING

This symbol indicates a hazard with a 
medium level of risk which, if not avoid-
ed, could result in death or serious injury.

 CAUTION

This symbol indicates a hazard with a 
low level of risk which, if not avoided, 
could result in minor or moderate injury. 

 NOTICE

This symbol warns against possible 
damage to property. 

This symbol refers to useful addi-
tional information.

Explanation of symbols

Warning: Fire hazard! Inflammable 
materials!
‘4 star’ symbol: Freezer at -18 °C or 
colder

Definitions

‘Food’ refers to foods, ingredients and drinks 
including wine and other things mainly intend-
ed for consumption, which require refrigera-
tion at certain temperatures.

‘Food to be frozen’ means fresh, room-temper-
ature food to be frozen throughout as quickly 
as possible – for best results ‘flash-frozen’.

 Safety

Summary of Contents for HCD17884EI

Page 1: ...Gefrier Kombination mit Wasserspender und Eisbereiter Gebrauchsanleitung Anleitung Version 2001 00998 DE 20200828 Bestell Nr 21354714 Nachdruck auch auszugswei se nicht gestattet HCD17884EI WATER DISP...

Page 2: ...til des Wasserspenders reinigen DE 32 Eisw rfelbereiter reinigen DE 33 Innenraumbeleuchtung DE 33 Inbetriebnahme DE 34 Bevor Sie das Ger t in Betrieb nehmen DE 34 Transportieren und Auspacken DE 34 Ge...

Page 3: ...iter 1 Eisw rfelschaufel 1 Messbecher 100 ml 1 Gebrauchsanleitung Lieferung kontrollieren 1 Transportieren Sie das Ger t an einen ge eigneten Standort und packen Sie es aus siehe Inbetriebnahme auf Se...

Page 4: ...hubladen 5 4 kleine Gefrierschubladen 6 2 gro e Gefrierschubladen 7 rechte Gefrierbereichst r 8 2 verstellbare Schraubf e 9 2 vordere Rollen 10 linke Gefrierbereichst r 11 Glasabdeckung ber den Obst G...

Page 5: ...nfeld Seite DE 5 Ger tet ren geschlossen 2 rechte K hlbereichst r 16 Bedienfeld und Display 7 rechte Gefrierbereichst r 10 linke Gefrierbereichst r 17 Wasserspender 15 linke K hlbereichst r WATER DISP...

Page 6: ...23 Taster MODE zum Einstellen der Funktionen 24 Taster FRZ TEMP zum Einstellen der Temperatur im Gefrierbereich 25 Taster REF TEMP zum Einstellen der Temperatur im K hlbereich 26 Anzeige SUPER REF leu...

Page 7: ...n zu Sachsch den oder sogar zu Personensch den f hren Der Hersteller bernimmt keine Haftung f r Sch den die durch nicht bestimmungsgem en Gebrauch entstanden sind Begriffserkl rung Folgende Signalbegr...

Page 8: ...rausschrauben ausschalten und unseren Service kontaktieren siehe Seite DE 41 Das Ger t entspricht der Schutzklas se I und darf nur an eine Steckdose mit ordnungsgem installiertem Schutzleiter angeschl...

Page 9: ...eparates Fernwirksystem zur Fern berwachung und steuerung ist unzul ssig Ortsver nderliche Mehrfachsteckdo sen oder Netzteile nicht an der R ck seite des Ger tes platzieren Risiken im Umgang mit K lte...

Page 10: ...NUNG Erstickungsgefahr Kinder k nnen sich in der Verpackungs folie verfangen oder Kleinteile verschlu cken und ersticken Kinder nicht mit der Verpackungsfolie spielen lassen Kinder daran hindern Klein...

Page 11: ...on Spei seeis oder Eisw rfeln geeignet Ein Zwei und Drei Sterne F cher sind nicht f r das Einfrieren von fri schen Lebensmitteln geeignet Wenn das K hl Gefrierger t l ngere Zeit leer steht das Ger t a...

Page 12: ...and und zu Sach sch den f hren Ger t nur an eine ordnungsgem installierte Schutzkontakt Steckdose anschlie en Der Anschluss an eine Steckdosenleis te oder eine Mehrfachsteckdose ist unzul ssig Ger t n...

Page 13: ...ten 5 Minuten warten Erst danach das Ger t erneut einschalten Einzelne Ger teteile nicht in der Sp l maschine waschen Sie sind nicht sp lmaschinenfest Ger t niemals mit einem Wasser strahl z B Hochdru...

Page 14: ...alten 1 Stecken Sie den Netzstecker in eine leicht zug ngliche Steckdose 220 240 V 50 Hz Wenn Sie eine Ger tet r ffnen ist der Ger teinnenraum beleuchtet Der Kompressor beginnt zu arbeiten das K ltemi...

Page 15: ...n Signalton ert nt und die Anzeige er scheint in der Anzeige Wenn 30 Sekunden lang kein Taster gedr ckt wird sperrt sich das Bedien feld automatisch Temperatur einstellen WARNUNG Gesundheitsgefahr Das...

Page 16: ...springt die Temperatur des Gefrierbe reichs wieder auf 16 C 5 Sobald die Anzeige dauerhaft erscheint ist die Temperatur eingestellt 6 Nach 30 Sekunden sperrt sich das Be dienfeld automatisch Die idea...

Page 17: ...ng 24 C f r den Gefrierbereich an Schnelles Einfrieren Schnelles K hlen Das Ger t bietet Ihnen die M glichkeit die tiefste K hl und oder Gefriertemperatur schnell und einfach ber Schnelles Einfrie ren...

Page 18: ...m Display die Anzeige SU PER FRZ 21 erlischt Schnelles Einfrieren ist ausgeschaltet Eine andere M glichkeit Schnelles Einfrieren auszuschalten ist den Tas ter FRZ TEMP 24 zu dr cken um die Temperatur...

Page 19: ...te Lebensmittel auch bei einem nur vor bergehenden Abschal ten aus dem Ger t nehmen und in einem ausreichend k hlen Raum oder einem anderen K hlger t lagern Auf oder angetaute Lebensmittel nicht wiede...

Page 20: ...Sie die Glasablage an neuer Posi tion ein Auch die T rablagen 3 lassen sich heraus nehmen und an neuer Postion einsetzen 1 Dr cken Sie die linken und rechten Seiten der T rablagen leicht gegeneinander...

Page 21: ...Dr cken Sie ein Gef gegen das Entnah me Pad 32 des Wasserspenders 17 Gek hltes Wasser beginnt in das Gef zu flie en Der Wasserfluss wird beendet wenn Sie das Gef vom Entnahme Pad 32 weg nehmen bzw we...

Page 22: ...ie T r f r eine l ngere Zeit ge ffnet wird kann es zu einem erheb lichen Temperaturanstieg in den F chern des Ger tes kommen Die Fl chen die mit Lebensmitteln und zug nglichen Ablaufsystemen in Ber hr...

Page 23: ...chen in die T rablagen 3 Um die Be lastung der T rscharniere zu mindern stellen Sie volle Beh lter dichter ans T rscharnier Bewahren Sie kleine Flaschen und Tu ben in den T rablagen 3 auf Legen Sie Ge...

Page 24: ...onellen o kontaminiert werden Die von den Lebensmittelherstellern empfohlenen Lagerzeiten einhalten Beachten dass sich die Lagerzeit des Gefrierguts aufgrund eines Tempe raturanstiegs im Ger teinneren...

Page 25: ...m ige Lagertemperatur von 18 C Das Einfrieren von Lebensmitteln hat eine positive Wirkung auf die Haltbarkeit der Le bensmittel Somit lassen sich auch Lebens mittelabf lle vermeiden Wenn Sie gr ere Me...

Page 26: ...ierbereich kurzfristig an Nach weiteren 12 Stunden ist die Ware bis in den Kern gefroren ber dem angegebenen maximalen Gefrierverm gen Wenn Sie ausnahmsweise mehr Ware auf einmal einfrieren wollen dau...

Page 27: ...iegt Eisw rfel herstellen 34 35 37 36 33 Ihr Ger t verf gt ber einen Eisw rfelbe reiter 35 mit einer Abdeckung 33 zwei Eisw rfelschalen 34 und einem Eisw r fel Auffangbeh lter 37 Mit Hilfe des Aus wer...

Page 28: ...mit nassen H nden ber hren Dies kann zu Haut verletzungen f hren Auch bei trockener Haut sind Haut sch den m glich Eisw rfel oder Eis am Stiel vor dem Verzehr etwas antauen lassen nicht direkt aus dem...

Page 29: ...indlich gegen l und Fett Verunreinigungen m g lichst schnell entfernen Nur weiche T cher verwenden Einzelne Ger teteile nicht in der Sp l maschine waschen Sie sind nicht sp lmaschinenfest Ger t niemal...

Page 30: ...la rem Wasser sie ist empfindlich gegen ber l und Fett 5 Wischen Sie den Innenraum trocken und lassen Sie die T r zum L ften noch einige Zeit offen Wieder in Betrieb nehmen 1 Setzen Sie die entnommene...

Page 31: ...bildung vorzubeugen 5 Reinigen Sie die T rdichtung nur mit kla rem Wasser Sie ist empfindlich gegen l und Fett 6 Reiben Sie alles einschlie lich der T r dichtung gr ndlich trocken und l ften Sie kurze...

Page 32: ...gr nd lich mit klarem Wasser nach und lassen Sie es trocknen 41 4 Dr cken Sie das Wasserventil 41 wieder in die linke K hlbereichst r bis ein Klick zu h ren ist Richten Sie das Ventil dabei am Schlit...

Page 33: ...euchtung nicht entfernen Nicht versuchen die Innenraumbe leuchtung oder die Beleuchtung am Eis Kaltwasserauslass selbst auszu tauschen Die Innenraumbeleuchtung 1 schaltet sich beim ffnen der T ren aut...

Page 34: ...n T ren Klappen etc nicht als Trittbrett oder zum Ab st tzen verwenden HINWEIS Besch digungsgefahr Unsachgem er Umgang mit dem Ge r t kann zu Besch digungen f hren Das Ger t m glichst nicht in die Hor...

Page 35: ...ut bel ftet und m glichst k hl sind Ung nstig sind Standorte mit direkter Sonneneinstrah lung oder unmittelbar neben einem Ofen Herd oder Heizk rper Diese Mindestabst nde m ssen eingehalten werden zu...

Page 36: ...ulation zu gew hrleisten halten Sie zur R ckwand einen Mindest abstand von 7 5 cm ein achten Sie seitlich auf einen Abstand von mindestens 10 cm lassen Sie oberhalb des Ger ts einen Raum von mindesten...

Page 37: ...annungsf hrenden Teilen kann zu schweren Verletzungen oder zum Tod f hren Ger t nicht in Betrieb nehmen oder weiter betreiben wenn es sichtbare Sch den aufweist z B die Anschlussleitung defekt ist Rau...

Page 38: ...pen Nach dem Transport und vor dem An schlie en das Ger t ca 2 Stunden aufrecht stehen lassen Dadurch hat das Schmiermittel gen gend Zeit um in den Kompressor zur ckzuflie en Stecken Sie den Netzsteck...

Page 39: ...te DE 15 Ger t k hlt nicht ausreichend Temperatur ist zu hoch ein gestellt Niedrigere Einstellung w hlen siehe Tem peratur einstellen auf Seite DE 15 T r ist nicht fest verschlos sen oder T rdichtung...

Page 40: ...St rungscode betroffener Ger tebereich L sungen Tipps E1 St rung am Temperatursensor des K hlbe reichs Nehmen Sie bitte Kontakt mit unserem Service auf siehe Sei te DE 41 E2 St rung am Temperatursenso...

Page 41: ...rsachte Sch den k nnen leider nicht anerkannt werden Beratung Reklamation und Bestellung Wenden Sie sich bitte an die Produktberatung Ihres Versandhauses wenn die Lieferung unvollst ndig ist das Ger t...

Page 42: ...Austritt von K ltemit tel besteht Brandgefahr Achten Sie darauf dass an einem K hlger t bis zur fachgerechten Ent sorgung keine K hlrippen oder Rohre besch digt werden Unser Beitrag zum Schutz der Oz...

Page 43: ...sspannung Frequenz Nennstrom Lampenleistung 220 240 V 50 Hz 1 9 A max 4 W Schutzklasse I Klimaklasse SN N ST T Dieses Ger t ist f r den Betrieb bei einer Umgebungstemperatur zwischen 10 C und 43 C bes...

Page 44: ...Produktdatenblatt nach VO EU Nr 2019 2016 Seite DE 44...

Page 45: ...e by side fridge freezer with water dispenser and ice maker User manual Manual version 2001 00998 EN 20200828 Article no 21354714 Reproduction even of excerpts is not permitted HCD17884EI WATER DISPEN...

Page 46: ...of the water dispenser EN 30 Cleaning the ice cube maker EN 31 Interior lighting EN 31 Start up EN 32 Before starting to use the appliance EN 32 Moving and unpacking EN 32 Choose a suitable location...

Page 47: ...drawer small 1 Egg tray 1 Ice cube maker 1 Ice cube scoop 1 Measuring cup 100 ml 1 User manual Check the delivery 1 Move the appliance to a suitable place and unpack it see Start up on page EN 32 2 C...

Page 48: ...4 2 fruit vegetable drawers 5 4 small freezer drawers 6 2 large freezer drawers 7 right freezer door 8 2 adjustable screw feet 9 2 front wheels 10 left freezer door 11 Glass cover above fruit vegetabl...

Page 49: ...s and control panel Page EN 5 Appliance doors closed 2 Right fridge door 16 Control panel and display 7 right freezer door 10 left freezer door 17 Water dispenser 15 Left fridge door WATER DISPENSER 2...

Page 50: ...g the display 23 Button MODE for setting the functions 24 Button FRZ TEMP for setting the tem perature in the freezer 25 Button REF TEMP for setting the tem perature in the fridge 26 Indicator SUPER R...

Page 51: ...perty or even personal injury The manufacturer accepts no li ability for damage caused by improper use Explanation of terms The following symbols can be found in this user manual WARNING This symbol i...

Page 52: ...ore detailed information about this can be found on the nameplate To disconnect this appliance from the power supply pull the mains plug out of the socket The appliance must therefore be connected to...

Page 53: ...process other than those recommended by the manufacturer For example do not use any electric heating equipment knives or devices with an open flame such as a candle The thermal insulation and the int...

Page 54: ...ppliance en sure that children cannot suffocate inside the appliance e g do not re move the fridge and freezer drawers unscrew the door cover Risks for certain groups of people CAUTION Dangers for chi...

Page 55: ...at microwave toaster etc Incorrect handling insufficient cool ing or overlapping items can spoil the stored food This could lead to a risk of food poisoning when consumed Note that the shelf life of t...

Page 56: ...Place the appliance only on a lev el and firm surface that can support the weight of the appliance when it is filled Do not use sharp or pointed objects to unpack it When unpacking the appliance nev...

Page 57: ...f they have not been used for 48 h flush the water system connected to a water sup ply if water has not been drawn for 5 days Do not dispense water from the cold water outlet for longer than 3 min ute...

Page 58: ...s sible socket 220 240 V 50 Hz When you open one of the appliance doors the interior of the appliance is lit up The compressor starts to work the re frigerant flows through the pipes and a quiet hummi...

Page 59: ...3 seconds A tone will sound and the indicator will appear on the display If no button is pressed for 30 seconds the control panel will lock automatically Setting the temperature WARNING Health hazard...

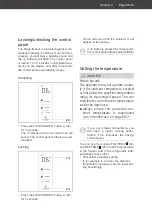
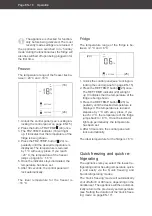
Page 60: ...ure for the freezer is 18 C Fridge The temperature range of the fridge is be tween 2 C and 8 C REF TEMP c 06 REF TEMP 25 29 1 Unlock the control panel see Locking un locking the control panel on page...

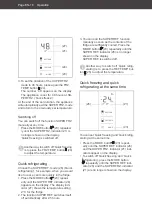
Page 61: ...duration of the function The appliance is set to SUPER FRZ mode for 6 hours After 2 5 hours the appliance will automati cally exit the Quick refrigerating mode and return to the previously set fridge...

Page 62: ...epeat edly until the SUPER REF indicator 26 appears on the display The display indi cator 27 shows the temperature setting 2 C for the fridge 2 The function SUPER REF switches itself off automatically...

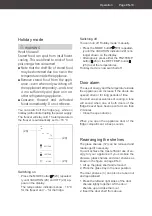
Page 63: ...manually Press the MODE button 23 repeated ly until the VACATION indicator 20 is no longer shown on the display Alternatively press either the FRZ TEMP button 24 or the REF TEMP button 25 to set the t...

Page 64: ...een used for 48 hours rinse out the water system if water has not been dispensed for 5 days 31 30 13 Open the closing cap 31 on the lid 30 of the water tank 13 Pour fresh cold tap water into the water...

Page 65: ...compartments of the appliance Clean regularly surfaces that can come in contact with food and acces sible drainage systems Clean water tanks if they have not been used for 48 h flush the water system...

Page 66: ...place full containers closer to the door hinge Store small bottles and tubes in the door shelves 3 Place cooked and baked foods on the glass shelves 12 Place fresh meat game poultry bacon sausage and...

Page 67: ...ella or similar bacteria Abide by the storage times recom mended by food manufacturers Note that the shelf life of the frozen food may be shortened due to a rise in the temperature inside the appli an...

Page 68: ...Freezing food has a positive effect on its shelf life You can also avoid food waste in this way If you are freezing a large quantity of food at once set Quick freezing 2 hours beforehand see page EN 1...

Page 69: ...t be avoided we recommend that you create a cold reserve in the freezer before freezing the fresh goods see Quick freezing and quick refrigerating on page EN 16 The temperature in the freezer briefly...

Page 70: ...6 CAUTION Health hazard Consuming ice cubes prepared using impure or standing water can endan ger your health Incorrect handling can lead to risks of food poisoning Use only fresh drinking water to ma...

Page 71: ...em with wet hands This can cause injury to the skin Skin damage can occur even with dry skin Let ice cubes or ice lollies thaw a lit tle before eating do not put into your mouth straight from the free...

Page 72: ...wa ter jet e g high pressure cleaner Make sure that no water gets into the electrical parts of the appliance Checking and cleaning door seals The door seals must be checked regularly so that no air c...

Page 73: ...and freezer temper ature see page EN 15 Cleaning the freezer WARNING Danger of explosion Improper handling of the appliance can lead to deflagration or explosion Never use defrosting sprays They can...

Page 74: ...food back into the freez er once the freezer has reached a tem perature of 18 C and switch off Quick refrigerating and Quick freezing 5 Set the desired fridge and freezer temper ature see page EN 15...

Page 75: ...r 35 and the ice cube collecting container 37 out of the freezer 2 Remove the cover 33 of the ice cube container 3 Wash the ice cube maker 35 the ice cube collecting container 37 and the lid 33 with w...

Page 76: ...ps or for support purposes NOTICE Risk of damage Improper handling of the appliance may result in damage If possible do not tilt the appliance horizontally Allow the appliance to stand upright for app...

Page 77: ...ect sunlight or which are directly next to an oven hob or radiator The following minimum distances must be maintained from electrical hobs 10 cm from oil and coal burning stoves 10 cm from other cooli...

Page 78: ...keep free an area of at least 30 cm above the appliance do not place any objects on the appli ance do not place the appliance on carpeted flooring Aligning the appliance 1 Check the position with a s...

Page 79: ...III must be connected to the house wiring with a contact gap of at least 3 mm this in cludes fuses circuit breakers and con tactors Do not kink or pinch the mains cable or lay it over sharp edges Thi...

Page 80: ...erature rises the compressor au tomatically switches on Appliance cools too quickly Temperature has been set too low Select a higher setting see Setting the tem perature on page EN 15 The appliance do...

Page 81: ...ppliance Fault code If a fault occurs the corresponding fault code e g E5 will be displayed until the fault has been fixed To fix the fault please contact our service department see page EN 38 Fault c...

Page 82: ...ately cannot be recog nised Advice complaints and orders Please contact your mail order company s customer service centre if the delivery is incomplete the appliance is damaged during transport you ha...

Page 83: ...d insulation must be proper ly disposed of Refrigerant leakage may cause a fire hazard Until the point of proper disposal en sure that none of the cooling fins or tubes on a refrigerating appliance ar...

Page 84: ...190 W Supply voltage frequency rated current lamp power 220 240 V 50 Hz 1 9 A max 4 W Protection class I Climate class SN N ST T This appliance is intended to be used at an ambient temperature betwee...

Reviews: