Start-up
Page GB-10
Choose a suitable location
Safety
For safety reasons, the room in which it is
installed must have a minimum size.
Model
Room size
HGT 8566A2L
5 m³
HGT 8595A2L
6 m³
HGT 85112A2L
7 m³
HGT 85129A2L
8 m³
Airflow
To ensure adequate air circulation,
– the chest freezer should not stand directly
against the wall. Leave at least 15 cm from
the wall, cabinets and other appliances.
– the ventilation grilles must remain clear
and must not be covered.
– the entire area above the chest freezer
must be unobstructed.
Cooling capacity
To achieve the highest possible cooling per-
formance with the least energy consumption,
choose a location that:
– is not too warm, is dry and well ventilated,
– is not in direct sunlight.
It is recommended not to place it next to an
oven, stove or radiator. Abide by minimum
distances:
– to electric stoves: 15 cm,
– to oil and coal burning stoves: 30 cm,
– to refrigerators: 15 cm,
– to washing machines/dishwashers: 15 cm.
If underfloor heating is installed in the room
where the chest freezer is to be installed,
place an insulating plate of solid material un-
der the chest freezer.
Set up the chest freezer and
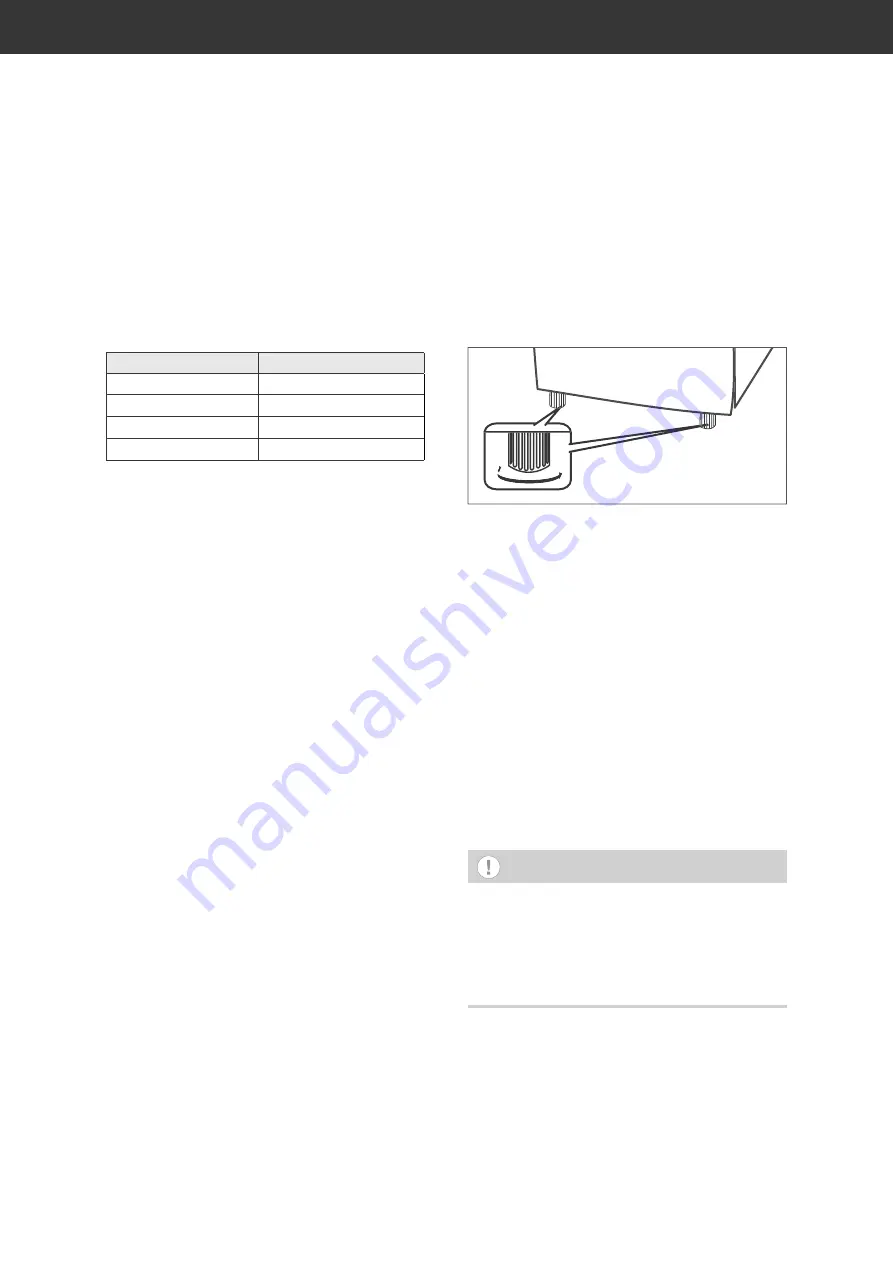
align
1. Place the chest freezer on as flat and as
firm a base as possible.
2. Check the position with a spirit level.
3. Level out any unevenness on the ground
using both of the front levelling screws. To
do this
– close the lid.
– tilt the chest freezer slightly to the right.
– twist the levelling screws in or out until
the chest freezer is vertically level and
set the chest freezer straight back down
again.
4. Check the alignment with a spirit level.
When opening the lid, the chest freezer
should not shift.
Connecting the chest freezer
NOTICE
Risk of damage!
The coolant must be allowed to settle
before connecting.
■
After transport leave the appliance to
stand for 2 hours.
• Connect the mains plug to a properly in-
stalled socket (220-240V ~ / 50Hz / 10A).
The power (7) indicator lights up.
Summary of Contents for HGT 8566A2L
Page 32: ......


