background image

Contents

Page EN-2

Contents

Explanation of terms and symbols, 

definitions   . . . . . . . . . . . . . . . . . . . . . . . . . . .EN-3

Explanation of terms   . . . . . . . . . . . . . . . . .EN-3

Explanation of symbols  . . . . . . . . . . . . . . .EN-3

Definitions   . . . . . . . . . . . . . . . . . . . . . . . . .EN-3

Safety   . . . . . . . . . . . . . . . . . . . . . . . . . . . . . .EN-4

Intended use   . . . . . . . . . . . . . . . . . . . . . . .EN-4

Safety notices   . . . . . . . . . . . . . . . . . . . . . .EN-4

Delivery  . . . . . . . . . . . . . . . . . . . . . . . . . . . EN-10

Package contents   . . . . . . . . . . . . . . . . . EN-10

Checking the delivery   . . . . . . . . . . . . . . EN-10

Start-up  . . . . . . . . . . . . . . . . . . . . . . . . . . . .EN-11

Before starting to use the appliance  . . . .EN-11

Unpacking and setup . . . . . . . . . . . . . . . .EN-11

Cleaning before use . . . . . . . . . . . . . . . . EN-14

Electrical connections   . . . . . . . . . . . . . . EN-14

Appliance parts and control elements   . . . EN-15

Operation   . . . . . . . . . . . . . . . . . . . . . . . . . EN-17

Before getting started   . . . . . . . . . . . . . . EN-17

Switching the appliance on and off  . . . . EN-17

Setting the temperature  . . . . . . . . . . . . . EN-17

Activating the fast cooling funtion   . . . . . EN-18

Activating the fast freezing fuction . . . . . EN-18

The shelves and drawers. . . . . . . . . . . .  EN-19

Pictograms . . . . . . . . . . . . . . . . . . . . . . . EN-19

Chilling food   . . . . . . . . . . . . . . . . . . . . . . . EN-20

Filling the fridge  . . . . . . . . . . . . . . . . . . . EN-20

Maintaining quality  . . . . . . . . . . . . . . . . . EN-21

Freezing foods, storing frozen foods   . . . . EN-22

Freezing food . . . . . . . . . . . . . . . . . . . . . EN-22

Storing frozen food. . . . . . . . . . . . . . . . .  EN-23

Defrosting food . . . . . . . . . . . . . . . . . . . . EN-24

Preparing ice cubes . . . . . . . . . . . . . . . . EN-24

Care and maintenance  . . . . . . . . . . . . . . . EN-25

Checking and cleaning door seals. . . . .  EN-25

Cleaning the exterior  . . . . . . . . . . . . . . . EN-25

Cleaning the reverse side  . . . . . . . . . . . EN-25

Cleaning the interior . . . . . . . . . . . . . . . . EN-25

Defrosting the appliance  . . . . . . . . . . . . EN-26

Interior light   . . . . . . . . . . . . . . . . . . . . . . EN-27

Changing the door hinge direction  . . . . . . EN-28

Troubleshooting table  . . . . . . . . . . . . . . . . EN-31

Service   . . . . . . . . . . . . . . . . . . . . . . . . . . . EN-33

Advice, complaints and orders   . . . . . . . EN-33

Repairs and spare parts   . . . . . . . . . . . . EN-33

Waste prevention, free return and  

disposal  . . . . . . . . . . . . . . . . . . . . . . . . . . . EN-34

Waste prevention   . . . . . . . . . . . . . . . . . EN-34

Free return of old electrical appliances . EN-34

Disposal  . . . . . . . . . . . . . . . . . . . . . . . . . EN-34

Packaging   . . . . . . . . . . . . . . . . . . . . . . . EN-35

Appendix  . . . . . . . . . . . . . . . . . . . . . . . . . . EN-36

Product fiche concerning  

Regulation (EU) No 2019/2016  . . . . . . . EN-36

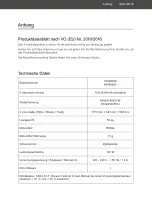
Technical specifications  . . . . . . . . . . . . . EN-36

Please read through the safety 

instructions and user manual 

carefully before using the appli-

ance. This is the only way you 

can use all the functions safely and relia-

bly.
Be sure to also observe the national reg-

ulations in your country, which are valid in 

addition to the regulations specified in this 

user manual.
Keep all safety notices and instructions 

for future reference. Pass all safety notic-

es and instructions on to the subsequent 

user of the product.

You can find more information 

on setting up the appliance and 

starting it up for the first time 

from page EN-11.

Summary of Contents for HKGK18055CW

Page 1: ...K hl Gefrier Kombination Gebrauchsanleitung Anleitung Version 2301 00755_DE_20240108 Bestell Nr 76228049 84409902 Nachdruck auch auszugs weise nicht gestattet HKGK18055CW HKGK18055CI...

Page 2: ...e und Wartung DE 26 T rdichtungen kontrollieren und reinigen DE 26 Au enw nde reinigen DE 26 R ckseite reinigen DE 26 Innenbereich reinigen DE 26 Ger t abtauen DE 27 Innenbeleuchtung DE 28 T ranschlag...

Page 3: ...arnt vor m glichen Sachsch den Symbolerkl rung Folgende Symbole finden Sie in dieser Ge brauchsanleitung bzw auf dem Ger t Dieses Symbol verweist auf n tzli che Zusatzinformationen Vorsicht Brandgefah...

Page 4: ...vermeiden Verwenden Sie das Ger t ausschlie lich wie in dieser Gebrauchsanleitung beschrieben Jede andere Verwendung gilt als nicht be stimmungsgem und kann zu Sachsch den oder sogar zu Personensch d...

Page 5: ...n dass die richtige Spannung anliegt N here Informationen hierzu finden Sie auf dem Typschild Die vollst ndige Trennung vom Stromnetz erfolgt bei diesem Ger t nur durch Ziehen des Netzsteckers aus der...

Page 6: ...iehe Service auf Seite DE 34 Ger t regelm ig auf Sch den pr fen Brandgefahr Unsachgem er Umgang mit dem Ge r t kann zu einem Brand zu Verletzun gen und zu Sachsch den f hren Der Anschluss an eine Zeit...

Page 7: ...K ltemitteld mpfe nicht einatmen Sollte K ltemittel austreten Raum unverz glich l ften Risiken durch chemische Stoffe VORSICHT Explosionsgefahr Unsachgem er Umgang mit chemi schen Stoffen kann zu Expl...

Page 8: ...dung zu ver meiden Gesundheitsgefahr Das Ger t arbeitet eventuell nicht ein wandfrei wenn die Umgebungstempera tur berl ngereZeitdenvorgeschriebenen Temperaturbereich ber oder unterschrei tet Es kann...

Page 9: ...frieren Eisw rfel zersto enes Eis oder Eis am Stiel nicht direkt aus dem Gefrierbe reich in den Mund nehmen Ber hren Sie Gefriergut und die In nenw nde des Gefrierbereichs nicht mit nassen H nden HINW...

Page 10: ...Ge wicht des gef llten Ger tes tragen kann Beim Auspacken keine scharfen oder spitzen Gegenst nde verwenden Beim Auspacken auf keinen Fall das Isoliermaterial an der Ger ter cksei te besch digen Innen...

Page 11: ...ie es aus siehe Inbetriebnahme auf Seite DE 12 2 Entfernen Sie alle Verpackungstei le Kunststoffprofile Klebestreifen und Schaumpolster 3 Pr fen Sie ob die Lieferung vollst ndig ist 4 Kontrollieren Si...

Page 12: ...ng mit dem Ge r t kann zu Verletzungen oder Gesund heitssch den f hren Den K ltekreislauf nicht besch di gen z B durch Aufstechen der K l temittelkan le des Verdampfers mit scharfen Gegenst nden Abkni...

Page 13: ...ngsteile Kunststoff profile Klebestreifen Schutzfolien und Schaumpolster innen au en und auf der Ger ter ckseite 2 Stellen Sie das Ger t auf einen m glichst ebenen festen Untergrund Halten Sie die vor...

Page 14: ...sen Halten Sie immer die vorgeschriebene Umgebungstemperatur ein siehe Bestimmungsge m er Gebrauch auf Seite DE 4 Klimaklasse bedeutet dass das Ger t f r den Betrieb bei der unten genannten Umgebungst...

Page 15: ...em ber spannungskategorie III in der Hau sinstallation mit mindestens 3 mm Kontaktabstand vorgeschaltet sein ziehen Sie gegebenenfalls eine Fach kraft zurate siehe Service auf Sei te DE 34 Netzanschlu...

Page 16: ...urregler 2 K hlbereichst r 3 T rablagen 4 Flaschenablage in der K hlbereichst r 5 Gefrierbereichst r 6 Schraubf e 7 Gefrierfach mit Klappe 8 Schublade Freeze Zone 9 Obst und Gem seschublade 10 Glasabl...

Page 17: ...Ger teteile und Bedienelemente Seite DE 17 12 Einstelltaste SETTING 13 LED MIN 14 LED MED 15 LED MAX 16 Innenbeleuchtung 3SEC SUPER FRZ MIN MED TEMP ZONE SETTING MAX Bedienfeld 12 13 14 15 16...

Page 18: ...e auf dem Ger t liegen Ausschalten Um das Ger t auszuschalten ziehen Sie den Netzstecker aus der Steckdose Wenn das Ger t ausgeschaltet ist las sen Sie die T ren leicht ge ffnet damit sich kein Schimm...

Page 19: ...schnelle K h len aktiviert Die LED MED 14 und die LED MAX 15 leuchten gleichzeitig Das Schnelle K hlen wird nach 6 Stunden automatisch deaktiviert Um das schnelle K hlen manuell zu de aktivieren dr ck...

Page 20: ...ich oder auf der Glasablage 17 mehr Platz zu schaffen Piktogramme Auf dem Ger t finden Sie folgende Pikto gramme Sie k nnen in der Obst und Gem seschub lade 9 frisches Obst und frisches Gem se lagern...

Page 21: ...fbewahrung von bereits eingefro renen Lebensmitteln und die Aufbe wahrung oder Zubereitung von Spei seeis oder Eisw rfeln geeignet Ein Zwei und Drei Sterne F cher sind nicht f r das Einfrieren von fri...

Page 22: ...m seschublade 9 Lagern Sie Frischfleisch Wild Gefl gel Speck Wurst und rohen Fisch auf der Glasablage 10 ber der Obst und Ge m seschublade Dort ist die Temperatur am niedrigsten Lagern Sie hochprozent...

Page 23: ...inlagern Die maximale Lagerzeit bei einer St rung entneh men Sie dem Typschild des Ger ts Nach einer St rung berpr fen ob die eingelagerten Lebensmittel noch genie bar sind Auf oder angetaute Lebensmi...

Page 24: ...ur Verpackungsmaterial das widerstandsf hig luft und fl ssig keitsundurchl ssig nicht zu steif und zu beschriften ist Es sollte als Gefrierverpa ckung ausgewiesen sein Verwenden Sie zum Verschlie en P...

Page 25: ...nsmittel aufzutauen nehmen Sie sie aus dem Gefrierraum und las sen Sie sie am besten bei Raumtem peratur oder im K hlschrank auftauen Tauen Sie Fleisch Gefl gel und Fisch immer im K hlschrank auf Acht...

Page 26: ...erunreinigungen m g lichst schnell entfernen Nur weiche T cher verwenden T rdichtungen kontrollieren und reinigen Die T rdichtungen m ssen regelm ig kon trolliert werden damit keine warme Luft in das...

Page 27: ...18 19 11 An der R ckwand des K hlbereichs ober halb der Obst und Gem seschublade 9 befindet sich der Tauwasserablauf 18 Reinigen Sie den Tauwasserablauf mit ei nem Reinigungswerkzeug 19 12 Reinigen Si...

Page 28: ...ffnet und legen Sie einen Scheuerlap pen vor das Ger t um austretendes Tau wasser aufzufangen Die Abtauzeit h ngt von der Di cke der Eis schicht ab Erfahrungsgem kann nach ca 1 Stunde mit dem Reinigen...

Page 29: ...die nachfolgenden Arbeits schritte vollst ndig durch bevor Sie mit der Arbeit beginnen T ren abmontieren 20 21 1 Nehmen Sie die Abdeckungen 20 und 21 ab 22 23 2 L sen Sie die Schrauben 22 am obe ren...

Page 30: ...33 11 Kippen Sie das Ger t so dass Sie das un tere Scharnier 32 mit dem Kreuzschlitz schraubendreher oder dem 8er Schrau benschl ssel erreichen k nnen 12 L sen Sie die Schrauben 33 am unteren Scharnie...

Page 31: ...tstoffein satz 37 der K hlbereichst r und nehmen Sie den Kunststoffeinsatz 38 ab 20 Schrauben Sie den mitgelieferten Kunst stoffeinsatz 36 auf der gegen berliegen den Seite der K hlbereichst r fest 39...

Page 32: ...tet sich der Kompressor selbstt tig ein Ger t k hlt zu stark Temperatur zu niedrig eingestellt H here Einstellung w hlen siehe Temperatur einstellen auf Seite DE 18 Ger t k hlt nicht ausreichend Tempe...

Page 33: ...oder aus St rende Ger usche Festen Stand berpr fen Gegenst nde vom Ger t entfernen Fremdk rper von der Ger ter ckseite entfernen Fehlercode M gliche Ursachen L sungen und Tipps LEDs MIN 13 und MED 14...

Page 34: ...araturen und Ersatzteile Durch die Reparatur defekter Ger te k nnen Sie Abfall vermeiden Wenden Sie sich an unseren Kundendienst Halten Sie bitte Ihre Ger te Rechnung parat Kaufdatum und Art Nr Ersatz...

Page 35: ...erbraucher bis zu drei Altger te einer Ger teart bei einer Sam melstelle eines Vertreibers unentgeltlich ab geben ohne dass dies an den Erwerb eines Neuger ts gekn pft ist Allerdings darf keine der u...

Page 36: ...d Um welt haben Kleben Sie daher bei lithiumhalti gen Batterien und Akkus vor der Entsorgung die Pole ab um einen u eren Kurzschluss zu vermeiden Batterien und Akkus die nicht fest im Ger t verbaut si...

Page 37: ...055CI Ger tema e H he Breite Tiefe 1773 mm 547 mm 568 mm Leergewicht 59 kg K ltemittel R600a K ltemittel F llmenge 81 g Schaummittel Zyklopentan Leistungsaufnahme 140 W Versorgungsspannung Frequenz Ne...

Page 38: ...Refrigerator freezer User manual Manual version 2301 00755_EN_20240108 Order no 76228049 84409902 Reproduction even of ex cerpts is not permitted HKGK18055CW HKGK18055CI...

Page 39: ...nd cleaning door seals EN 25 Cleaning the exterior EN 25 Cleaning the reverse side EN 25 Cleaning the interior EN 25 Defrosting the appliance EN 26 Interior light EN 27 Changing the door hinge directi...

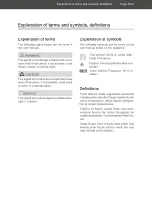
Page 40: ...st possible dam age to property Explanation of symbols The following symbols can be found in this user manual and or on the appliance This symbol refers to useful addi tional information Caution Fire...

Page 41: ...s user manual Any other use is deemed improper and may result in damage to prop erty or even personal injury The manufactur er accepts no liability for damage caused by improper use Safety notices In...

Page 42: ...ce from the power supply pull the mains plug out of the socket The appliance must therefore be connected to an easi ly accessible socket so that it can be quickly disconnected from the power supply in...

Page 43: ...gerants WARNING Risk of fire and explosion Your appliance s refrigeration circuit contains the environmentally friendly but flammable and as a mixture of air and gas explosive refrigerant R600a isobut...

Page 44: ...ease toxic fumes if they melt or catch fire Do not use any electric heating equip ment knives or devices with an open flame such as candles Do not use electrical appliances in side the food storage co...

Page 45: ...ed power failure or malfunction of the appliance remove the stored frozen food from the appliance and store it in a sufficiently cool place or in another cooling appliance After a malfunction check wh...

Page 46: ...g this time Risk of damage to property Improper handling of the appliance can lead to damage to property Do not pull or lift the appliance by its doors or door handles Place the appliance only on a le...

Page 47: ...to a suitable place and unpack it see Start up on page EN 11 2 Remove all parts of the packaging plastic profiles tape and foam padding 3 Check that the delivery is complete 4 Check whether the applia...

Page 48: ...lead to injury or damage to health Do not damage the refrigeration cir cuit e g by puncturing the refrigerant channels of the condensate evapora tor with sharp objects bending the piping or cutting o...

Page 49: ...ll packaging plastic moulding adhesive strips protective film and foam padding from the inside outside and back of the appliance 2 Place the appliance on as flat and as firm a base as possible Observe...

Page 50: ...lways ensure the prescribed ambient temperature is maintained see Intended use on page EN 4 Climate category means that the appliance is intended for operation at the specified ambient temperature Zon...

Page 51: ...overvoltage cate gory III must be connected within the house installation with at least 3 mm contact clearance consult a qualified professional if necessary see Ser vice on page EN 33 Do not kink or...

Page 52: ...temperature controller 2 Fridge door 3 Door shelves 4 Bottle rack in the fridge door 5 Freezer door 6 Screw feet 7 Freezer compartment with flap 8 Freeze Zone drawer 9 Fruit vegetable drawer 10 Glass...

Page 53: ...Appliance parts and control elements Page EN 16 12 SETTING button 13 LED MIN 14 LED MED 15 LED MAX 16 Interior light 3SEC SUPER FRZ MIN MED TEMP ZONE SETTING MAX Control panel 12 13 14 15 16...

Page 54: ...top of it Switching off To switch the appliance off pull the mains plug out of the socket If the appliance is switched off leave the doors open slightly to avoid mould formation Setting the temperatu...

Page 55: ...ds After 30 seconds the fast cooling function is activated The MED LED 14 and the MAX LED 14 light up simultaneously The fast cooling function is automatically deactivated after 6 hours To deactivate...

Page 56: ...e Freeze zone drawer 8 in the freezer can be removed to create more space in the freezer compartment with flap 7 or on the glass shelf 17 below it Pictograms The following pictograms are displayed on...

Page 57: ...star frozen food compartments are suitable for storing pre frozen food storing or making ice cream and making ice cubes One two and three star compart ments are not suitable for the freez ing of fresh...

Page 58: ...the fruit vegetable drawer 9 Store fresh meat game poultry bacon sausages and raw fish on the glass shelf 10 above the fruit vegetable drawer This is where the temperature is lowest Only store strong...

Page 59: ...diately do not refreeze Risk of injury Improper handling of the appliance mayresultininjury Riskofburnscaused by low temperatures The food and the inside walls of the freezer have a very low temperatu...

Page 60: ...volume should be frozen make sure that it is tightly sealed Label the frozen food by type quantity amount and expiry date Use waterproof marker pens or adhesive labels wherever possible How to pack t...

Page 61: ...he manufacturer s instructions and note that bacteria and germs can multiply in this way If you want to defrost only part of a pack remove the portion you need and immediately close the rest of the pa...

Page 62: ...be checked regularly so that no air can enter the appliance 1 To test them clamp a thin piece of paper in various places The paper should be difficult to pull through at all points 2 If the seal is no...

Page 63: ...appliance WARNING Danger of explosion Improper handling of the appliance may lead to deflagration explosion Never use defrosting sprays They can generate explosive gases NOTICE Risk of damage to prop...

Page 64: ...n wiping clean add a few drops of vinegar to the water to prevent mould from forming 9 Only clean the door seals with clean wa ter they are sensitive to oil and fat 10 Rub everything completely dry in...

Page 65: ...ease read through all of the following steps before starting work Removing the doors 20 21 1 Remove the covers 20 and 21 22 23 2 Loosen the screws 22 on the upper hinge 23 and remove the hinge Changin...

Page 66: ...t the appliance so that the lower hinge 32 can be accessed using the cross tip screwdriver or size 8 spanner 12 Loosen the screws 33 on the lower hinge unscrew the screw feet 6 and re move the lower h...

Page 67: ...37 19 Loosen the screw on the plastic insert 37 for the fridge door and remove the plastic insert 38 20 Screw down the plastic insert sup plied 36 on the opposite side of the fridge door 39 23 21 Usi...

Page 68: ...rises the compressor automatically switches on Appliance cools too quickly Temperature has been set too low Select a higher setting see Setting the temperature on page EN 17 The appliance doesn t cool...

Page 69: ...ng on or off Disturbing noises Check that the appliance is stable Remove any objects from the appliance Remove any foreign matter from the back of the appliance Error code Possible causes solutions an...

Page 70: ...HKGK18055CI 84409902 Repairs and spare parts You can prevent waste by having your defective appliances repaired Please contact our Customer Service department Please have your appliance invoice ready...

Page 71: ...d electrical appliances of the same type to a distributor s collection point for free with out having to purchase a new electrical ap pliance In this case however the old appli ances external dimensio...

Page 72: ...tant to tape off the terminals of lithium batteries and rechargeable batter ies before disposing of them to prevent an external short circuit Single use and rechargeable batteries that are not built i...

Page 73: ...5CI Device measurements Height Width Depth 1773 mm 547 mm 568 mm Unloaded weight 59 kg Refrigerant R600a Filling capacity refrigerant 81 g Foaming agent cyclopentane Rated power 140 W Supply voltage f...

Reviews: