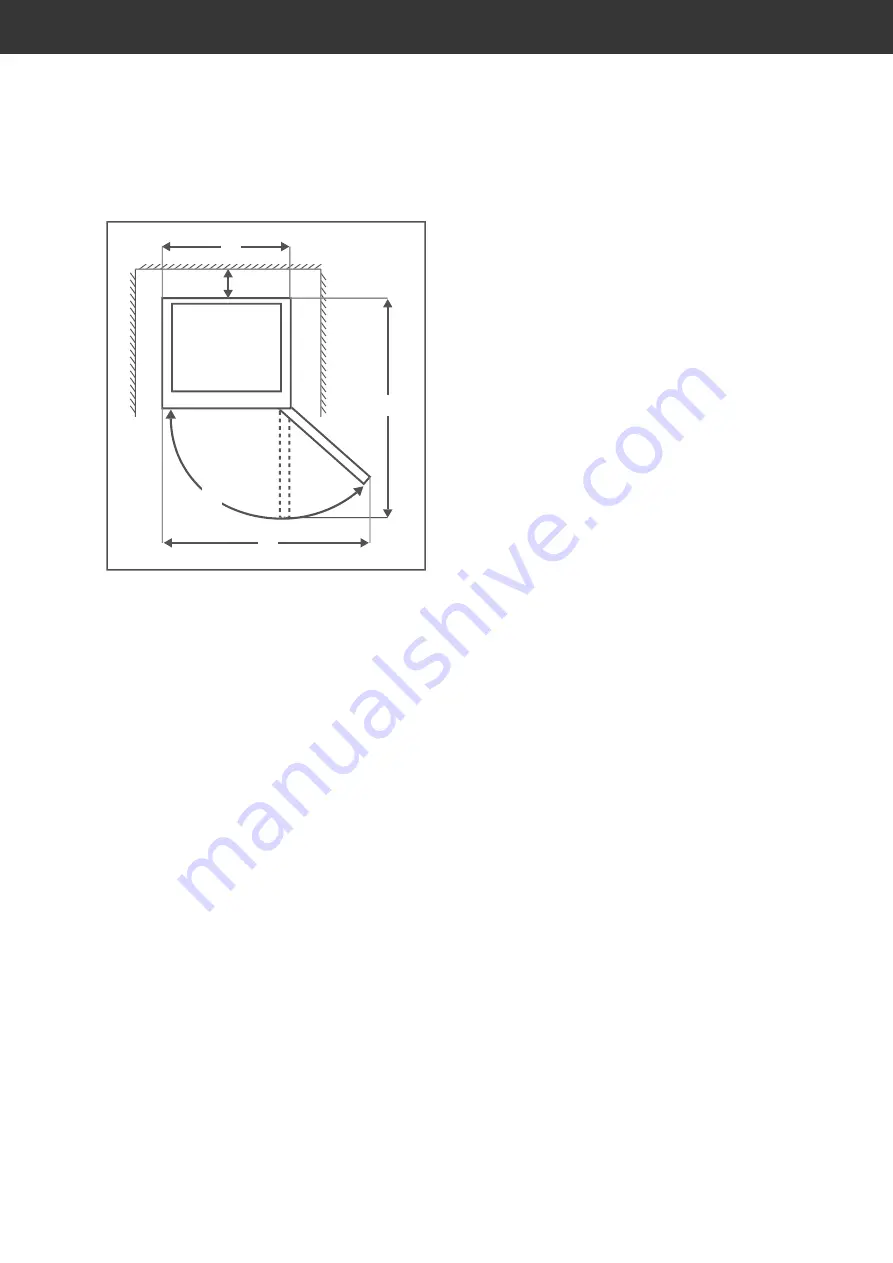
C
B
A
D
E
Space requirement according to appliance
dimensions
A:
54.5 cm
B:
107 cm
C:
91.5 cm
D:
≥ 5.0 cm
E:
110-125°
– To prevent the formation of a flammable
gas-air mixture in the event of a leakage
in the refrigeration circuit, the installation
space must be at least 3 m³.
– The appliance must only be placed on a
level and firm surface. The surface must be
strong enough to support the appliance’s
weight when fully laden.
– Suitable locations are dry, well-ventilated
areas that are cool if possible.
– Unsuitable locations are ones with direct
sunlight or which are directly next to an
oven, hob or radiator.
– The following minimum distances must be
maintained:
– from electrical hobs
3 cm
– from oil and coal burning stoves 30cm
– from other cooling appliances
2 cm
– from washing machines/
dishwashers
2 cm
– If you would like to reduce these distances,
you can fit an insulation plate between the
appliances.
– If underfloor heating is installed at the set-
up location, place the cooling appliance on
an insulation plate made from solid mate-
rial.
Setting up and aligning the
appliance
1. Place the appliance on as flat and as firm
a base as possible.
2. To ensure adequate air circulation,
– the entire space above the appliance
must be clear.
– the appliance should not stand directly
against the wall (leave a minimum clear-
ance of 5 cm)
– the clearance between the ventilation
slots and the wall, units and other appli-
ances must be at least 15 cm.
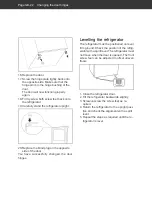
3. Check the position with a spirit level.
4. Level out any unevenness on the ground
using both of the front screw feet.
– Close the door.
– Tilt the appliance backwards slightly and
screw/unscrew the screw feet.
– Stand the appliance back up again and
check the alignment with a spirit level.
Repeat the process until the appliance
is standing up vertically. The appliance
should not move when opening the
doors.
Cleaning before use
In order to remove the odour which is present
in all new appliances, wipe the interior with
diluted vinegar prior to first use. Then wipe it
out with clean water and dry all of the parts
off afterwards.
Start-up
Page GB-18
Summary of Contents for HKS 8555A3W
Page 30: ......


