Start-up
Page GB-16
Choosing a suitable location
To achieve the highest possible cooling per-
formance with the least energy consumption,
choose a location that:
– is not too warm, is dry and well ventilated,
– is not exposed to direct sunlight,
– measures at least 2 m
3
.
We do not advise positioning the appliance
next to an oven, stove or radiator. The mini-
mum distances to such appliances are:
– from electric stoves
3 cm
– from oil and coal burning stoves
30 cm
– from refrigeration appliances
2 cm
– from washing machines/dishwashers 2 cm
If these distances cannot be maintained,
place an insulating plate in-between. If un-
derfloor heating is installed in the room where
the mini refrigerator is to be installed, place an
insulating plate of solid material underneath.
Setting up and aligning the
appliance
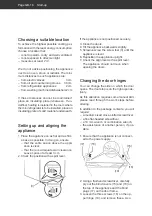
1. Place the appliance on as flat and as firm
a base as possible. In doing so, ensure
– that the entire space above the appli-
ance is clear;
– that there is adequate wall clearance.
Leave space of at least 3 cm.
2. Check the position with a spirit level.
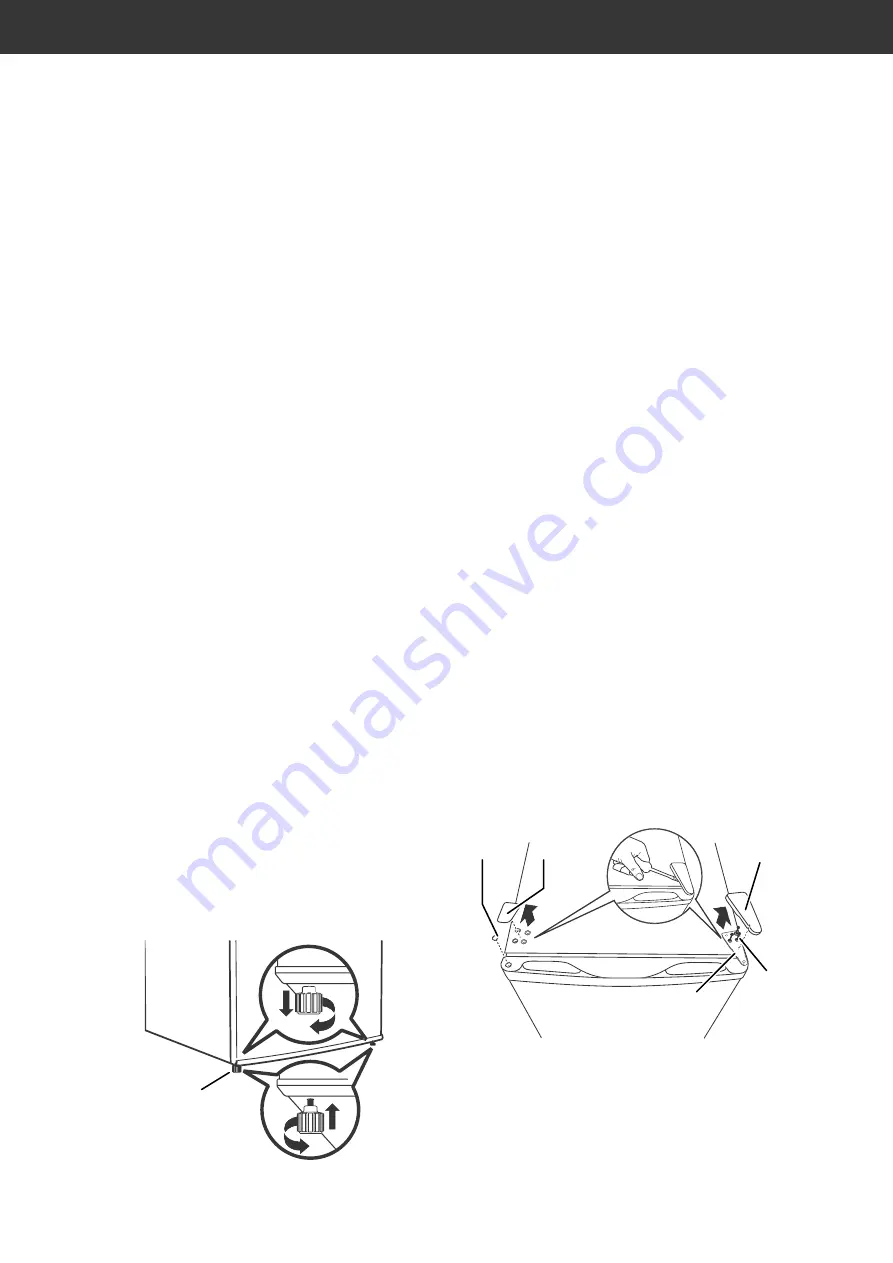
(3)
If the appliance is not positioned securely,
3. Close the doors.
4. Tilt the appliance backwards slightly.
5. Screw/unscrew the screw feet (3) until the
appliance is level.
6. Reposition the appliance upright.
7. Check the alignment with a spirit level.
The appliance should not move when
opening the doors.
Changing the door hinges
You can change the side on which the door
opens. The door stop is on the right upon de-
livery.
As this alteration requires some manual skill,
please read through the work steps before
altering.
In addition to the package contents, you will
require:
– a medium sized cross-slotted screwdriver,
– a fine flat-headed screwdriver,
– a 10 mm wrench or combination wrench,
– the assistance of another person, if pos-
sible.
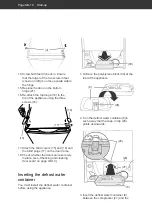
1. Ensure that the appliance is not connect-
ed to the power supply.
(15)
(18)
(17)
(16)
(19)
2. Using a flat-head screwdriver, carefully
pry out the blind covers (15) and (18) on
the top of the appliance and the blind
plugs (17) on the door frame.
3. Loosen the three screws (16) on the up-
per hinge (19), and remove these. As a

