background image

Page EN-13

Storing bottles

•  Make sure that the bottles do not directly 

touch the interior walls of appliance or the 
glass door.

•  Remove the packaging (e.g. cardboard) 

before placing items in the appliance.

•  Systematically fill the appliance so the 

wine you want is easy to reach so that 
you do not have to move the wine bottles 
around a lot.

•  Make sure that the appliance is at least 

70 % filled in order to counteract fluctua-
tions in temperature.

Maximum storage capacity

 NOTICE

Risk of damage!
Damage may be caused to the appli-
ance by placing too much weight on 
the shelves.

The maximum load is 26 kg/shelf.

The appliance is designed to only hold a cer-
tain number of 0.75 l bottles.

You can find out how many of these standard 
0.75 l bottles you can store in the appliance 
in the section “Intended use” on page EN-4.

•  Observe the max. load capacity.

 Maintaining quality

Storage temperature

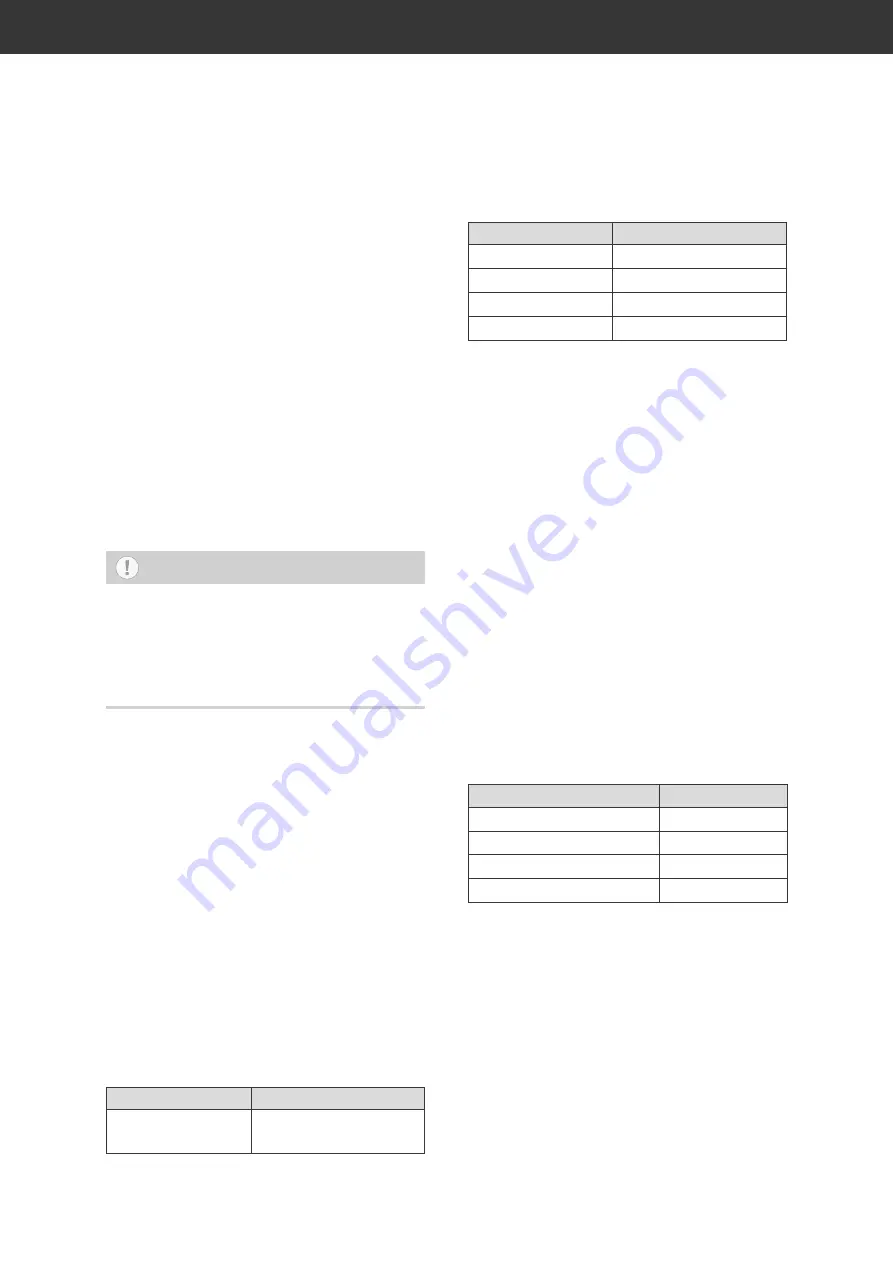
The optimum storage temperature varies de-
pending on the type of wine, due to the fact 
that wines have different shelf lives and age 
differently. A temperature setting that is too 
high or too low can reduce the shelf life of 
your wine. This leads to greater food waste.

Wine

Storage temperature

Semi-sparkling 
wine

+6 °C to +10 °C

Wine

Storage temperature

Sparkling wine

+10 °C

White wine

+10 °C to +12 °C

Red wine

+12 °C to +14 °C

Rosé wine

+12 °C to +16 °C

•  Avoid strong and frequent variations in 

temperature.

•  Ensure that there is enough space be-

tween the bottles to promote the circula-
tion of air inside the appliance.

•  The appliance’s interior temperatures can 

increase and lead to increased energy 
consumption
– if the glass door is opened frequently or 

for a prolonged period.

– if the temperature falls below or exceeds 

the prescribed interior temperature.

– if a large number of bottles is put into 

storage at once.

– if the appliance’s nominal capacity is ex-

ceeded.

Storage period

The storage periods of wines differs and is 
dependent on many factors. Use the follow-
ing storage periods as a general guideline:

Wine

Storage period

Rosé wine, light red wine 1 to 2 years
White wine

3 to 5 years

Red wine

approx. 6 years

Very sweet wines

+15 years

Additional factors

•  Make sure to move the wine as little as 

possible during storage. Frequently mov-
ing the wine around can lead to rapid 
ageing.

•  Ensure that the wine is kept as far away 

as possible from light and stored in the 
dark.

•  Switch on the LED light as seldom as 

possible. Exposure to light can affect the 
taste.

Summary of Contents for HWC24FCBH

Page 1: ...Weink hlschrank Gebrauchsanleitung Anleitung Version 2001 01226_DE_20200917 Bestell Nr 86458855 Nachdruck auch auszugsweise nicht gestattet HWC24FCBH...

Page 2: ...igneten Standort w hlen DE 18 ber Klimaklassen DE 20 Ger t aufstellen und ausrichten DE 20 Grundreinigung DE 21 Ger t anschlie en DE 21 T ranschlag wechseln DE 22 Fehlersuchtabelle DE 24 Service DE 26...

Page 3: ...ahme auf Seite DE 18 2 Entfernen Sie alle Verpackungsteile Kunststoffprofile Klebestreifen und Schaumpolster 3 Pr fen Sie ob die Lieferung vollst ndig ist 4 Kontrollieren Sie ob das Ger t Transport sc...

Page 4: ...kenntnis nicht in der Lage sind das Ger t si cher zu bedienen m ssen bei der Benutzung beaufsichtigt werden Nehmen Sie keine technischen Ver nderun gen am Ger t vor Verwenden Sie das Ger t ausschlie...

Page 5: ...tz erfolgt bei diesem Ger t nur durch Ziehen des Netzsteckers aus der Steckdose Ger t daher nur an eine gut zug ngliche Steckdo se anschlie en damit es im St rfall schnell vom Stromnetz getrennt wer d...

Page 6: ...R ck seite des Ger tes platzieren Risiken im Umgang mit K ltemitteln WARNUNG Brand und Explosionsgefahr Im K ltemittelkreislauf Ihres Ger tes be ndet sich das umweltfreundliche aber brennbare K ltemit...

Page 7: ...n Zum Abtauen auf keinen Fall Abtau sprays verwenden Sie k nnen explo sive Gase bilden Risiken f r Kinder Risiken f r Kinder WARNUNG Erstickungsgefahr Kinder k nnen sich in der Verpackungs folie verfa...

Page 8: ...r unterschreitet Es kann dann zu einem Temperaturanstieg im Ger teinneren kommen Immer die vorgeschriebene Umge bungstemperatur einhalten siehe Bestimmungsgem er Gebrauch auf Seite DE 4 Besch digungsg...

Page 9: ...reifen die Kunststofffl chen an Empfeh lenswert sind Allzweckreiniger mit einem neutralen pH Wert T rdichtungen und Ger teteile aus Kunststoff sind empfindlich ge gen l und Fett Verunreinigungen m gli...

Page 10: ...nelement 3 Glast r 4 Schraubf e 5 Pr sentationsbox 6 Flaschenborde 7 Taste zum Erh hen der Temperatur 8 Beleuchtungsanzeige 9 K hlanzeige 10 Lichtschalt Taste 11 Funktionstaste SET 12 Temperaturanzeig...

Page 11: ...3 leicht ge ffnet damit sich kein Schimmel bildet Bedienung Temperatur kontrollieren Die aktuelle Temperatur des Innenraums k nnen Sie w hrend des Betriebs an der Tem peraturanzeige 12 ablesen Wenn Si...

Page 12: ...eigt Die gew nschte Temperatur ist eingestellt Wenn Sie eine niedrigere Temperatur einstellen ben tigen Sie mehr K hl leistung Das erh ht den Energieverbrauch LED Beleuchtung Einschalten Dr cken Sie d...

Page 13: ...tlichen Sch den verursachen Wenn die T r f r eine l ngere Zeit ge ffnet wird kann es zu einem erheb lichen Temperaturanstieg in den F chern des Ger tes kommen Die Fl chen die mit Lebensmitteln und zug...

Page 14: ...ei nem Griff zur Hand haben Dadurch ver meiden Sie h ufiges Bewegen des Weins Um Temperaturschwankungen entgegen zu wirken sorgen Sie daf r dass das Ge r t mindestens zu 70 gef llt ist Maximales Lage...

Page 15: ...gen und damit auch der Energie verbrauch wenn die Glast r h ufig oder lange ge ffnet wird wenn die vorgeschriebene Raumtempe ratur ber oder unterschritten wird wenn eine gro e Menge an Flaschen neu ei...

Page 16: ...ralen pH Wert T rdichtungen und Ger teteile aus Kunststoff sind emp ndlich gegen l und Fett Verunreinigungen m g lichst schnell entfernen Nur weiche T cher verwenden T rdichtungen kontrollieren und re...

Page 17: ...ildet haben lassen Sie dies abtauen Geben Sie beim Nachwischen einige Tropfen Essig ins Wasser um Schimmel bildung vorzubeugen 7 Wischen Sie den Innenraum trocken und lassen Sie die Glast r 3 zum L ft...

Page 18: ...ial an der Ger ter ck seite besch digen 1 Transportieren Sie das Ger t mithilfe einer Transportkarre oder einer zweiten Person 2 Packen Sie das Ger t aus und entfer nen Sie vorsichtig alle Verpackungs...

Page 19: ...nnen Gut geeignet sind Standorte die trocken gut bel ftet und m glichst k hl sind Ung nstig sind Standorte mit direkter Sonneneinstrahlung oder unmittelbar ne ben einem Ofen Herd oder Heizk rper Diese...

Page 20: ...berpr fen Sie den Stand mit einer Wasserwaage 4 4 Gleichen Sie Unebenheiten des Unter grunds mithilfe der beiden vorderen Schraubf e aus Schlie en Sie dazu die Glast r 3 Kippen Sie das Ger t leicht na...

Page 21: ...ssig Netzkabel nicht knicken oder klem men und nicht ber scharfe Kanten legen Die Folge kann ein Kabelbruch sein VORSICHT Brandgefahr Unsachgem er Umgang mit dem Ge r t kann zu einem Brand und zu Sac...

Page 22: ...n 1 Stellen Sie sicher dass das Ger t nicht ans Stromnetz angeschlossen ist 2 Nehmen Sie die Pr sentationsbox und die Flaschenborde heraus 16 17 3 Dr cken Sie die Blindplatte 16 und die Scharnierabdec...

Page 23: ...ie sie vorsichtig auf dem unteren Scharnier ein Halten Sie die Glast r fest Sie ist noch lose 4 berpr fen Sie den korrekten Sitz der Glast r Justieren Sie die Glast r gegebe nenfalls nach Wiederholen...

Page 24: ...der Kompressor selbstt tig ein Ger t k hlt zu stark Temperatur zu niedrig einge stellt H here Einstellung w hlen siehe Tempe ratur einstellen auf Seite DE 11 Ger t k hlt nicht ausreichend Temperatur z...

Page 25: ...etriebsger usche sind funktionsbedingt und zeigen keine St rung an Rauschen K lteaggregat l uft Flie ger usche K ltemittel flie t durch die Rohre Klicken Kompressor schaltet ein oder aus St rende Ger...

Page 26: ...Inverkehrbringen des letzten Exemplars des Modells zur Ver f gung T rdichtungen stehen f r einen Zeit raum von zehn Jahren zur Verf gung Kunden in Deutschland Wenden Sie sich bitte an unseren Technik...

Page 27: ...i Austritt von K ltemittel besteht Brandgefahr Achten Sie darauf dass an einem K hlger t bis zur fachgerechten Ent sorgung keine K hlrippen oder Rohre besch digt werden Unser Beitrag zum Schutz der Oz...

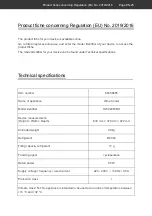
Page 28: ...ennung Ihres Ger ts finden Sie unter Technische Daten Technische Daten Bestellnummer 86458855 Ger tebezeichnung Weink hlschrank Modellkennung HWC24FCBH Ger tema e H he Breite Tiefe 830 mm 470 mm 472 m...

Page 29: ...Wine refrigerator User manual Manual version 2001 01226_EN_20200917 Article no 86458855 Reproduction even of excerpts is not permitted HWC245FCBH...

Page 30: ...N 18 Setting up and aligning the appliance EN 18 Cleaning before use EN 19 Connecting the appliance EN 19 Changing the door hinges EN 20 Troubleshooting table EN 22 Service EN 23 Advice complaints and...

Page 31: ...see Start up on page EN 16 2 Remove all parts of the packaging plastic profiles tape and foam padding 3 Check that the delivery is complete 4 Check whether the appliance was dam aged during transit 5...

Page 32: ...erate the appli ance safely due to their physical sensory or mental abilities or lack of knowledge must be supervised during use Do not make any technical changes to the appliance Use the appliance ex...

Page 33: ...erefore be connected to an easi ly accessible socket so that it can be quickly disconnected from the power supply in the event of a breakdown When positioning the appliance en sure the supply cord is...

Page 34: ...sensitive and can melt Do not use electrical appliances in side the food storage compartments of the appliance unless they are of the type recommended by the man ufacturer Keep the appliance away from...

Page 35: ...nside the appliance e g do not re move the shelf unscrew the door Risks for certain groups of people CAUTION Dangers for children and people with limited physical sensory or mental ca pacity This appl...

Page 36: ...for two hours before start up The lubricant will ow back into the compressor during this time Improper handling of the appliance can lead to damage to property Do not pull or lift the appliance by its...

Page 37: ...t 3 Glass door 4 Screw Feet 5 presentation box 6 Bottle shelves 7 Button for increasing the temperature 8 Lighting indicator 9 Cooling indicator 10 Light switch 11 SET function button 12 Temperature i...

Page 38: ...Operation If you want to control your temperature set ting press the SET function button 11 once The appliance will beep and the temper ature indicator 12 will flash the set tem perature Setting the t...

Page 39: ...The bottle shelves 6 can be removed and rearranged as necessary Removing the shelves Lift the rear of the bottle shelf slightly and pull it out The presentation box 5 can also be removed from the app...

Page 40: ...r health Opening the door for long periods can cause a signi cant increase of the temperature in the compartments of the appliance Clean regularly surfaces that can come in contact with food and acces...

Page 41: ...wine This leads to greater food waste Wine Storage temperature Semi sparkling wine 6 C to 10 C Wine Storage temperature Sparkling wine 10 C White wine 10 C to 12 C Red wine 12 C to 14 C Ros wine 12 C...

Page 42: ...neutral pH are recommended Door seals and plastic parts are sen sitive to oil and grease Remove con taminants as quickly as possible Only use soft cloths Checking and cleaning door seals The door seal...

Page 43: ...liquid If ice has formed on the walls let it thaw When wiping clean add a few drops of vinegar to the water to prevent mould from forming 7 Wipe the interior dry and leave the glass door 3 open for a...

Page 44: ...ack of the appliance 1 Move the appliance using a dolly or with the help of a second person 2 Unpack the appliance and carefully re move all packaging plastic moulding adhesive strips protective film...

Page 45: ...when fully laden Suitable locations are dry well ventilated areas that are cool if possible Unsuitable locations are ones with direct sunlight or which are directly next to an oven hob or radiator The...

Page 46: ...the back wall and 5 cm to the side 3 Check the position with a spirit level 4 4 Level out any unevenness on the ground using both of the front screw feet Close the glass door 3 Tilt the appliance back...

Page 47: ...pinch the mains cord or lay it over sharp edges This can re sult in a break in the cord CAUTION Fire hazard Improper handling of the appliance can lead to re and damage to property Connect the applia...

Page 48: ...ip screwdriver Medium size flat headed screwdriver Removing the glass door 1 Ensure that the appliance is not connect ed to the power supply 2 Remove the presentation box 5 and the bottle shelf 6 16 1...

Page 49: ...ully insert it on the lower hinge Firmly hold onto the glass door It is still loose 4 Ensure that the glass door is positioned properly Adjust the door if necessary Re peat steps 1 to 4 20 18 5 Tighte...

Page 50: ...he appliance doesn t cool suffi ciently Temperature has been set too high Select a lower setting see Setting the temperature on page EN 10 Door not tightly closed or door seal is not completely tight...

Page 51: ...or a minimum peri od of seven years after the final version of the model has been placed on the market Door seals are available for a period of ten years Customers in Germany Please contact our techni...

Page 52: ...d insulation must be proper ly disposed of Refrigerant leakage may cause a re hazard Until the point of proper disposal en sure that none of the cooling ns or tubes on a refrigerating appliance are da...

Page 53: ...e can be found under Technical specifications Technical specifications Item number 86458855 Name of appliance Wine Cooler Model identifier HWC24FCBH Device measurements Height Width Depth 830 mm 470 m...

Reviews: