Appendix D: Graphics Installation
Operator Manual
C
4000™
(Rev 1)
© Hantle 2010
D.3
3.
Open the SD card in ‘My Computer’, and create a folder called
“Common”.
4.
Open the “Common” folder, and create a sub-folder called “img4SCR”.
5.
Inside the img4SCR folder is where you want to copy all your graphic
files.
-
The graphic files must follow the naming convention that we describe
on page 1. (ie: center1.bmp, center2.bmp or top1.bmp, top2.bmp).
6.
Once your graphic files are copied, insert the SD card into the SD card
slot on the mainboard located behind the LCD.
7.
Power off, then power on the C4000™ with the power supply switch.
8.
When the ATM is fully initialized then remove the SD card.
Enabling the Center Graphics:
1.
Go into the Operator Menu.
2.
Then to Customer Setup > Graphics >
Advertise
EN/Disable and go
through each advertisement you want to show up and turn it ON.
Enabling the Banners Graphics:
1.
Go into the Operator Menu.
2.
Then to Customer Setup > Graphics >
Banner
EN/Disable and go
through each banner you want to show up and turn it ON.
Windows XP users
:
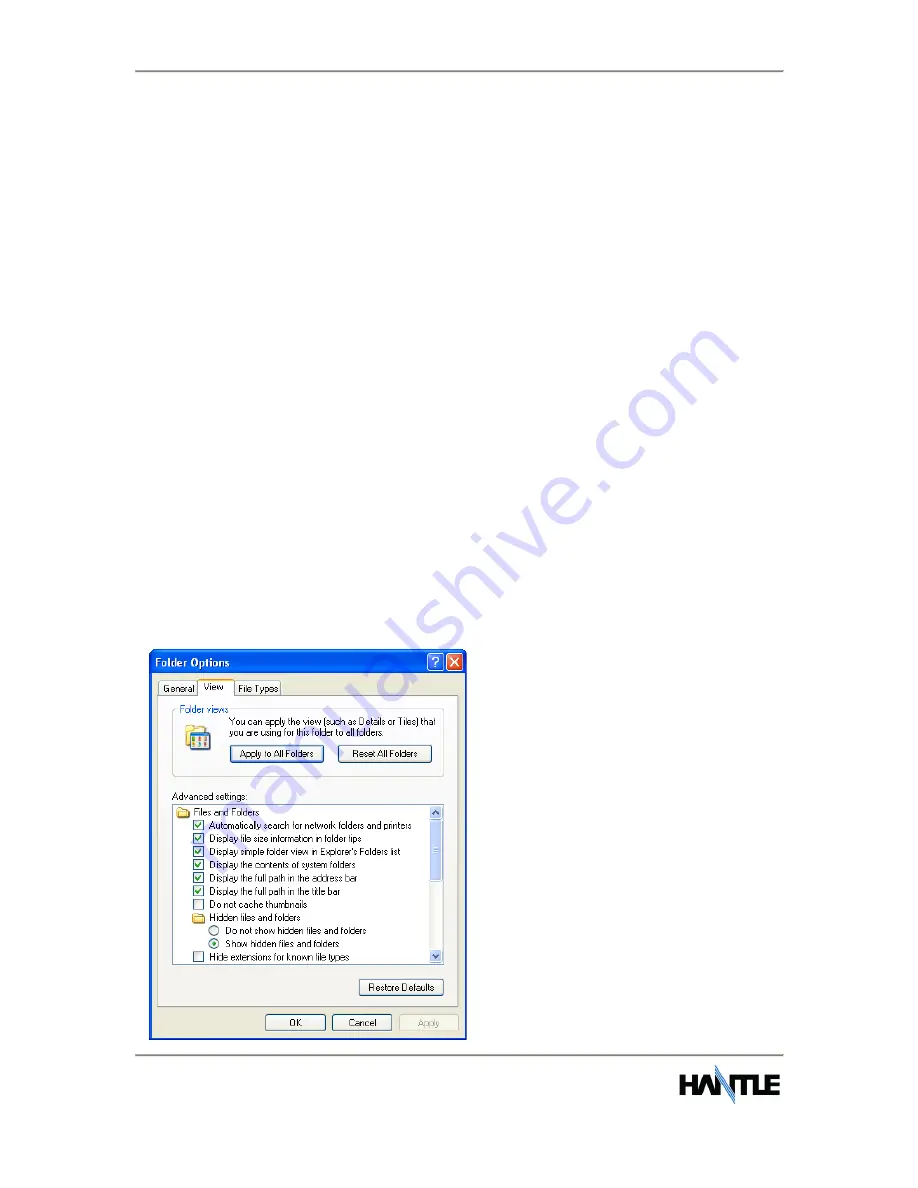
Before creating the file in step #2, you may need to change your file options.
Open a folder and click on “Tools”, select Folder Options
Make sure Folder Options match
those shown here. Specifically
the “Hide extensions for known
file types” option which needs
to be unchecked.
If these options are not set
properly, the update.acu file
may not function, causing the
graphics to not load.


