background image

42_

 setup

setup

setup

Sets the camera, recording, event, device, network, and system environment.

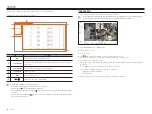
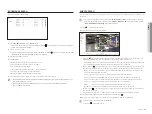
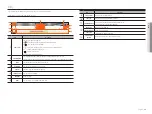
Screen lAyout of tHe SetuP

a

c

e

d

b

Item

Description

a

Menu 

Click each menu to go to the menu screen.

b

Top menu list

Configure the settings or select a parent item to change the existing settings.

c

Sub-menu list

Among the sub-menus of selected parent menu, select a desired item to set. 

d

Detailed Menu

Click desired item's input field to change and enter a desired value.

e

Apply

Apply the modified settings.

Setting tHe cAMerA

You can access to the channel setup, camera settings, and profiles and camera password-related settings.

Setting the channel

You can register a network camera for each channel and make connection between.

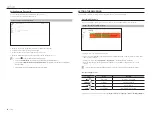
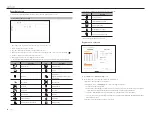
Setup > camera > channel setup 

• 

 : Displays the camera of the corresponding channel as a list or a thumbnail.


`

Camera searched with ONVIF does not provide previews. 

•  Camera name : Provide a camera Name. You can enter up to 15 letters including spaces.
•  IP address : Display the IP address of a network camera.
•  Model : Show the camera model name.
•  Protocol : Show the protocol information of a registered network camera.
•  Video

-  ON/OFF : You can turn ON/OFF the selected channel's camera. If the camera video is turned off, a blank 

screen is displayed.

-  Covert1 : Shows information other than the video of the selected channel.

For privacy protection, it does not display the video while the recording continues.

-  Covert2 : Shows nothing but an empty screen while the recording continues.


`

If the channel is set to 

<Covert1

> or 

<Covert2

> mode, the channel's sound is not hearable.

However, the channel's sound is recorded if its Audio setting is set to <

ON

>, even the sound is not heard in Live mode.

•  Audio 

-  If set to <

on

>, you can turn the audio of the channel ON/OFF on the Live screen.

-  If set to <

off

>, the channel's audio is off on the Live screen and not recorded.

•  Status : Display the connection status.
•  Edit : You can change the connection information of the camera.
•  Upgrade : You can check the camera’s version, upgrade version, and status and upgrade it.


`

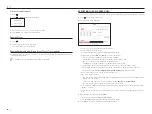
If you cannot register a camera after initializing the system, check the network setting. As the system is initialized and the network 

setting is reset, the camera's network bandwidth will be different from the product's network bandwidth, so it will be impossible 

to register a camera.

Summary of Contents for Wisenet XRN-3210B4

Page 1: ...NETWORK VIDEO RECORDER User Manual Wisenet NVR ...

Page 2: ... provided Use of this document and the subsequent results shall be entirely on the user s own responsibility Hanwha Techwin reserves the right to change the contents of this document without prior notice Design and specifications are subject to change without prior notice You can download the latest version from the HanwhaTechwin web site www hanwha security com The initial administrator ID is adm...

Page 3: ...rch for text data from the POS device connected to Wisenet Recorder Monitor real time events that occur in Wisenet Recorder sensors and cameras or search through logs Before using this product check if the latest version of this software is installed Go to Hanwha Techwin s website http www hanwha security com to check the software version and download necessary files Important Safety Instructions ...

Page 4: ... part or the body seek immediate medical attention ATTENTION IL Y A RISQUE D EXPLOSION SI LA BATTERIE EST REMPLACÉE PAR UNE BATTERIE DE TYPE INCORRECT METTRE AU REBUT LES BATTERIES USAGÉES CONFORMÉMENT AUX INSTRUCTIONS Ne pas ingérer la pile risque de brûlure chimique Ce produit contient une pile de type bouton pièce de monnaie Si la pile de type bouton pièce de monnaie est avalée elle peut causer...

Page 5: ...Up the Live Layout 22 Check Layout List 22 Add Layout and Set Name 23 Change of Layout Channel and Name 23 Delete Layout 23 Play Layout Sequence getting started 9 live 13 32 Screen Layout of the Search 32 Time Search 33 Event Search 33 Text Search 34 Export Search 34 ARB Search 35 Bookmark Search 35 Smart Search search 32 24 Real Time Event Monitoring 24 Check Event List 24 Event Search 25 Event I...

Page 6: ...Option 52 Setting the Event 52 Event setup 54 Event Rule Setup 55 Alarm Input 55 ONVIF 56 Schedule setup 42 56 Setting the Device 56 Storage Device 60 Distributed Recording 61 S M A R T 61 Monitor 63 Text 64 Setting the Network 64 Interface 66 DDNS 67 IP Filtering 67 HTTPS 68 802 1x 68 E mail 69 SNMP 70 DHCP Server 70 Failover 72 P2P 72 Setting the System 72 Date Time Language 73 User 76 System Ma...

Page 7: ...ive Screen Menu 88 Camera Video Control 88 Capture 88 PC Recording 88 Instant Viewer 88 Microphone Output 88 PTZ Mode 89 Performing Digital Zoom 89 Audio Out 89 Video Rotation 89 Channel Aspect Ratio 89 PTZ Control 89 PTZ Control Menu 90 Using Digital PTZ D PTZ function 90 Preset 90 Running Preset 90 Running Swing auto pan Group scan Tour or Trace pattern 90 Exporting Video search viewer 91 AI sea...

Page 8: ... Camera Setup 100 Profile Setup 101 Camera Password 101 Setting the Recording 101 Recording Schedule 101 Record Setup 102 Record Option 102 Setting the Event 102 Event Setup 103 Event Rule Setup 103 Alarm Input 103 ONVIF Setup 104 Schedule 104 Setting the Device 104 Storage Device 105 Monitor 106 Text 106 Setting the Network 106 Interface 107 DDNS 107 IP Filtering 107 HTTPS 107 802 1x 10⁸ E mail 1...

Page 9: ...e accessed at factory reset If you do not want to proceed click exit It will automatically change to the optimal monitor resolution and run the install wizard If the install wizard does not run remove the monitor connection from the back of the recorder reboot the recorder and reconnect the monitor 1 In the language screen select the language and press the next button 2 Set the network connection ...

Page 10: ...ewer Can be used as a port transmitting video to the web viewer If you access the network information on your browser then you can remotely monitor video in your web viewer Network 3 iSCSI Can be used as a port for an iSCSI connection All Can be used as a common port for connecting camera web viewer and iSCSI IP type Allows you to select the type of network access IP Address Subnet Mask Gateway DN...

Page 11: ...d click change iP After completing camera register click next After entering the ID and password set in the camera the connection test must be completed to successfully register 7 On the channel setup screen you can view the camera videos registered to each channel in thumbnails along with thumbnail information To change the camera video position select a video and drag and drop it to the desired ...

Page 12: ...f Contents Login To use the Recorder menu you are required to login as a user that is authorized to access the applicable menu 1 Select Login at the top right of the screen 2 The Login dialog appears 3 Enter the user ID and password then click OK The initial administrator ID is admin and you will need to configure the password in the installation wizard Please change your password every three mont...

Page 13: ...lected channel in the designated path in a recorder or SEC format Clears the alarm in the event list and stops the alarm at the notification display of the system status Activates the manual recording function of the recorder g Displays information of the OSD screen on the video window Shows channel information Shows the status of all cameras connected to the recorder h Moves the page of the split...

Page 14: ...PU It disappears when you modify the Delete Camera or Set Camera to reduce the data rate Displayed if the server has firmware to update It is displayed when the system is overloaded Limit the number of users remotely monitored by Web Viewer or VMS or control the number of events displayed in the event list of the recorder Displayed when manually recording a video while the access restriction for s...

Page 15: ...creen menu appears differently depending on the recorder operation status or the type of the registered camera Each function may be restricted depending on the type of camera and the user s authority For more detailed information about each function refer to the table of contents Live Camera Video Control Item Description Capture You can take a screenshot of the selected channel Instant Viewer You...

Page 16: ...on the live screen but only the OSD will be displayed Item Description c Event Display Events from the recorder and camera are displayed in icons For details refer to the Setup Setting the Event Event rule setup page in the Table of Contents Status Display It is displayed on the channels that can enable the PTZ mode Displays AUDIO ON OFF It will not be displayed when Off is selected for the audio ...

Page 17: ... CH3 Single mode Horizontal 2 split screen Vertical 2 split screen Vertical 3 split screen CH1 CH2 CH3 CH4 CH2 CH1 CH3 CH4 CH5 CH6 CH2 CH3 CH1 CH4 CH5 CH6 CH7 CH8 CH1 CH2 CH3 CH4 CH5 CH6 CH7 CH8 CH9 4 split mode 6 split mode 1 5 split mode 8 split mode 1 7 split mode 9 split mode CH2 CH3 CH4 CH5 CH6 CH7 CH8 CH1 CH9 CH10 CH11 CH12 CH13 CH1 CH2 CH3 CH4 CH5 CH6 CH7 CH8 CH9 CH10 CH11 CH12 CH13 CH14 CH...

Page 18: ... CH33 CH34 CH35 CH36 CH31 CH32 CH1 CH2 CH3 CH4 CH1 CH7 CH8 CH4 CH3 CH2 CH5 CH1 CH6 CH12 CH1 CH13 CH19 CH4 CH7 CH5 CH10 CH8 CH11 CH6 CH2 CH3 CH4 CH5 CH2 CH6 CH1 CH3 CH7 CH8 CH9 CH1 CH2 CH3 CH4 CH5 CH6 CH7 CH8 CH9 CH10 CH11 CH12 CH13 CH14 CH15 CH16 CH1 CH4 CH5 CH2 CH6 CH1 CH3 CH7 CH8 CH9 CH13 CH14 CH11 CH15 CH10 CH12 CH16 CH1 CH3 CH2 CH4 CH5 CH6 CH1 CH2 CH1 CH2 CH3 CH1 CH15 CH11 CH16 CH12 CH7 CH3 CH...

Page 19: ... monitored 800x448 H 264 S I D 25 24 9 24 9 XNV 6081Z S 800x448 Displays the resolution of the video H 264 Displays the video codec S I D 25 24 9 24 9 Displays the frame rate FPS of the video S Settings I Video input D Video display XNV 6081Z Displays the camera model name CH1 For multi channel cameras the channel number is be displayed The channel number may not be displayed depending on the came...

Page 20: ...nfigured to each channel Record Type View the record type according to general or event recording Frame rate fps Show the input record frames per second for each channel Bitrate bps Limit Input Record Shows the amount of limit input recording data for each channel Receive Limit Shows the data ratio of actual data transferred from the camera and allowed maximum defined by user Record setup You can ...

Page 21: ...2 CH1 CH13 CH19 CH4 CH7 CH5 CH10 CH8 CH11 CH6 CH2 CH3 CH4 CH5 CH2 CH6 CH1 CH3 CH7 CH8 CH9 CH1 CH2 CH3 CH4 CH5 CH6 CH7 CH8 CH9 CH10 CH11 CH12 CH13 CH14 CH15 CH16 CH1 CH4 CH5 CH2 CH6 CH1 CH3 CH7 CH8 CH9 CH13 CH14 CH11 CH15 CH10 CH12 CH16 CH1 CH3 CH2 CH4 CH5 CH6 CH1 CH2 CH1 CH2 CH3 CH1 CH15 CH11 CH16 CH12 CH7 CH3 CH8 CH4 CH13 CH9 CH14 CH10 CH5 CH1 CH6 CH2 CH15 CH11 CH16 CH12 CH7 CH3 CH8 CH4 CH13 CH9 ...

Page 22: ... room 2 Directors lounge 1 Corridor camera on the 7th floor check layout list Click list at the top left of the live screen and then click to display the layout list Create a new layout Change the channel or name of the layout Save the changed layout Delete the added layout Open or close the layout list Add layout and Set name 1 Click to add a layout 2 Click to set the name for the added layout 3 ...

Page 23: ...ally switch the layout list to a set time interval to view Sequence Setting Click at the bottom of the layout list to set the sequence Sequence switching time Set the switching time of the layout list Sequence list Set the layout sequence playback order You can add the same layout repeatedly Play layout Sequence Click Play sequence at the bottom of the layout list to automatically switch the layou...

Page 24: ...time and post event time are set event recording is performed before or after the event according to the set recording method For more information about event recording settings refer to the Setup Setting the Recording Record setup page in the Table of Contents The video may be delayed depending on the network condition The event output can be delayed as the transfer of the alarm event from the ne...

Page 25: ...op the alarm output if necessary For details refer to the Setup Setting the Event Event rule setup page in the Table of Contents Camera Video Control By using the function icon of the video window you can easily use the functions of capture video zoom PTZ camera and thermal imaging camera When you place your mouse over the video window the live screen menu will appear Capture You can take a screen...

Page 26: ...rol mode Depending on the camera the PTZ control function and speed may be different The PTZ mode is closed Captures video of the current state After clicking the digital zoom icon you can use the buttons to zoom in or zoom out the video Returns to the 1x zoom screen Adjusting the Camera Direction When you rolls over the mouse to the 8 way key appears and when the mouse leaves the area of the dire...

Page 27: ...ngs as appropriate The sound icon can be displayed if the sound signal fails to output from noise Only the channel where Audio is set to On in Setup Camera Channel Setup displays the audio icon in Live mode that you can use to turn the sound on off Display Text You can monitor texts regarding the sales record received from POS in real time This is executable when a text device is connected The Rec...

Page 28: ...cting the desired channel click on the live screen menu This is available only if a PTZ camera is connected and the icon is displayed on the screen Even if the connected network camera does not support the PTZ operations you can configure the PTZ control settings if possible by installing the PTZ driver physical device It only supports a network camera with Hanwha Techwin s PTZ function and a came...

Page 29: ... Some cameras may differ in the menu title and operation with regard to Swing Group Tour and Trace Even if your network camera supports the function you can use it only if the button is activated in the PTZ control launcher using digital PtZ d PtZ function 1 Register a camera that supports the D PTZ profile In cameras that support the D PTZ profile you can use the D PTZ function 2 Both cameras tha...

Page 30: ... recorded End You can set the end time for the export to the desired time Click end to set the export end time to the last time the video was recorded Overlapped Data Shows a list of overlapping data on a same time according to the number of data This is displayed when there are duplicate data in the same channel due to changes in the time or time zone For more details refer to the Setup Setting t...

Page 31: ...port is in which is a progress You can switch to the menu screen during export progress but data playback will not be possible Data can be played in the web viewer during export progress but audio will not be supported If the export fails check the current capacity and status to see if the hard disk is connected properly in the Device Storage Device menu If Hide is selected while the export is in ...

Page 32: ...ages you can click to go to the previous next page Or you can click the current page number and enter the desired page to move Time Search You can search the recorded data by the desired date and time conditions The time displayed will be based on the time zone and daylight saving time DST applied time zone so it may be displayed differently depending on whether the data time zone recorded at the ...

Page 33: ...fies a bookmark to the recorded video 7 If you double click an item to play in the search list the recorded video will be played Text Search You can search the data input to the POS device connected to the recorder 1 Select Text search in the Search menu 2 Select a date and time to search 3 Set the keyword item When you click an item the keyword setting window appears You can search with a narrowe...

Page 34: ... recorded video will be played ARB Search You can search auto recovery backup data stored on ARB storage devices 1 Select ARB search in the Search menu For more information about ARB search refer to the Setup Setting the Device Storage device page in the Table of Contents 2 When you click on the storage device selection the device search window is displayed Click to search for backup devices The m...

Page 35: ...in the Table of Contents 1 Click on the video window menu 2 Set the smart search area in the video window Virtual line Detects the passing of an object based on the virtual line and direction set on the image Click and drag the start and end points of the virtual line to the desired location with the mouse The virtual line can be set in one direction or both directions If you select the option of ...

Page 36: ...corded data you can search for a person by any condition you want such as gender top bottom color 1 Select Person search in the AI search menu 2 Select a channel to search If you select a channel to search you can change the channel display mode by clicking You can select a desired channel by clicking or dragging it from the channel table and clicking the channel in the channel list 3 Select a dat...

Page 37: ...ded video 7 If you double click an item to play in the search list the recorded video will be played Vehicle Search You can search the vehicle by setting the vehicle type and color conditions from the recorded data 1 Select Vehicle search in the AI search menu 2 Select a channel to search If you select a channel to search you can change the channel display mode by clicking You can select a desired...

Page 38: ...g the channel in the channel list 3 Select a date and time to search 4 Select the overlapped data It will be displayed when there is overlapped data in one channel by changing the time or time zone at the selected time 5 Click the Search button CH Displays the recorded channel Camera name Displays the camera name Time Displays the start time of the recorded video Play Plays the recorded video with...

Page 39: ...ime zone change at the selected time c Export You can export the video of the channel you are playing d Event filter You can filter the event items to see the time line e Channel The channel and camera name will be displayed f Playback control You can control video playback g Date Time Set the date time h Status You can check the live recording and network status Item Description i Select channel ...

Page 40: ...the time line of multiple channels You can click to display 1 to 4 channels in the time line The time line will be displayed as many channels as selected Click to move to the previous or next channel Place your mouse over the time line to see the corresponding thumbnail of the recorded video Play button name and function Paused state a b d c e f Playback state g i h Item Description a Previous eve...

Page 41: ...ort in your own file format that can be played directly on your PC You can play with the viewer included in the export folder Click Setup to set a password for the exported video If you check Text data included you can save text data in the exported video Recorder You can export to a file that can be played only on the recorder 7 Check the path to save the file to be exported Only the file name to...

Page 42: ...rotocol Show the protocol information of a registered network camera Video ON OFF You can turn ON OFF the selected channel s camera If the camera video is turned off a blank screen is displayed Covert1 Shows information other than the video of the selected channel For privacy protection it does not display the video while the recording continues Covert2 Shows nothing but an empty screen while the ...

Page 43: ...Setup Camera Camera password If the camera s ID and password have already been set the registered information matches the ID and password set in the Setup Camera Camera password up to 3 sets Wisenet camera is registered via Wisenet protocol while a third party camera is registered via ONVIF protocol registering a network camera Manually 1 In the channel setup field click on the Manual button 2 The...

Page 44: ...he reason for the failure will be displayed Connection failed due to unknown error This message appears if the camera has failed to be registered due to unknown connection status Due to the camera account locking access has failed When you enter a wrong ID password 5 times to login to the camera account this message is displayed Try to log in again after 30 seconds If the same message appears you ...

Page 45: ...der the file may not be scanned The system may reboot if USB is disconnected from the device during an upgrade via USB Video data of the channel connected to the camera to upgrade may not be recorded Do not format the HDD until the upgrade is complete The upgrade may fail Setting the camera functions You can set the camera while viewing the live video of the selected camera Setup camera camera set...

Page 46: ...f Defog levels can be set focus You can adjust the focus of you camera s video You can set focus zoom in simple focus and focus reset flip You can set flip mirror modes and hallway view Privacy You can set an area to be hidden in the camera image range to protect privacy You can select whether or not to use the privacy setting and set up to 32 new privacy areas With a PTZ camera it is not possible...

Page 47: ... is performed with the profile set for recording Profile You can set the camera profile Codec Show the codec of the selected profile Resolution Show the resolution of the selected profile Frame rate Show the frame rate of the selected profile Edit You can add change and delete the camera profiles Setting the remote Profile You can set the video profile transmitted to the network Setup camera Profi...

Page 48: ...on and frame rates can be changed in the setup menu of the camera web viewer For camera web viewer refer to the Setup Viewer Setting the Camera Camera Setup page in the Table of Contents Click Camera website button for connection If you change the current profile settings you may encounter an interrupted playback on the recording or live screen for a certain time Changes made in your camera s setu...

Page 49: ...n there is no motion in the video Minimum GOV value can be set on the camera web page Range The range of the input value of length is displayed Any profile not supported with the dynamic GOV FPS setting is marked with How to set wiseStream Function to analyze the complexity of the video and effectively reduce the data size while maintaining the quality For details refer to the camera s help or the...

Page 50: ...ding event recording and other recording related settings recording Schedule If you set a recording schedule for a specific date and time the recording will start at that specific time Setup record recording schedule Channel Select the channel you want to set All The entire time range Monday through Sunday including holidays AM 0 PM 23 will be reserved with the same recording schedule Apply to CH ...

Page 51: ...d data is not being transferred from the camera and that the recording is being performed temporarily using another profile on the camera Check the channel information to see the applied profile to the channel listed in yellow A channel displayed in orange indicates that the amount of inputted data is greater than the permitted data amount In this case it is impossible to record all of the incomin...

Page 52: ...t are clearly distinguishable and a higher sensitivity for an environment where the background and an object are not clearly distinguishable Object size You can set the size of the object to recognize the motion Click Setup to select the minimum maximum size and set the object size on the preview screen Motion Setup Event Event setup Motion Motion detection You can set whether to enable motion det...

Page 53: ...me or if an object which exists inside the area disappears an event is created You can set the minimum observation time for each area which is needed to trigger an event after motion detection Loitering Creates an event when the motion of a loitering object in the virtual area is detected You can set the minimum observation time for each area which is needed to trigger an event after motion detect...

Page 54: ...er On Off Alarm in camera alarm in NVR Manual recording Event action Displays the event action set in the event rule Item Description PTZ preset setting Alarm output and beep setting E mail recipient setting Mobile push receive setting Event monitoring duration setting Edit Changes the registered event rule register a new event rule 1 Click Add in the event rule setup field 2 Set the details when ...

Page 55: ...n will run only when all set event triggers occur If only one of the multiple events set has occurred the event action will not run Set the event action only when necessary 3 Click OK at the bottom of the setting window to register the event rule Alarm Input You can set the operation of the alarm sensor Setup Event Alarm input Type Set the mode in which the alarm sensor will operate Off Alarm sens...

Page 56: ... storage device If the state of use is in Not Defined format the HDD before use Status Displays the current working condition of a storage device Temperature You can check the temperature of the HDD mounted in the Recorder Time Displays the use time of an HDD Format Select a device and click on format after which a format confirmation window appears Click on the OK button to format the selected st...

Page 57: ...ple channels If you select All all channels will be selected ARB bandwidth Select a bandwidth for the ARB function The ARB feature is available only when your video is saved in the SD card after registering your Wisenet camera using the Wisenet protocol This is only supported in SUNAPI 2 3 2 or later Set the profile bitrate used for recording a video in the SD card of camera to 6144 kbps or below ...

Page 58: ... function is supported If you activate the LUN mapping function in the iSCSI device the LUN can only be connected to a Recorder which is mapped More than one mapped lun should be available to connect to the initiator when using lun mapping An internal HDD must be mounted in the Recorder before connecting the iSCSI device For the stable communication of large data register only one iSCSI device to ...

Page 59: ...en the maximum number of HDDs allowed in the RAID level are malfunctioning if an additional HDD malfunctions you cannot use or restore the RAID Immediately replace the HDD and proceed with restoration For more information about how to replace the HDD and recover the RAID array refer to the Setup Setting the Device Storage device page in the Table of Contents Rebuilding Indicates that the RAID arra...

Page 60: ... an HDD of the same capacity from the same manufacturer A HDD used to build the RAID should be one of the recommended models If it s not possible to use the same model of HDD then use the HDD with the same capacity from the same manufacturer should be used If you remove the power cord while using the RAID it can damage it so be careful For reliable power it is recommended you use the UPS A new HDD...

Page 61: ...mode for video display Clone mode You can set the video display resolution of the primary monitor HDMI 1 and secondary monitor HDMI 2 to be the same If you set a resolution exceeding 1920 x 1080 while operating in clone mode the video will not be displayed to the secondary monitor HDMI 2 Extended mode You can set the video display resolution of the primary monitor HDMI 1 and secondary monitor HDMI...

Page 62: ... the extended monitor 2 Select split mode in the layout mode 3 Select as many channels on the channel table as the number of channels selected in layout mode and you can view the applicable screens on the monitor If the newly selected resolution does not fit with the monitor the display won t function properly In this case wait until the native resolution is restored and then switch to another res...

Page 63: ... in the text device list 2 Enter the device information to register in the text device window Device name Enter the desired text device name Use of a device Specify whether to enable text device CH Select a channel to add a device from a channel table Playback start time Enter the start time of the playback from how many seconds before when an event occurs Port Enter the device s port number Encod...

Page 64: ...twork connection route and protocol Setting a network connection Sets the protocol and environment of the network Setup network interface network Network Each product supports a different number of network ports If it supports two or more network ports you can set the network for each function as follows Network 1 Camera It can be used as a port for connecting a camera If you connect a camera then...

Page 65: ...on the local PC that is connected to the Broadband Router and enter the router s address ex http 192 168 1 1 2 At this stage make the local PC s windows network configurations to the below example example IP 192 168 1 2 Subnet Mask 255 255 255 0 Gateway 192 168 1 1 Once connected to the Broadband Router it prompts with password While entering nothing to the User Name field enter admin into the pas...

Page 66: ...rity com DDNS is a short form of Dynamic Domain Naming System DNS Domain Name System is a service that routes a domain name consisting of user friendly characters ex www google com to an IP address consisting of numbers 64 233 189 104 DDNS Dynamic DNS is a service that registers a domain name and the floating IP address with the DDNS server so that the domain name can be routed to the IP address e...

Page 67: ... the screen 3 When the additional window is displayed set the details IP filtering Select whether to enable IP filtering IP address Enter the address to enable IP filtering When entering an IP address a value in the range 0 255 must be entered to register Prefix Enter the prefix value 4 Click oK to complete To delete a registered item select the check box of the item to be deleted and click Delete...

Page 68: ...nt private key For successful implementation of the 802 1x operating environment the administrator must use the RADIUS server In addition the switch hub connected to the server must be a device that supports 802 1x If the time setting of the RADIUS server the switch hub and an Recorder device do not match communication between them can fail If a password is assigned to the client s private key the...

Page 69: ...a group and enter names and email addresses If a group is created you can add a recipient SnMP The SNMP protocol allows system or network administrators to remotely monitor and configure the network devices Setup network SnMP Enable SNMP v1 SNMP v1 is used Enable SNMP v2c SNMP v2c is used Read Community Enter the name of read only community to access the SNMP information By default it is set to pu...

Page 70: ... The recorder you want to configure for failover needs to be connected to both the camera and viewer ports to the local network Failover configurations can only be set with recorders of the same model Troubleshooting network interface supports IPv4 only All recorders must have time synchronized For more information about time synchronization settings refer to the Setup Setting the System Date Time...

Page 71: ...an only enable some functions in the System Device and Network menus You can t use the Record and Event menus In the standby recorder the previous operation will stop when a failover is performed during the playback or section export and the screen will move to the live screen State name description Ready Ready to be connected Connected General equipment and standby equipment connected failover av...

Page 72: ...check and setup the current Date Time and time related properties as well as the language used for the interface on the screen Setup System date time language Date Sets the date and its format that will appear on the screen Time Sets the time and its format that will appear on the screen Time zone Sets the time zone of your area based on the Greenwich Mean Time GMT GMT Greenwich Mean Time is stand...

Page 73: ...as adding or deleting users and granting different authorities for each user Setting the Administrator You can set and change Administrator s ID and password The administrator can use and set all menu items and functions Setup System user Administrator ID Change the admin ID Password Enter the current PW New PW Enter new password Confirm PW Enter the new password again If View password is selected...

Page 74: ...an select and set the setting menu that can be accessed A group user can only access the menu selected If you select the menu the menu permission setting screen will be displayed Record Record stop PTZ Remote alarm out Shutdown You can set the menu to grant access to users in the group Permission set menus will show up in the Live menu when users of the group log in 2 Select Apply Users in the gro...

Page 75: ...automatically logged out if there is no operation on Recorder for over set period of time Manual Input of ID In the login window select whether to enter ID On Enter your ID manually each time you log in Off The registered ID will be displayed in the login window if the user has restricted access If a general user selects a menu to which they do not have access an access restriction confirmation wi...

Page 76: ...ware version 1 Connect a device storing the software to be updated It may take about 10 seconds to recognize the device Upgradeable devices include USB memory and network device If you want to upgrade it on the network the product should be connected to an external network Upgrade via the proxy server may not be enabled due to the restricted access 2 Select System management from System window 3 S...

Page 77: ...larm output used when the power is off check box and click Apply to clear all alarms set for alarm output 1 and then selecting alarm 1 with another alarm out will not be possible This function is provided only for products that support alarm output If that function is set the first alarm out checkbox and all alarms in the alarm setup screen are deactivated to Off If you export setup information th...

Page 78: ...rmat by selecting the type Select the desired type and click Apply First page Last page Move to the first last page when there are many search results Export Save all the logged information recorded in the Recorder into the storage media checking the export log You can search the user who performed the export and the execution time and details time channel device file type Setup System log informa...

Page 79: ... address or URL of Recorder into the URL address box 2 A user with the admin permissions should provide the admin ID and password A registered user should provide the user ID and password 3 After you log in the Live Viewer main screen appears All settings are applied according to the Recorder settings When an initial password is entered while partially resetting to access a web viewer a pop up win...

Page 80: ...nd click Next When the password is in factory reset it can be changed and managed in a batch Up to 3 sets of camera ID with password and password can be registered You cannot change the password for cameras registered with ONVIF and RTSP 3 Set the network connection type and the connection environment on the Network screen and then click the Next button For details on network settings refer to the...

Page 81: ... the camera connected to the recorder p The ID of the connected user is displayed You are directly connected to the Hanwha Techwin homepage www hanwha security com Changes the color theme of Web Viewer q System status display Displays the status of the system hard disk and network live viewer You can check the video from camera registered in the Recorder connected from a remote PC Also you can adj...

Page 82: ...when the amount of input data by channel exceeds the set amount of data limit Displayed when the hard disk is full during recording and the recording capacity is insufficient Displayed when the hard disk does not exist or needs to be replaced Displayed when there is an abnormality in RAID or cannot be used Displayed when RAID is being rebuilt Displayed when an error occurs in the iSCSI device conn...

Page 83: ...s Record Status Click the button followed by the Record tab You can check the profile recording type input recording rate and setting input recorded data rate by channel Use Current Max to check the current recording status and maximum recording setting value To change the profile setup click the Record Setup button Network Status Click the button followed by the Network tab You can check the stat...

Page 84: ...ges to the actual proportion of the video If you want to go back to the previous screen ratio click again Full Screen Mode You can change to full screen mode which has no top bottom left right areas of the live screen Click at the bottom of the screen To exit the full screen press the ESC key on the keyboard or click at the bottom of the full screen mode General mode Full screen mode ...

Page 85: ...he layout list Add Layout and Set Name 1 Click the button 2 Set the name of the layout 3 Double click a channel to display on the layout screen from the device list 4 Click to save the set layout The default layout of the live viewer consists of a 4 split screen Each layout is saved separately by the user Change of Layout Channel and Name 1 Click after selecting a layout 2 Add or delete channels o...

Page 86: ...vents in the event list Common event Searches for event types that have occurred in general cameras such as motion detection and IVA AI event Searches for AI event types such as face person and vehicle Camera Displays events for the selected camera only The Safari browser does not support this feature Check Event List When new events occur the list of events will be updated accordingly The specifi...

Page 87: ...nnel on the split mode roll the mouse cursor over the screen to see the live screen menu The live screen menu appears differently depending on the recorder operation status or the type of the registered camera Each function may be restricted depending on the type of camera and the user s authority REC 90 90 REC 90 REC 90 REC 90 90 REC 90 REC 90 REC 90 90 REC 90 REC 90 REC 90 90 REC 90 REC 90 REC 9...

Page 88: ...he live screen Select the desired channel and click PTZ Mode You can run PTZ control of the selected channel Select the desired channel and click Enters the PTZ control mode Depending on the camera the PTZ control function and speed may be different REC 90 90 REC 90 REC 90 REC 90 90 REC 90 REC 90 The PTZ mode is closed Captures video of the current state REC 90 90 REC 90 REC 90 Go to the instant v...

Page 89: ...f Video Rotation You can rotate the live video screen Select the desired channel and click Each click of the button will rotate the video 90 degrees clockwise Channel Aspect Ratio You can change the aspect ratio of each channel Select the desired channel and click It changes to the actual proportion of the video PTZ Control PTZ Control Menu If the connected network camera is a PTZ camera the icon ...

Page 90: ...hat saves your preset settings with a different one you must configure the preset settings again To delete a registered preset 1 Click 2 Select the preset to delete and click Delete The selected preset will be deleted Running Preset 1 Click 2 Double click the preset you want to run from the list The camera lens moves to the set position Running Swing auto pan Group scan Tour or Trace pattern The r...

Page 91: ... actual proportions Name Description e Turns on off the section setup f Saves the video of the selected channel in the designated path in AVI format g Calendar The date of the recorded video is displayed in orange and the current date is displayed in a orange circle Click the date in orange to view the recorded video information on the time line h Play adjustment Select a search result to open the...

Page 92: ... recording data Light green Normal recording video Red Event video You can filter the event items to view the time line Overlapped You may check the timeline by setting the overlapping section caused by time change The search results will be displayed in the event list Click the desired event list to play Text Search You can search the data input to the POS device connected to the recorder 1 Selec...

Page 93: ...ated recording However when the automatic deletion is set it will be deleted according to the set period When the bookmark is released the video will not be saved If necessary before releasing the bookmark export the video Up to 100 bookmarks can be specified Search Results Export Search results of events texts and bookmarks can be exported to a file Example Bookmark search result export 1 Click i...

Page 94: ...results list You can check the specified video in the bookmark search menu Person Search In the recorded data you can search for a person by any condition you want such as gender top bottom color 1 Select Person search in the AI search menu 2 Select a channel to search 3 Select the date and time to search 4 Select a detailed search option Person search options Gender Clothing Top color Clothing Bo...

Page 95: ...o 6 Click in the search list to display the instant viewer 7 Click to go to the playback screen Vehicle Search You can search the vehicle by setting the vehicle type and color conditions from the recorded data 1 Select Vehicle search in the AI search menu 2 Select a channel to search 3 Select the date and time to search 4 Select a detailed search option Vehicle search options Vehicle Vehicle color...

Page 96: ...a name Time Displays the start time of the recorded video Play Plays the recorded video with an instant viewer Bookmark Specifies a bookmark to the recorded video 5 Click in the search list to display the instant viewer 6 Click to go to the playback screen Search Results Export Search results such as people faces and vehicles can be exported to a file Example Person search results export 1 Click i...

Page 97: ...om You can use the mouse wheel over the time line to zoom in or out on the time scale The time line magnification of the time line will be displayed at the top right of the time line To see the time line before or after zooming in zoom in and drag the time line left or right Export Video by Section Setup You can select the desired section from the time line or search list during video playing and ...

Page 98: ...ext event video f Speed Select the video playback speed Speed x1 8 x1 4 x1 2 x1 x2 x4 x8 x16 x32 x64 x128 x256 g Backward X times playback It is used for reverse playback Speed x1 8 x1 4 x1 2 x1 x2 x4 x8 x16 x32 x64 x128 x256 Depending on the split screen the maximum speed may be limited h Freeze Pause the video i Forward X times playback It is used for forward playback Speed x1 8 x1 4 x1 2 x1 x2 ...

Page 99: ...lect a desired item to set d Detailed Menu Click desired item s input field to change and enter a desired value e Ok Apply the modified settings Setting the Camera You can check a list of cameras that are connected to the Recorder and configure the necessary settings For details refer to the Setup Setting the Camera page in the Table of Contents Camera Register You can add a network camera s Setup...

Page 100: ... are automatically set in sequence as many as the number of channels supported by Recorder If you want to change the proxy port then select the port setup menu 32 channels 10001 10032 64 channels 10001 10064 example defaults of cam proxy ports for each product XRN 3210B4 32 channels 10001 10032 XRN 6410DB4 XRN 6410B4 64 channels 10001 10064 When connecting outside the closed network as shown in th...

Page 101: ...era password Setting the Recording For details refer to the Setup Setting the Recording page in the Table of Contents Recording Schedule If you set a recording schedule for a specific date and time the recording will start at that specific time Setup Record Recording schedule Record Setup Select a type of the normal event recording frame rate for each channel Setup Record Record setup setup viewer...

Page 102: ...to the Setup Setting the Event page in the Table of Contents Event Setup You can set detailed settings for each channel s event detection mode Setup Event Event setup Object detection You can change the AI object detection event setup The object detection function is displayed only when connected Wisenet AI camera Motion detection IVA You can change the motion detection and intelligent video analy...

Page 103: ...You can set the event trigger and action rule to output an alarm when an event occurs Setup Event Event rule setup Alarm Input You can set the operation of the alarm sensor Setup Event Alarm input ONVIF Setup You can set the camera registered with the Onvif protocol Setup Event ONVIF setup setup viewer ...

Page 104: ...ontents Storage Device You can check and change the settings related to the data storage device Setup Device Storage device Device Format You can check a storage device amount of use type of use and status of storage device ARB Video that was not recorded due to disconnection from the camera can be backed up after the connection with the camera is re established Press the button and an Auto Recove...

Page 105: ...eck the connection status and details of the hard disk mounted in the recorder Monitor You can set the information displayed on the monitor as well as the output system Setup Device Monitor If the screen does not work properly see Troubleshooting FAQ in the Appendix The Monitor Setup settings control the monitor connected to the Recorder Video exceeding the resolution of 1080p will not be displaye...

Page 106: ... set total amount conditions and keywords to display events of a text device Setting the Network For details refer to the Setup Setting the Network page in the Table of Contents Interface A remote user can access the Recorder via the network to check the current mode and the IP address Setup Network Interface Network Specify the network connection path Port You can configure the protocol related s...

Page 107: ...or install public certificates Setup Network HTTPS While using HTTPS if you want to switch to HTTP then abnormal operation can take place as the browser contains the setting values You need to change the URL to HTTP and reconnect or initialize the cookie setting of the browser 802 1x When connecting to a network you can select whether to use the 802 1x protocol and install a corresponding certific...

Page 108: ...t the server that sends mails and specify if you use the authentication process Event You can set the event interval and specify which events the server sends mails for Recipient You can set groups and recipients to receive emails SNMP Using the SNMP protocol the system or network administrator can remotely monitoring the network devices and sets the environment Setup Network SNMP ...

Page 109: ... server and assign an IP address to the network camera Check IP You can check the IP and MAC currently used through the DHCP server and the connected network port P2P This function is only available for products that support P2P If you want to use P2P service check the Enable P2P box You need to scan the QR code on the screen to use the P2P service Setup Network P2P setup viewer ...

Page 110: ...uring the summer Daylight Saving Time DST advances clocks one hour forwards from the standard local time zone Language Select a preferred language for the Recorder Holiday A user can select specific dates as holidays according to their own preferences User You can manage users such as adding or deleting users and granting different authorities for each user Setup System User Administrator You can ...

Page 111: ...torage device connected to the PC to perform an upgrade Settings Using a storage device you can apply the current configuration of Recorder to another Recorder Press the Initialization button to return the network settings to their factory default state Items in the Exclusion Setting category are excluded from the initialization Log Information You can check the log information related to system e...

Page 112: ...ewer Event log The event log lists recorded events such as sensor events camera events or image losses Export log You can search the user who performed the export and the execution time and details time channel device file type ...

Page 113: ...0 05 14 20 54 13 Name Description a Split screen Selects screen ratio to display The screen is changed to a split screen b Fisheye view mode IIf is pushed it is possible to change to a fisheye installation type It is possible to select wall ground ceiling mode according to the installation place The fisheye view mode on the current screen can be changed independently on each split c Digital Zoom E...

Page 114: ...back screen Information such as backup date day of the week time model name and channel number will be displayed on the screen i Maintain aspect ratio Full screen Maintains the aspect ratio of the playback screen Plays the video on a full screen j Enlarge Reduce Timeline Collapses the time range that is displayed on the range bar of the storage time You can collapse the range bar until the overall...

Page 115: ...able to stop the PTZ on its own This is used to change to PTZ mode from screen mode 10 It allows to exit PTZ mode in PTZ mode The Web Viewer won t be able to stop the PTZ on its own Goes back to the previous screen in the Screen mode d 11 12 In PTZ mode Focus Near Far operation is run When using the screen mode the same operations can be done by moving the mouse Using Virtual Keyboard 1 For alphan...

Page 116: ...ut HDMI1 or HDMI2 Check the monitor resolution HDMI1 3840x2160 30 Hz 1080P 720P 1280x1024 HDMI2 1920x1080 1280x720 1280x1024 1024x768 Logo screen on bootup stalls in the state The HDD may have problems Visit your nearest customer service center to check the HDD No response controlling PTZ in the live viewer Check the registered Camera if it support PTZ function The camera is not connected or the P...

Page 117: ...tual video stream can be serviced by the camera at a lower frame rate than specified Configure your camera to use one profile for data streaming as possible For example if you set the same profile for recording and network profiles the actual recording is made at the specified frame rate Still live video display using split screen mode may apply yet another profile to camera in accordance with the...

Page 118: ......

Reviews: