6
3
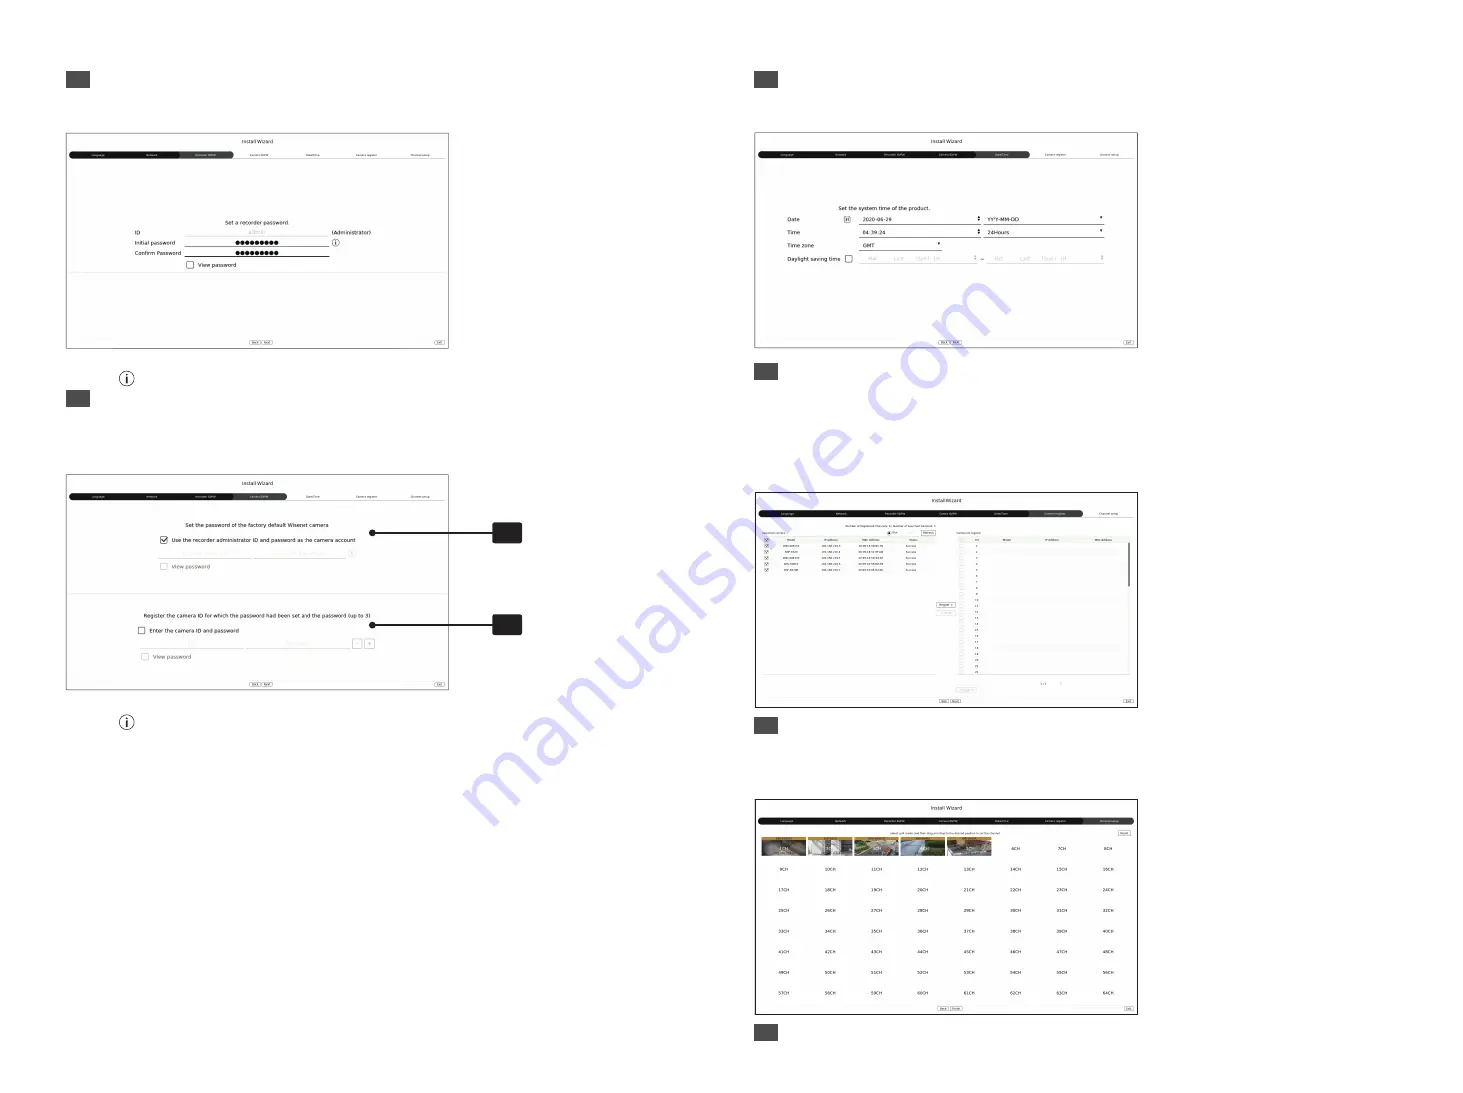
Recorder ID/PW Setup
Sets the administrator's password.
※
Click < > to view the basic guide for setting a password. Refer to the password setup rules.
4
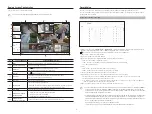
Camera ID/PW Setup
4-1.
Set a camera password in factory reset. The initial password for the camera must be entered.
4-2.
If ID/PW is already set in the camera, register the ID/PW and click <
Next
>.
4-1
4-2
※
Click < > to view the basic guide for setting a password. Refer to the password setup rules.
※
When the password is in factory reset, it can be changed and managed in a batch.
※
Up to 3 sets of camera ID with password and password can be registered.
※
You cannot change the password for cameras registered with ONVIF and RTSP.
5
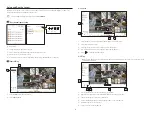
Date/Time Setup
Set the date, time, time zone, and DST and then click <
Next
>.
6
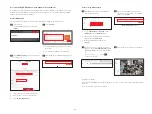
Camera Register
Registers the searched network cameras.
6-1
Select a camera to register from the searched camera list and click <
Register
>.
6-2
Select a camera to register from the list and click <
Change IP
>.
6-3
After completing camera register, click <
Next
>.
7
Channel Setting
You can view the camera videos registered to each channel in split mode along with thumbnail information. To
change the camera video position, select a video and drag and drop it to the desired location.
8
Click <
Finish
> to complete the Install Wizard.


