9
ASSEMBLY INSTRUCTIONS
U
INSTALLATION TO YOUR WOODEN TABLE
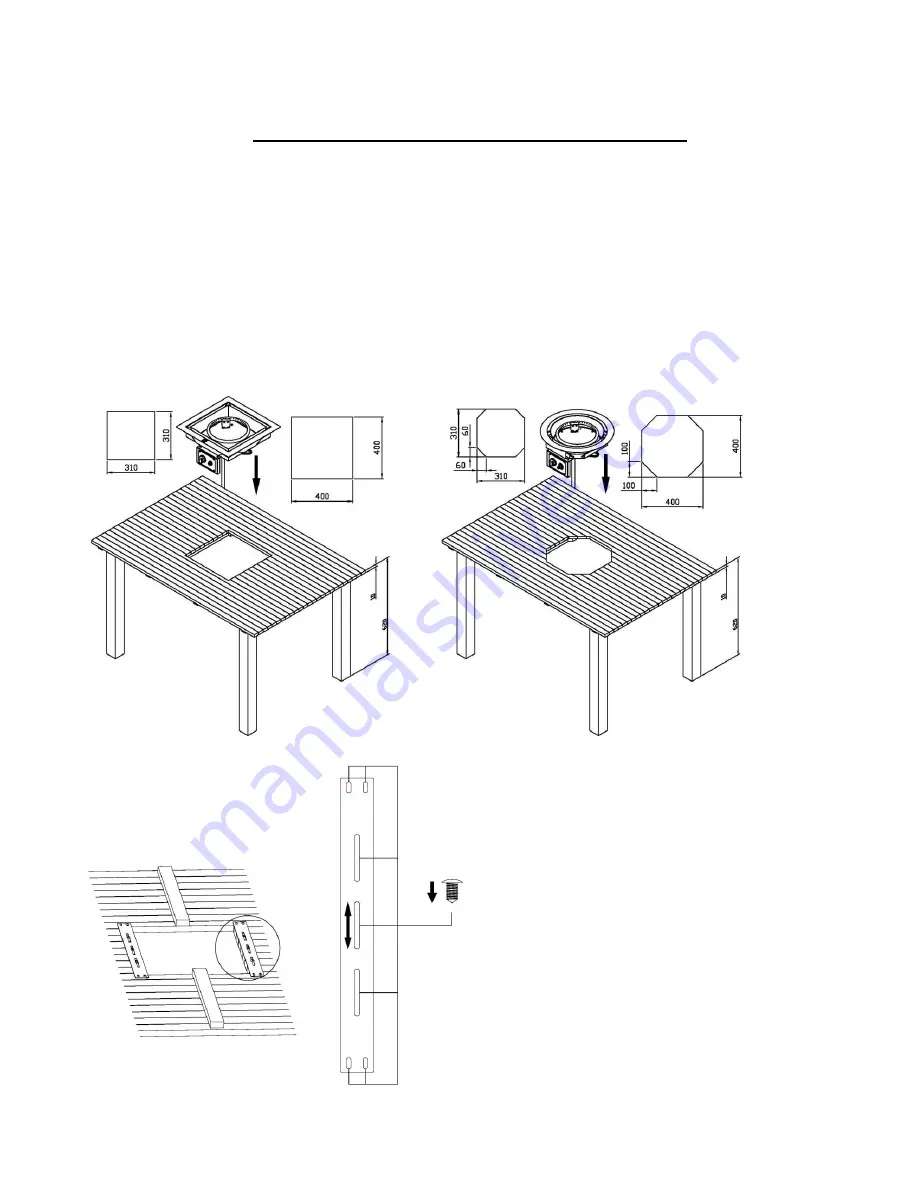
Get the cardboard SR2201BI/I2+ & SRRBI/I2+: 31cm x 31cm, SR4001BIS/I2+ &
SR4001BIR/I2+: 40cm x 40cm from the package and use it to draw and saw off the built-in area
on the center of your wooden table. After the gas hose connection, place the build-in gas fire
burner kit onto the opening of your wooden table as shown in FIG. 01
NOTE:
You may need to use and attach the optional table support bracket kit as shown in FIG.
02 to secure the slats you saw off. Adjust and secure underneath the slats you saw off at proper
positions by screws. The optional table support bracket kit is available from the same dealer or
qualified installer.
NOTE:
The thickness of the table countertop should not be less than 1 cm;
the height of the table should not be less than 62 cm.
FIG.01
FIG.02


