


132
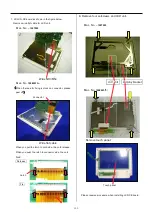
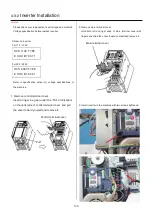
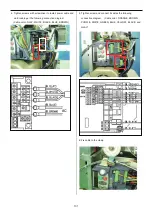
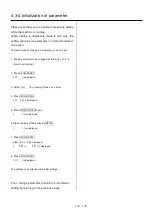
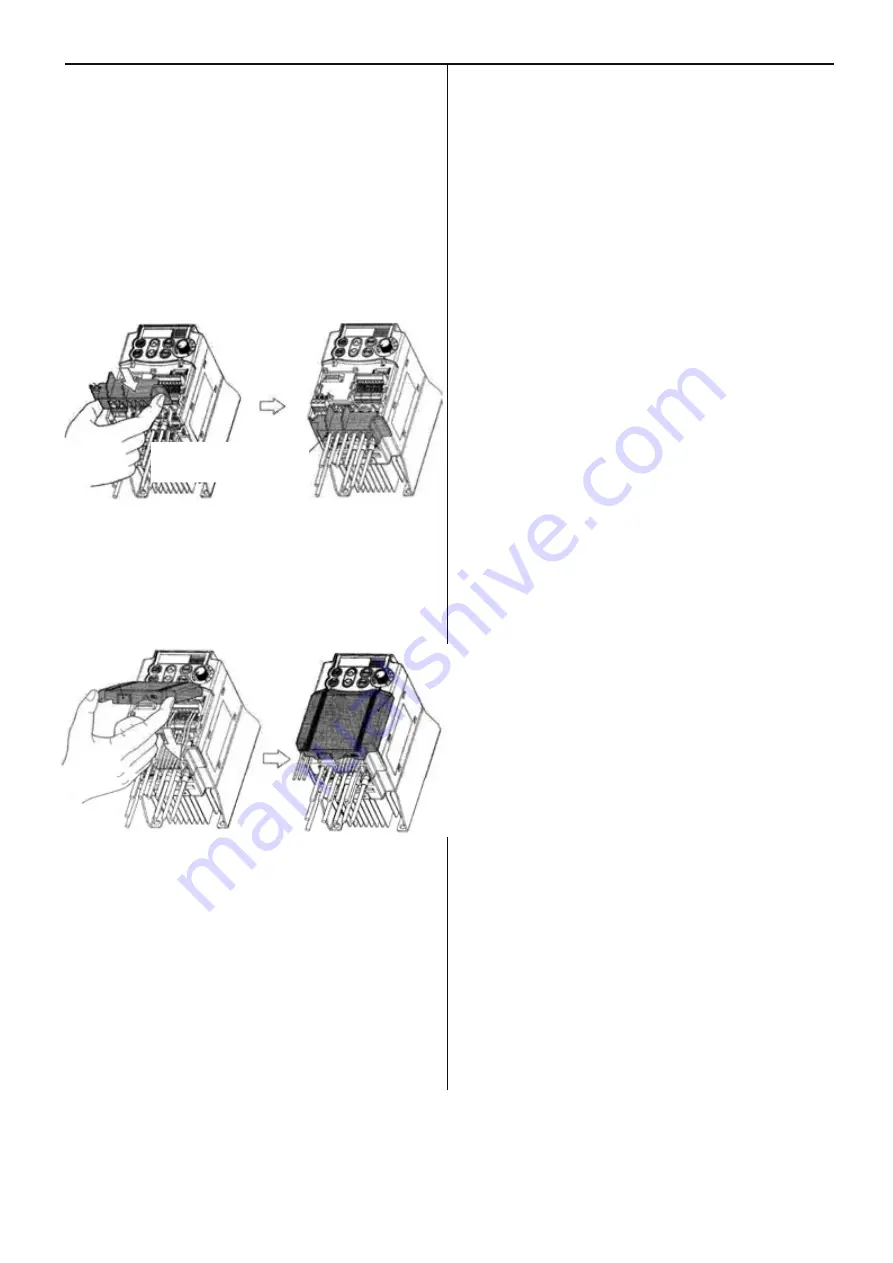
7. Set
main terminal cover
Install main terminal cover
Hold both left and right ends of main terminal cover
with fingers and install the cover in the inverter
<Note>
Install main terminal cover not to apply stress to
the cable. If stress is applied to the cable, load is
applied to the screws for the main terminal and
the screws might be loosened.
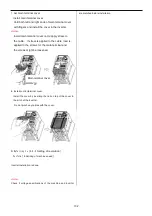
8. Install control terminal cover
Install the cover by inserting the nail on top of the cover to
the ditch of the inverter.
Do not pinch any cables with the cover.
9.
Referring to [4-4-5
Setting of revolution
],
Perform [
Initializing of machine speed
].
Inverter Installation is done.
<Note>
Check if voltage specifications of the machine and inverter
are matched before installation.
Main terminal cover
Summary of Contents for HCS2-1201-30
Page 1: ...Maintenance Manual for Embroidery Machine HCS2 1201 30 Version 2 3 HappyJapan Inc...
Page 154: ...153 5 1 1 Electrical connection diagram except for Rev A...
Page 155: ...154 5 1 1 Electrical connection diagram except for Rev A...
Page 156: ...155 5 1 2 List of electrical connection diagrams except for Rev A...
Page 157: ...156 5 1 3 Electrical connection diagram for Rev A...
Page 158: ...157 5 1 3 Electrical connection diagram for Rev A...
Page 159: ...158 5 1 4 List of electrical connection diagrams for Rev A...
Page 160: ...159 5 2 1 Connection of inverter 100V Inverter set...
Page 161: ...160 5 2 2 Connection of inverter 200V Inverter set...
Page 165: ...160c HCD8116 TP switch board ass y 6 5 265 2 1 6 7 257...


