


65
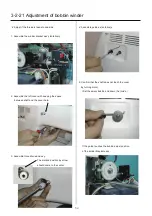
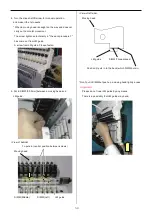
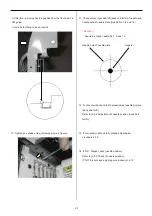
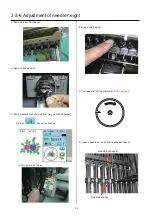
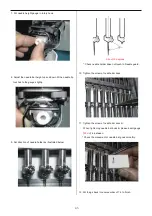
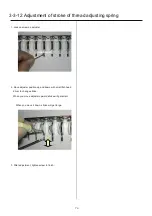
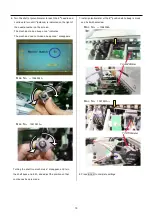
7. Put needle height gauge in rotary hook.
8. Adjust the needle bar height up and down till the needle tip
touches to the gauge slightly.
9. Set direction of needle
holder
as illustrated below.
About 30 degrees
* Check needle holder dose not touch to Needle guard.
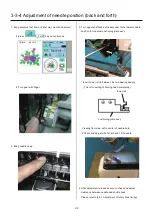
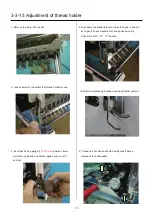
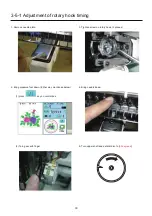
10. Tighten the screw of needle bar boss.
11. Tighten the screw of needle bar boss B.
When tightening needle bar boss B, please insert gauge
[
25mm
] in-between.
* Check the movement of needle bar goes smoothly.
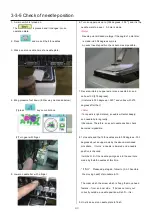
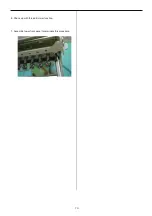
12. Put things back in reverse order of 1-5 to finish.
Summary of Contents for HCS2-1201-30
Page 1: ...Maintenance Manual for Embroidery Machine HCS2 1201 30 Version 2 3 HappyJapan Inc...
Page 154: ...153 5 1 1 Electrical connection diagram except for Rev A...
Page 155: ...154 5 1 1 Electrical connection diagram except for Rev A...
Page 156: ...155 5 1 2 List of electrical connection diagrams except for Rev A...
Page 157: ...156 5 1 3 Electrical connection diagram for Rev A...
Page 158: ...157 5 1 3 Electrical connection diagram for Rev A...
Page 159: ...158 5 1 4 List of electrical connection diagrams for Rev A...
Page 160: ...159 5 2 1 Connection of inverter 100V Inverter set...
Page 161: ...160 5 2 2 Connection of inverter 200V Inverter set...
Page 165: ...160c HCD8116 TP switch board ass y 6 5 265 2 1 6 7 257...


