4
8
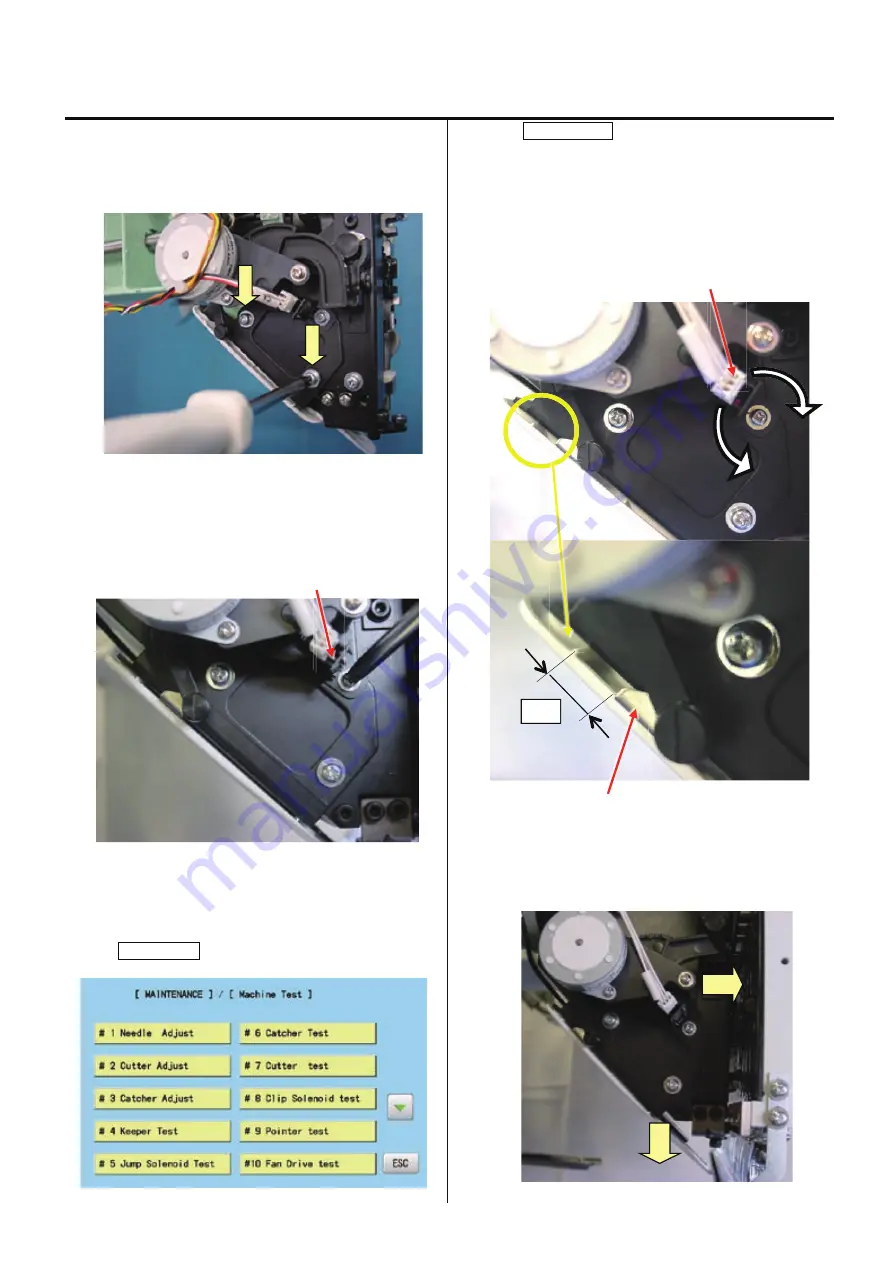
Exchange of thread catcher
3-2-18
1.
Install thread catcher tentatively by tightening
screws.
2.
Loose screw of sensor for thread catcher unit
a little bit.
Sensor
3. Refer to “5-6-11 How to enter maintenance mode” and
enter maintenance mode.
4. Press Machine Test .
5.
Press
Catcher Adjust
, take thread catcher unit in
and out, and move and adjust the sensor shown in
the direction of the arrow so that the dimension in
the following figure meets the value in the
following figure when hook goes back.
Fix the sensor with setscrew after adjustment.
Sensor
Hook
6.
Tighten the screws securely while pushing thread
catcher unit in the direction of the arrows of the following
figure to fix the unit.
10mm
Summary of Contents for HCH-701-30
Page 1: ...Maintenance Manual for Embroidery Machine HCH 701 30 Version 2 4 HappyJapan Inc ...
Page 132: ...128 Electrical connection diagram 5 ...
Page 133: ...129 Electrical connection diagrams 5 ...
Page 134: ...130 List of electrical connection diagrams 5 ...
Page 137: ...130c HCD81222 LCD CE MX 基板組 ...
Page 138: ...130d HCD8116 TP switch board ass y 3 82 7 32 7 387487 2487 ...


